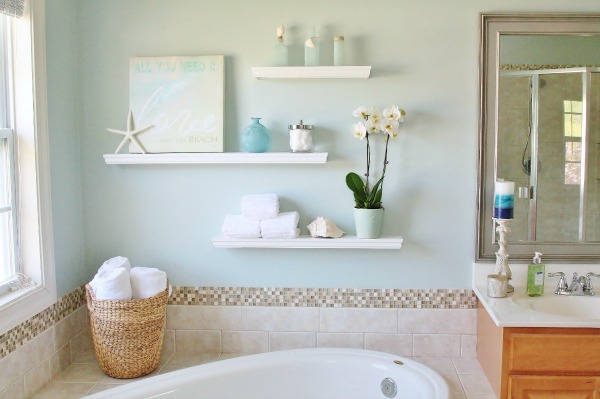
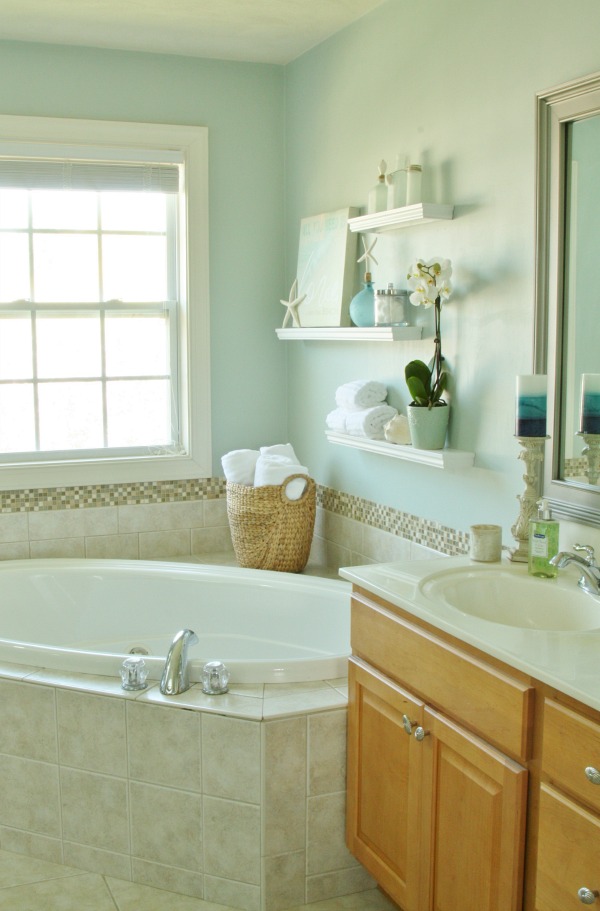
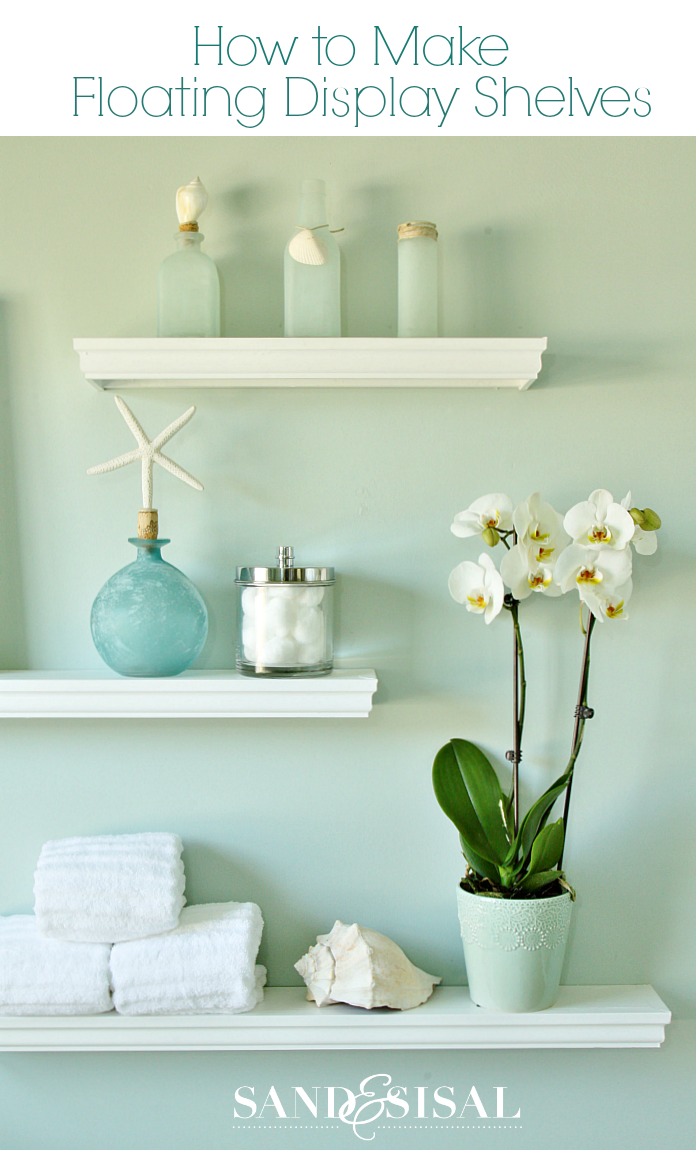
The best part of moving into a home is being able to customize and personalize the space to reflect your style. You can transform a boring builder-grade bathroom for example, into a customized looking spa retreat. How? Personalize blank walls with DIY Floating Display Shelves, which are perfect for displaying art and accessories. Three years ago I built these DIY floating display shelves in our master bath, but I never shared the entire tutorial here on the blog, so I dug into the archives and found the old photos and put a tutorial together for you! DIY floating display shelves are easy to make and can be installed on any empty wall which might need some pizzazz!
DIY Floating Display Shelves
To build DIY Floating Display Shelves you will need the following supplies:
- stud finder
- ScotchBlue™ Painter’s Tape
- level
- compound miter saw
- nail guns with 1″-1/4″ nails and 2″ nails, or drill and screws
- wood glue
- wood filler
- Behr Premium Plus Paint and Primer in One (satin or semi-gloss) + paint brush
- (1) 1″ x 4″ x 8′ Primed Finger Joint Pine Board
- (3) 3/4″ x 36″ square dowel rods
- (1) 1-9/16″ or 1-3/4″ decorative trim molding (pre-primed or composite)
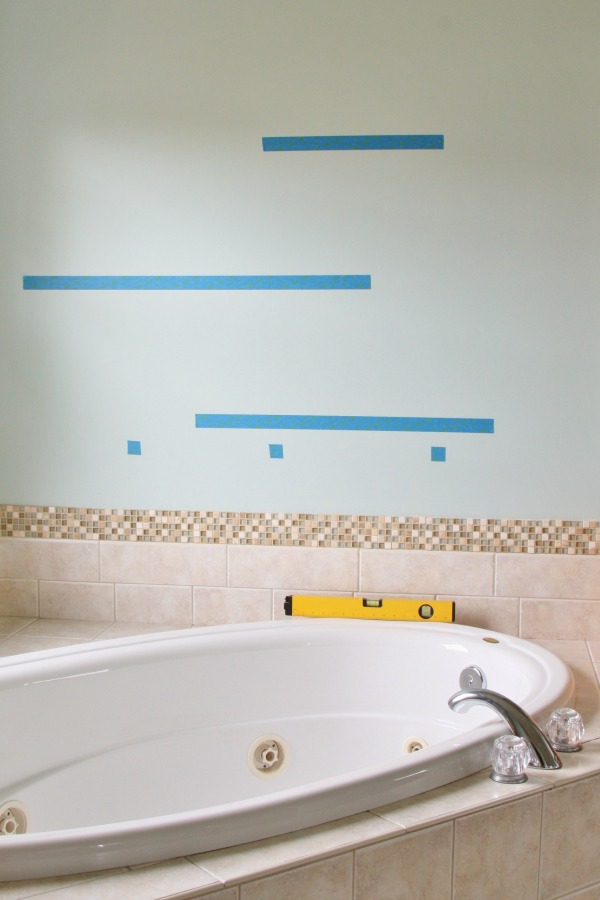
Step 1: Use a stud finder to find the wall studs. Mark the location of the studs with a small square of ScotchBlue™ Painter’s Tape. Use a pencil to lightly mark where any pipes might be located in the walls.
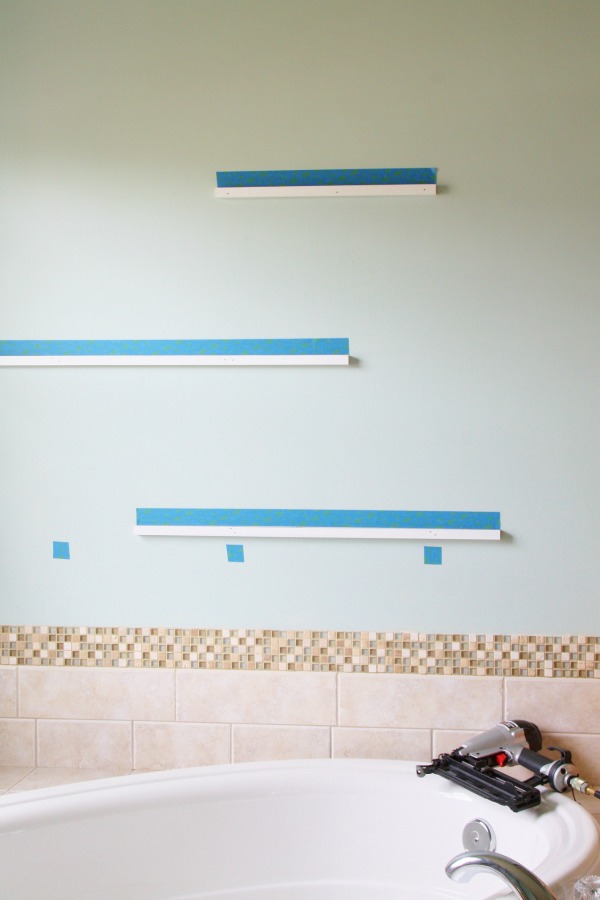
Step 2: Cut the tape into 3 separate lengths. These will be the desired lengths of your shelves. I chose 18″, 30″, and 36″. Place the tape horizontally on the wall where you would like the shelves. Use a level to make sure the tape is level.
Important – Make sure that each strip of tape is somewhat centered over at least 2 wall studs.
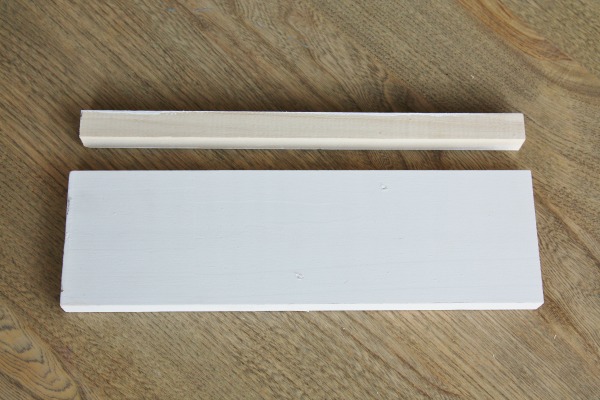
Step 3: Cut the 1″ x 4″ x 8′ Primed Finger Joint Pine Board into your desired shelf lengths (18″, 30″, 36″) with a miter saw. Cut the square dowels to the same lengths except subtract 1/4″ from each dowel (17-3/4″, 29-3/4″, 35-3/4″). The square dowels will be the cleats that the shelves will rest upon.
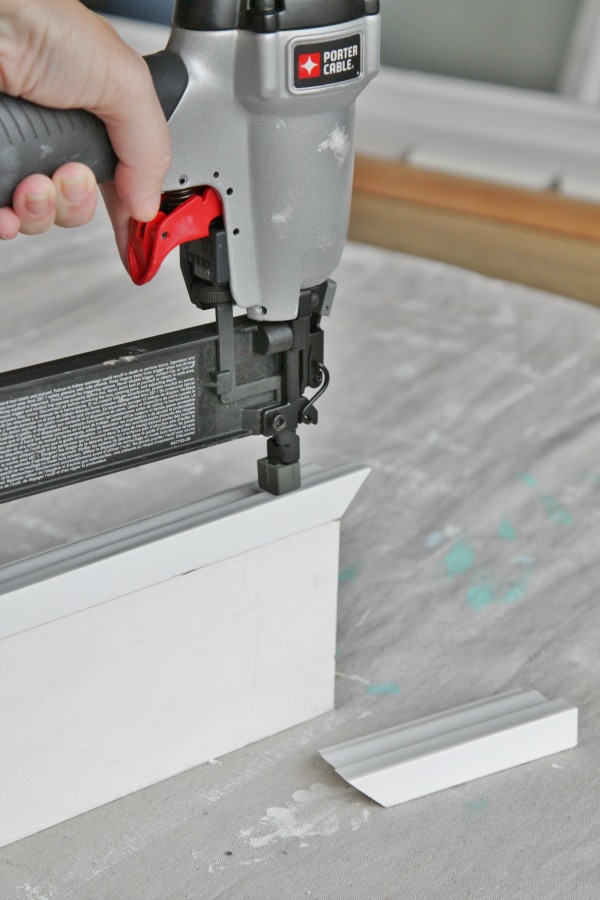
Step 4: Cut decorative trim with a miter saw. Be sure to stand the trim up flat against the saw fence as pictured below. The first cut will be a 45° to the left. This trim piece will eventually be placed on right side of your shelf.
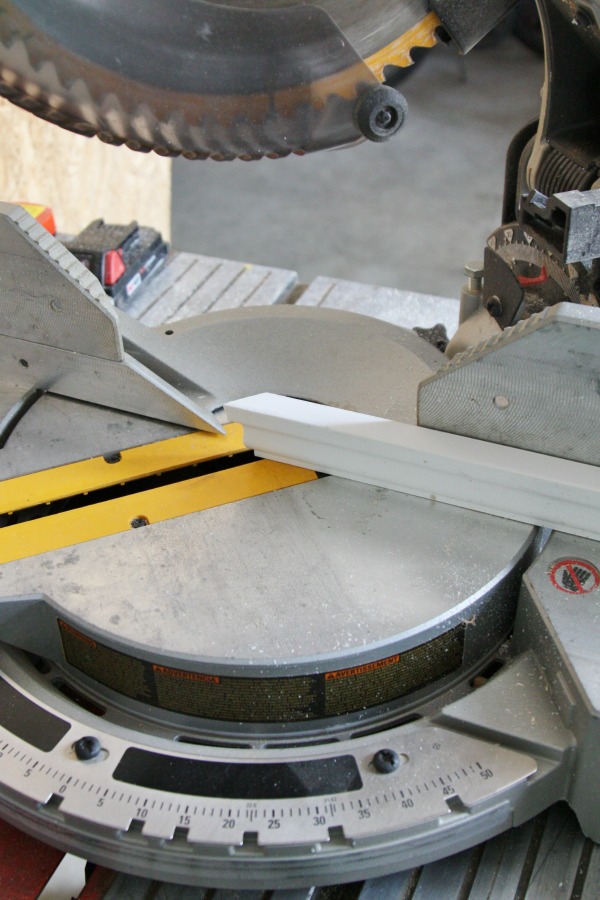
The second cut will be a straight 90°. The straight cut will be flush against the wall when installed. To find where exactly you need to make the cut, I found that the easiest way was to place the inside edge of the newly cut trim right against the right side of your shelf board and mark with a pencil where that board ends (see pic below). Be sure to cut the trim board on the right side of your marking.
Repeat Step 4 again for the left side trim piece, but in the opposite 45° direction.
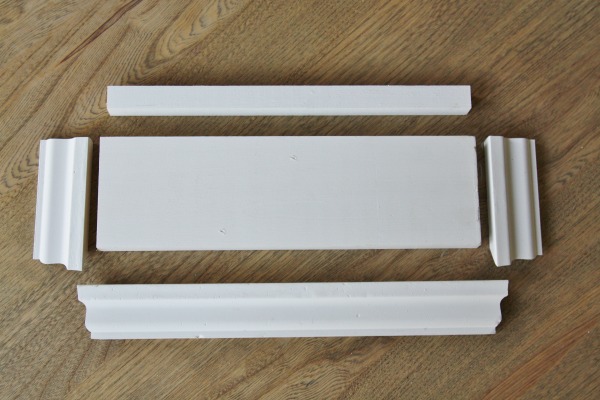
For the front trim piece follow step 4 but instead of straight cuts, you will be making opposing 45° cuts. Pictured below are all the pieces for one shelf, laying flat.
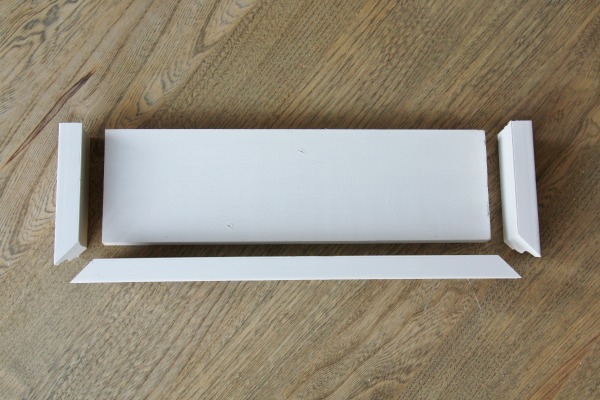
Here is a view from above to help you visualize how your 3 trim pieces need to look.
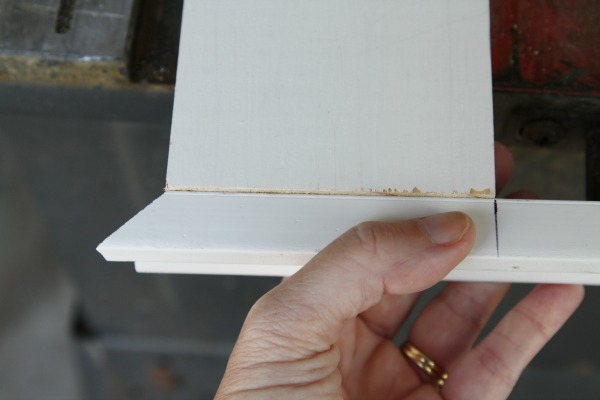
Step 5: Nail the trim to the shelf board using 1-1/4″ trim nails or you can use wood glue. A combination of both is even better! Fill in any nail holes with white wood filler.
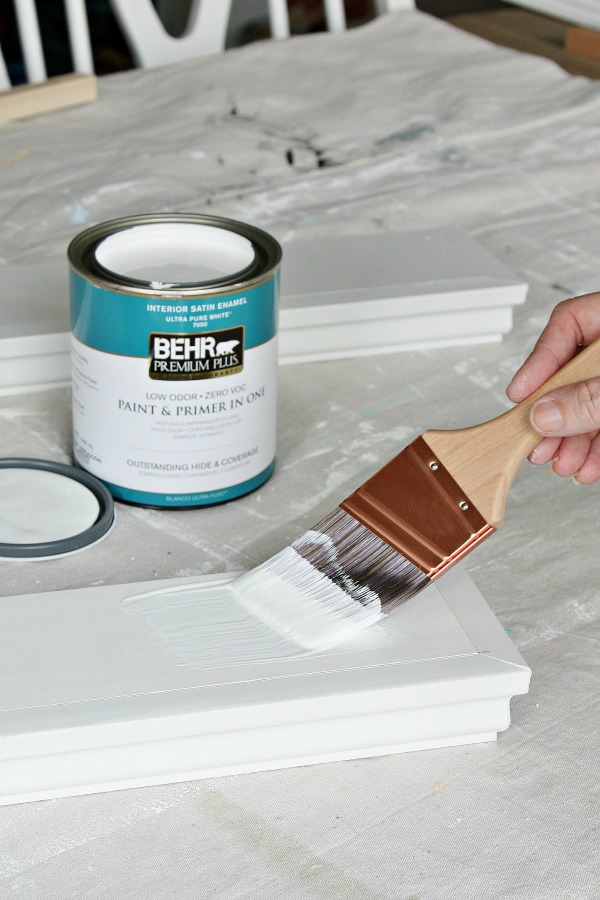
Step 6: Paint the shelves (tops and undersides) and the separate dowel cleats with Behr Premium Plus Paint and Primer in One or your choice of favorite paint. Allow to dry.
Step 7: Align the dowel cleats directly under the tape. Nail the cleat into the studs with 2 inch nails and your nail gun. Add a few nails in between also, avoiding any possible pipes in the wall. The nails in between won’t be driving into wood, but it will help to secure the shelf. If you choose to use a drill instead of a nail gun then be sure to pre-drill first before screwing in the screws to prevent possible splitting.
Step 7: Have a friend help with this part. Set the shelves onto the cleats and while holding in place, nail the shelves to the cleats with the 1-1/2″ nails or screws. I nailed every 2 inches. If the shelves flex at all then add more nails into the cleats. 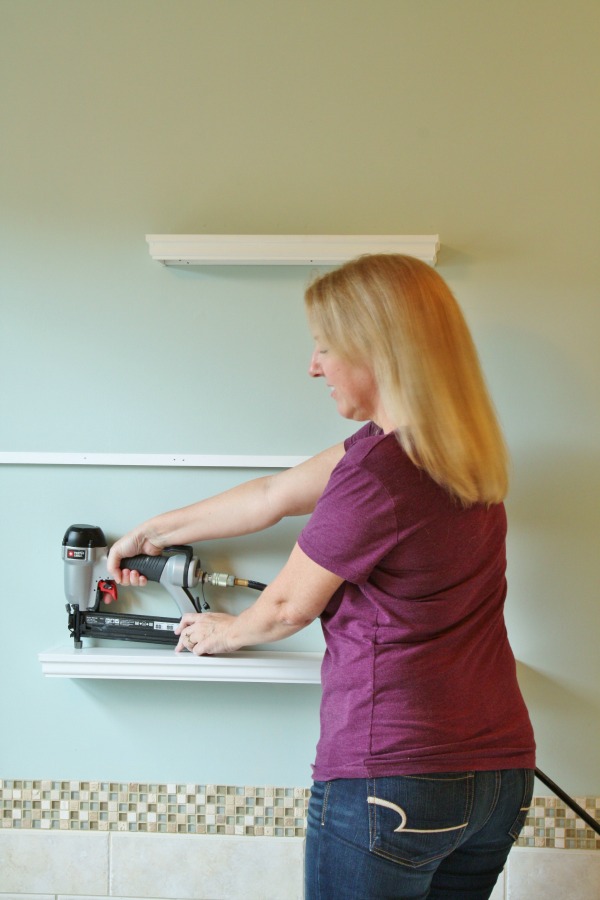
Step 8: Fill the nail holes with wood filler and then wipe the shelves down with a damp paper towel to remove any wood filler dust. Touch up the nail hole areas with paint.
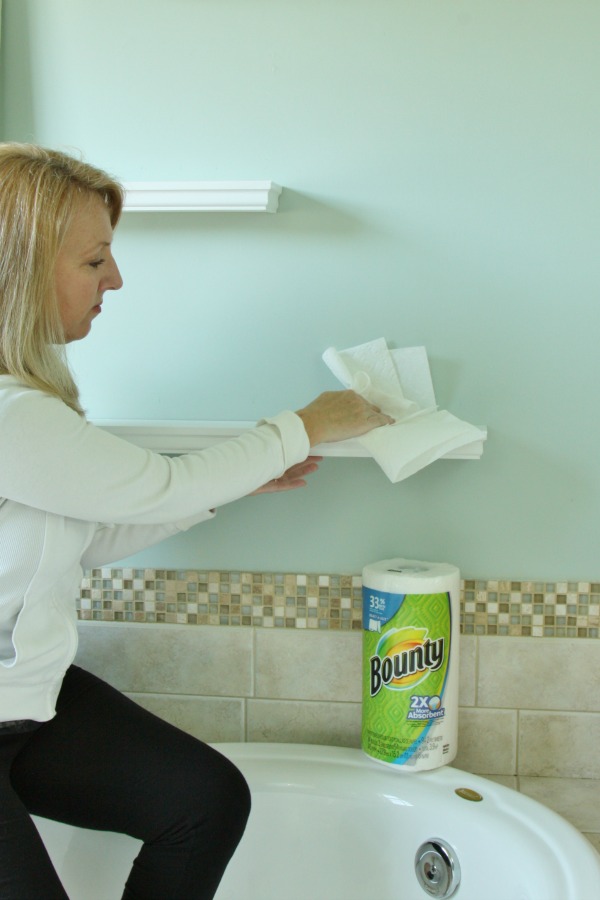
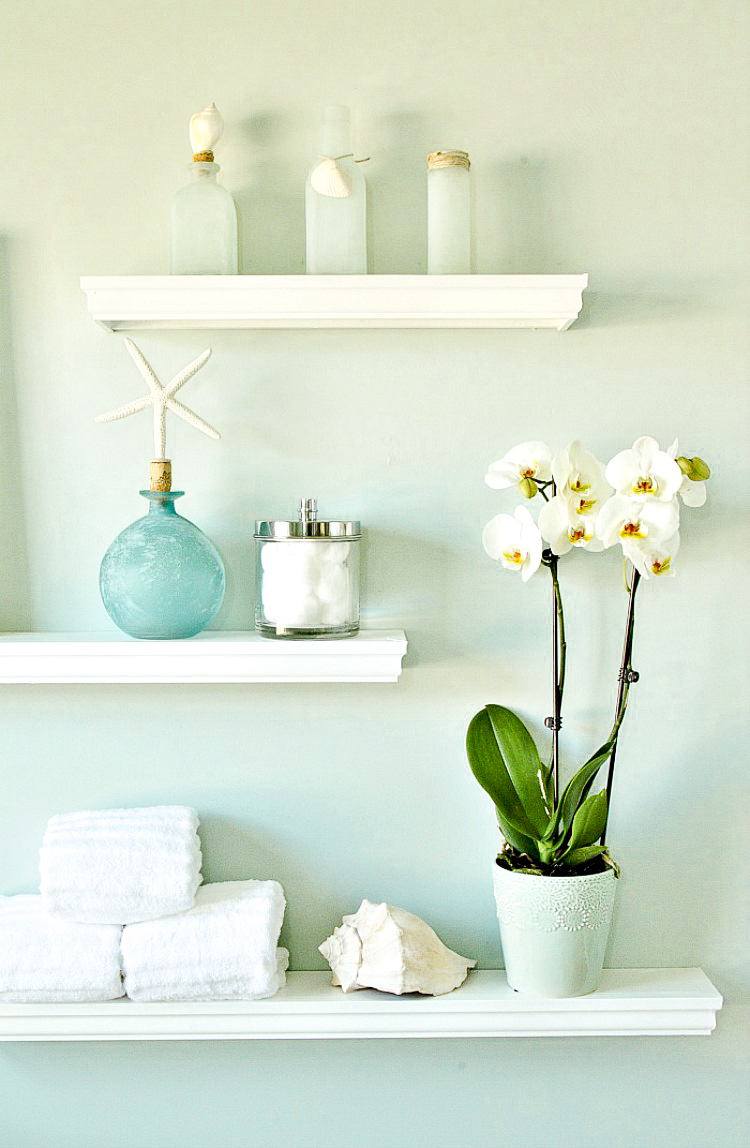
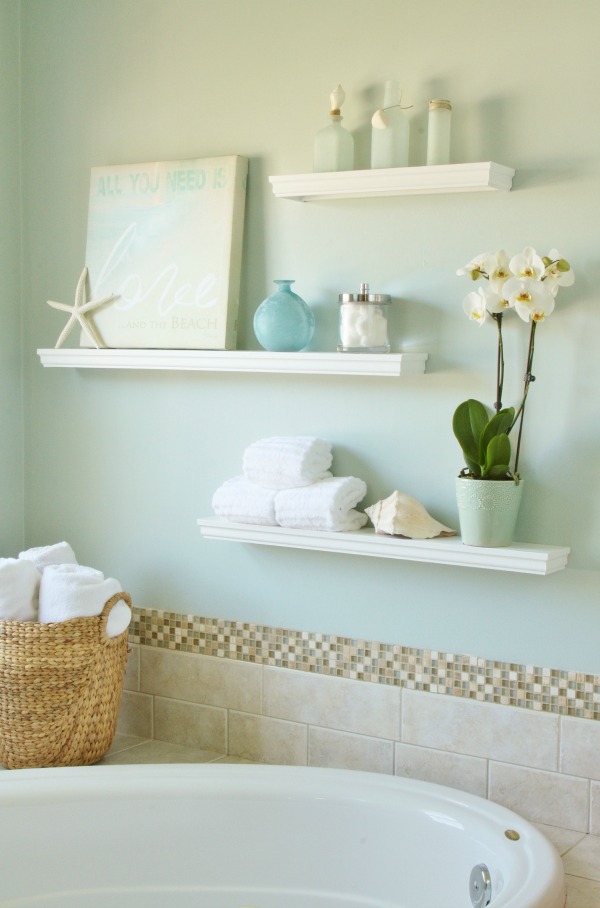
Step 9: Time to celebrate and decorate! Add bottles of bubble bath, or bath salts, candles, folded towels, flowers, art… whatever expresses your style!

LOVE IT? PIN IT!
What was once a boring blank wall feels now like a special and serene spa oasis, and best of all, you made it! I hope you try to make some DIY floating display shelves for your home!
You might also like this:
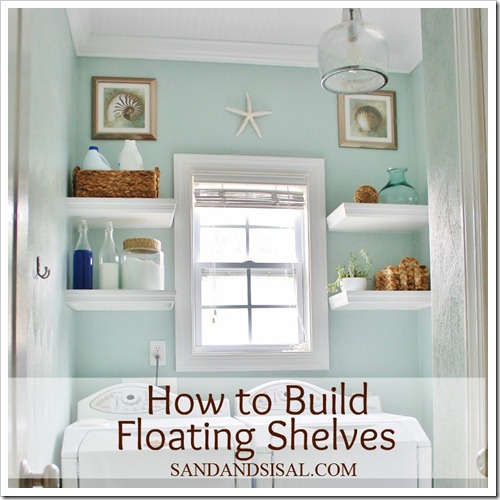
How to Build Floating Shelves to Add Stylish Storage to any Space
Happy Building!
~KIM
Such a perfect and beautiful addition to the tub wall. Love it.
Thank you so much Marty!
Love it! It looks perfect!
Thank you Lisa!
You did a great job, and they look super near your tub, just the touch……love how you spaced them & then have the ability to mix taller items off the side etc, but you obviously have more talent & patience than I. I would just go buy the shelves because I don’t own all the needed tools lol
Impressed & jealous:)
Thank you so much Janet! Yes, I like having the flexibility to add taller items too!
The white shelves look so pretty on that minty blue/green wall. I love that color. What color is it?
Thank you so much Nancy! The color of the walls is called Rainwashed by Sherwin Williams.