Eager eyes meet the postman when he delivers the Pottery Barn Teen catalog each month.
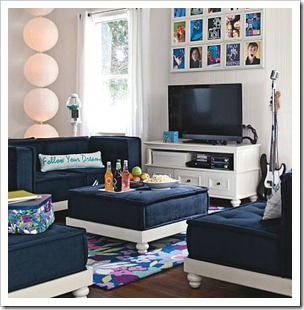
The PB Teen Spring Catalog had this paper lantern light fixture and I knew my teen would love it!
Photo credit Pottery Barn Teen
But I also knew I could make it for about 75% less.
Party City had 9.5in paper lanterns, in a 3-pack, in a variety of color choices for around $3.99.
Home Depot had 12ft. rope lights for around $10 and I picked up a swag hook for the ceiling.
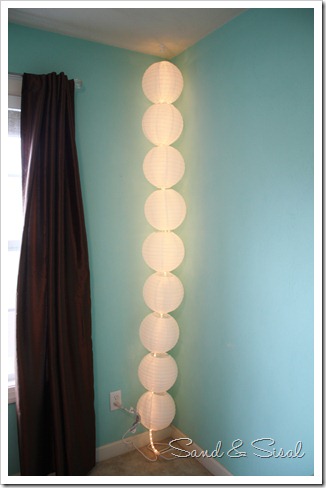
Assemble 9 paper lanterns.
Screw your swag hook into the ceiling where ever you desire.
Thread the rope light through all the lanterns starting from the bottom, over the top and back down some.
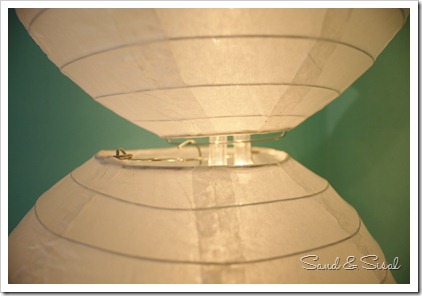
Each lantern has a small hook on it, simply hook the lanterns together.
How cool is this!?!?!
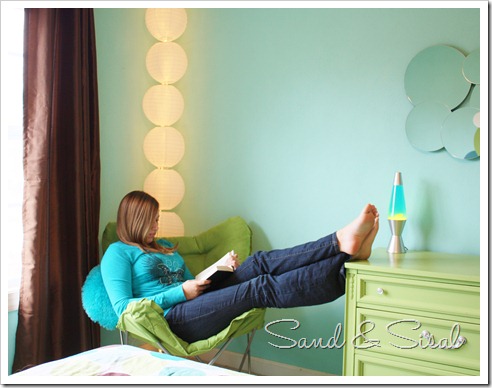
My teenager loves it!
This project could be done with any size lantern. Mix lantern sizes and colors for endless creative combinations!
Kim
Linking up to:
 |
 |
 |
 |
 |
 |


Okay this is genius! I love it! This is something she can take with her to college, too, because let me tell ya…the lighting in dorm rooms is not pretty!
omg you are amaaaazing! That looks awesome! Your daughter is so lucky 🙂
That is amazing!! Great job! I have to share on my FB page!
How awesome is that?!!! Such a great idea. Thanks for sharing:)
Too cool! I would have loved an awesome light like that when I was a teenager…. actually, I’d still love a light like that!
The mirror over the dresser is very cool too. Did you buy it or is it another designer knockoff?
this is so cute! you did a fantastic job! tai @ http://taidyeoriginal.blogspot.com
i love this soooooo much! how cute! the whole room is adorable!
That’s really great! My kids would love it. Do the paper lanterns ever get too warm from the lights?
Thanks everyone! To answer a few questions.
@Homepodge: The circle mirror was from Target, bought in 2009.
@ Randi: The rope lighting gives off 36 watts dispursed over a 12 ft. span. It barely even gets warm, even when left on for hours.
L O V E !!!!!! You have got to be kidding me~! Amazing. I need this. It has a mid century modern feel that will be very cool in my house. And you can’t beat the price. I will link back when we do it. GREAT idea.
Very cool!! Love it and the low price tag!
Super creative and cute!
Brilliant!
Very fun…I love PB and absolutely love it when I see knock offs that can save.so.much.money! Great idea! Can I be a teenager again (only to get the light though)?
What a fun look. And how easy to DIY!!
so great!! this would be great for our screened in porch!
xx-kristyn
amazing! good thinkin’!
Wow Kim, you did an excellent job on your lamp. I love how good it looks in a bedroom versus a large living room. Thanks for sharing! ~Molly
You are my new favorite person!! I saw this lantern in the PB Teen catalog and I keep flipping back to it, trying to figure out how I can remake it! And you just solved my problem for me!! Thanks SOOO much!! I’ll be setting up one of these in my little brother’s room…he’ll be thanking you as well, I’m sure! =)
this turned out awesome!!! What a great idea 🙂
Too darn cute!!!!!
Sandi
I love a good knock off project. Especially when it’s from Pottery Barn. I am hosting a blog party. The link opens up tonight at 8pm EST. I hope you will stop by and join in the fun.
What a great lamp. I don’t know how I didn’t notice it. I better look through the catty again!
I love this project. I’m so glad you stopped by and joined the party and shared this awesome idea. Hope to see you next week again.
Awesome!! I’m with Beth…keep going do all the cabinets!! 🙂
That is AWESOME! 😀 I acquired a set of 8 inch or so paper lanterns a while ago, and have been searching for the perfect way to use them for ages now..I think I’ve found it! Thank you! 😀 😀
This rocked so much that I just had to feature it this week at my Hookin Up with HoH party!
Stop by and grab a button if you’d like!
~Allison @ House of Hepworths
This is wonderful I absolutely love it!!How cool I am doing this for Isabella’s room!
xoxo
Karena
Art by Karena
Love it! Hubby and I had bought a bunch of those to decorate for our wedding reception. Perfect use for all of those that are sitting around.
I love this idea! Now off to find the perfect corner in the perfect room for it.
Saw this on House of Hepworths and LOVE it!
This is so awesome!!!! Great job…and I know she loves it!
Very cool!
Saw you on one of the linky parties and just had to say that this is pretty awesome! This just looks so fun (but not “take over the entire room and you can’t look at anything else because it’s just so dominant”)!
i featured this idea on my blog today..
kimboscrafts.blogspot.com
My 13 year old will love this!!!!!
What a great idea! I love the look in your daughter’s room. ~Megan
I love that this could be used in a boys room as well. I can just see it in a modern masculine room with deep espresso, chocolate brown and maybe a touch of parrot green… 🙂
Awesome idea and price friendly as well! My girls will love this idea! Quick question – did you paint your daughter’s dresser and if so, do you remember what color? Getting ready to re-do both girls rooms once school starts! Thanks!!
Thanks Nancy! I used spray paint for it and I don’t remember the exact color name but I think it was “green Apple” maybe?