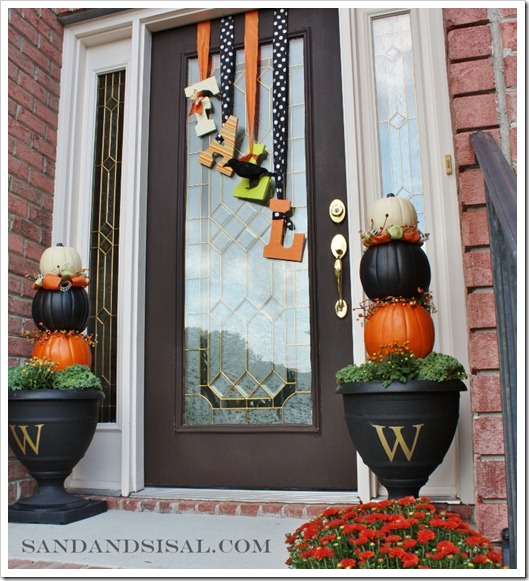
Ok, maybe “wreath” is a stretch. It may not be round, but you all know what I mean. It’s my fun, festive, and kid friendly, fall front door decor. The fall front porch adorned with a pumpkin topiary on each side welcomes guests and announces to trick-or-treaters that this is a house to hit up for candy (I give out chocolate candy, kiddos)! This DIY (do it yourself) wreath is made with MDF letters just like I used in my Pottery Barn Inspired Noel Tutorial. Let’s make a fall “wreath”!
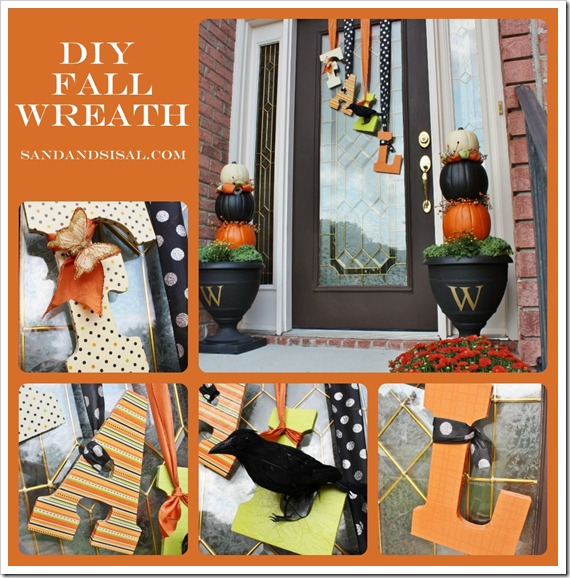
DIY Wreath
You will need the following items for this DIY FallWreath
(I’ve provided Amazon Affiliate links below for your convenience):
MDF Letters:
1- Mdf Classic Font Wood Letters 9.5″-Letter F
1- Mdf Classic Font Wood Letters 9.5″-Letter A
2- MDF Classic Font Wood Letters 9.5″-Letter L
Plaid Mod Podge 8-Ounce, Gloss
Plaid:Craft Martha Stewart Basic Brush Set 5/Pkg-
Patterned scrapbook or tissue paper
Wide Ribbon
scissors
optional embellishments-
- Touch of Nature Standing Crow Feather, 6-Inch
- Touch of Nature 1-Piece Feather Butterfly on Clip 3-Inch

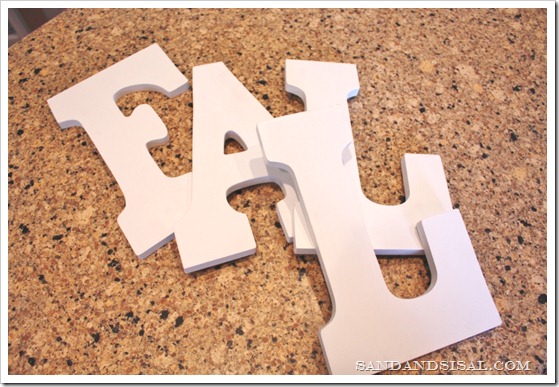
I picked up some of my favorite MDF letters from Michaels. This time the letters spell FALL. Each letter runs around $3 each. I always use a coupon on the letters to save money when I can.
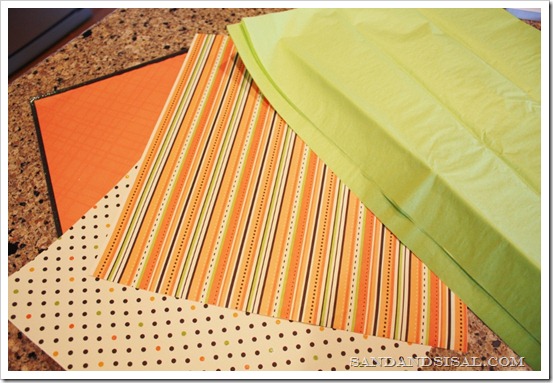
I scrounged my scrapbook and tissue paper collection to see what I had on hand. I found 3 fall themed papers and one coordinating green tissue paper. I firmly believe you should always shop your home before venturing into the stores. We often hoard so many material items that if we don’t search out our own homes, we’ll never realize the resources we already own.
Step 1: Turn the scrapbook paper over AND turn your letter over. Trace around your letter, leaving about 1/2 inch border. Cut it out. (Now before you all look too closely and leave me a lovely comment, please realize I completely screwed up in this picture below. I forgot to flip my letter over. So I had to re-work this one.)
Step 2: Apply a thick layer of Mod Podge over the front and sides of the MDF letter.
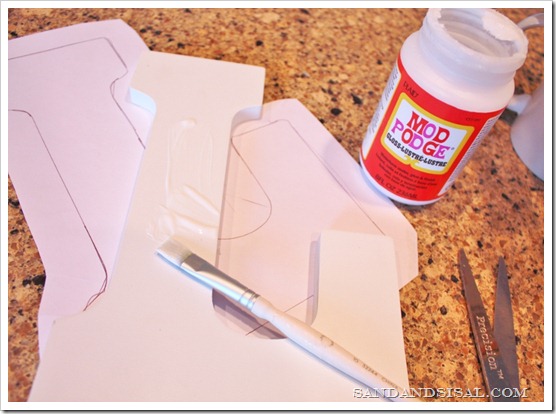
Step 3: Apply the scrapbook or tissue paper on the letter. Bend and press around the edges and backside. Make slit cuts along any corner or curves to aid in bending. Patch any exposed areas with pieces of the scrap paper. Smooth out any air bubbles.
Step 4: Cover the entire letter with another layer of gloss Mod Podge and allow to dry. I personally love how easy tissue paper is to use on this project and how it looks like crinkly leather afterwards! It results in a very cool texture.

Step 5: Tie each letter with varying lengths of ribbon and add any embellishments or adornments you like. I added a sparkly butterfly and black crow, but a few of my kids are freaked out by Mr. Crow.
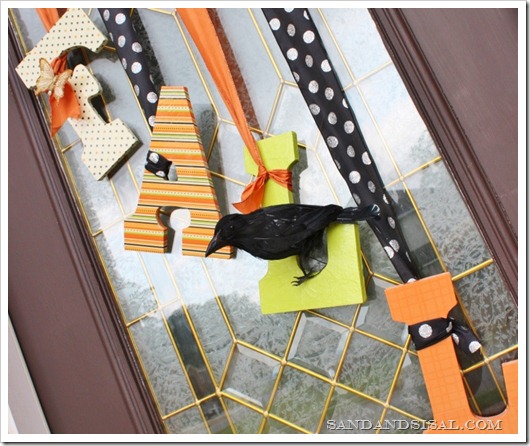
Step 6: Hang the DIY Fall Wreath from your door. Make your letters “FALL” down the door. Here are a few hanging options.
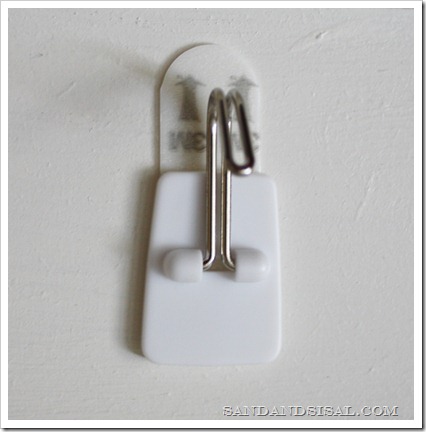
METAL DOORS- I have a metal door so nailing anything to it is out of the question. To attach the ribbons to the door, I used four 3M Command hooks and applied them to the inside of my door. I applied them upside down so I could tie the ribbon to the hook. The ribbon extends from the hook, over the top, and down the front of the door. A less expensive (though less attractive) option is to use painters tape to secure the ribbon on the inside of the door. The choice is yours.
WOOD DOORS- If you have a wood door you can pin each ribbon to the top edge of the door with an upholstery flat tack. Tap it in with a hammer.
I hope you’re loving my DIY Wreath as much as I do! Pin it if you love it!
Click for directions to make the Pumpkin Topiary or the Monogramed Urn.
Kim
linking up to: Home Stories A to Z- Tutorials & Tips, Savvy Southern Style-Wow Us Wednesday, Southern Hospitality- Fall Fun Outdoor Décor, Thrifty Décor Chick- Fall linky
LOVE!!!!
what a perfect entry for Fall and halloween! Love it, Kim. xo Jenna
That is so cute! Great idea and helpful tutorial!
I love it! So cute. Do the letters bang on the door a lot when it is opened and closed? I am wondering how to minimize that.
I forgot to add that you can apply rubber bumpers(like you use for cabinets/drawers)to the back of the letters if desired. That really helps. Thanks!
Oh, I didn’t think of that! Thanks! 🙂
I love this project, Kim! Pinning — I think I’ll do this for my preschool classroom door, too!
xo Heidi
That is one of the cutest “wreath creations” i have seen!!….Fantastic!
Love it, Suggestions for putting it on a storm door.
Oh this is fall perfection at its finest! A truly cozy vignette.
While we don’t have much fall here in Phoenix I would love for you to stop by to see where I did find a bit of fall.
Have a blessed day!
Great idea and it looks fabulous 🙂 Am I still showing as a no reply? I think I fixed it?
Love this and even went out to buy materials to make one. I am finding it hard to keep the scrapbooking paper on the letters and folding it over the edges without it getting weird bumps. Any suggestions?
Hi Kait,
Make sure you are loading plenty of Mod Podge on the top and sides of the letter first before you apply the paper. Add more if it starts drying out. Thinner paper is easier to work with too. Also try cutting small slits like little tabs around the corners or curved edges. These will fold down easier and hopefully eliminate large bumps. I’m sorry you’re having trouble with it. I hope that helps. 😉
Kim, I seriously need someone with your abilities in my place, 😉 Great stuff, your house looks very nice with all the extra touches you add to it!
I have always loved falling fall, but you are brilliant!!!
Love your front porch!
Love this idea! I’m thinking “JOY” for Christmas.
Love this! I made this with different letters to support our football team!
How do you attach these to the door! That’s the only part I haven’t figured out.
Hi Jessica,
I explain how it is attached in Step 6 of the tutorial. I used four 3M Command hooks on the inside of the door, placed upside down. Then each ribbon is tied to the hook and extended over the top of the door and hangs outside. Hope that helps 😉
~KIM
I can’t wait to try this. Thanks for a awesome idea. 🙂
Just made these and LOVE them! I painted the sides instead of trying to fold over and it worked out great. I also glued assorted leaves, glitter acorns and pumpkins. This is such a great idea! I’ve already started on my sons name for his room, BELIEVE for Christmas and LOVE for Valentines day! Thank You!
That sounds beautiful Erin! Thank you!