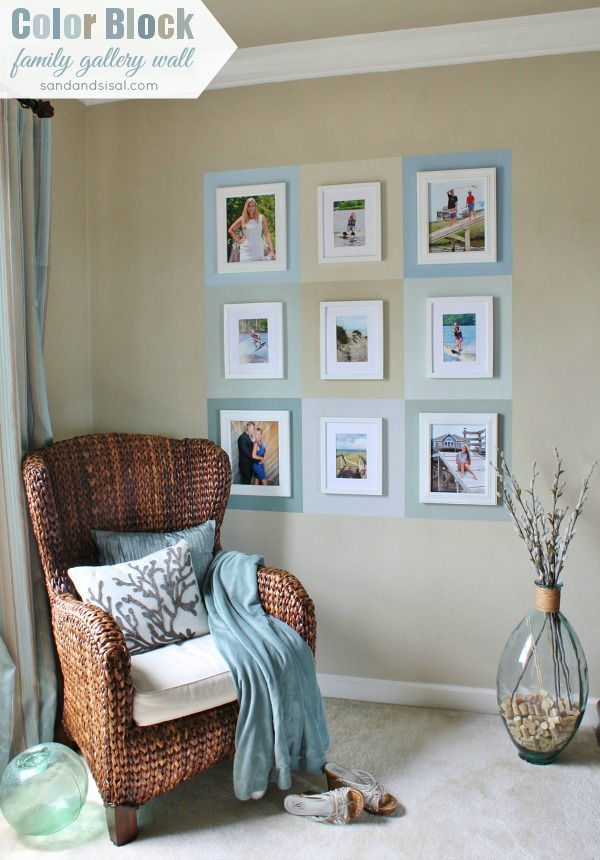
I can’t believe I have never revealed any part of my master bedroom on the blog before! Slowly, we have been working on it over the past 5 years and it is almost ready to show off, but for today, you just get to see a corner of it. I’ve created a little reading corner with a gorgeous Color Block Family Gallery Wall that I just LOVE! I took this blank, boring and empty wall …..
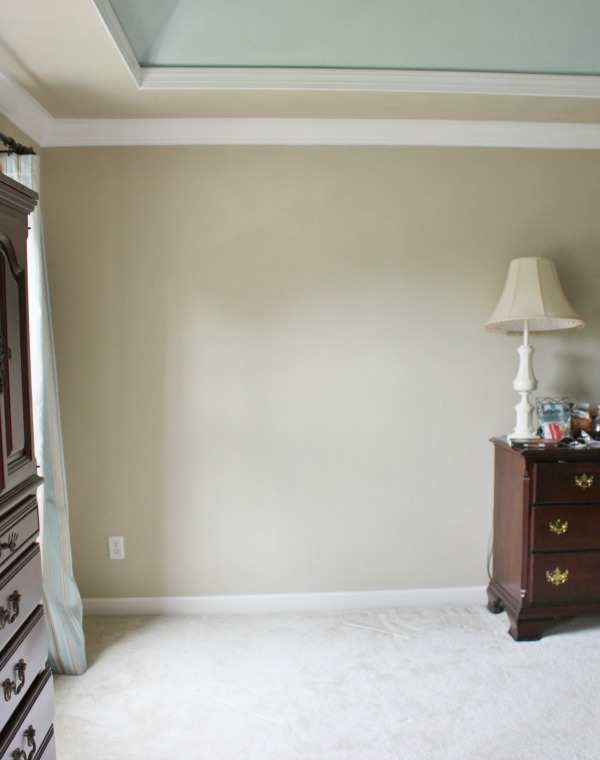
… and turned it into a fabulous and meaningful focal point in our room. I chose to use 9 different colors, all of which are part of my home’s coastal color palette. Choosing colors that coordinate nicely together is important and if you use the house paint you already have on hand then the cost of this project is very minimal.
How to Paint a Color Block Family Gallery Wall
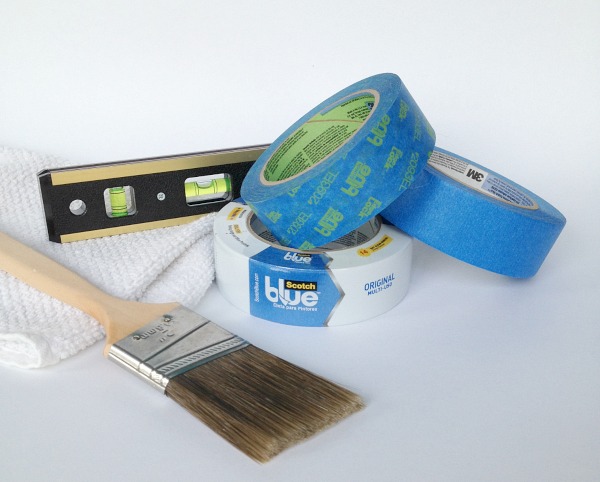
Supplies Needed:
- Your choice of ScotchBlue Painter’s Tape –
ScotchBlue Painter’s Tape Original Multi-Use #2090

or ScotchBlue Painter’s Tape Multi-Surface #2093EL (both tapes work well for textured walls like mine using a base coat/top coat painting method)

- soft white rag
- level
- paint brush
- multiple coordinating colors of paint
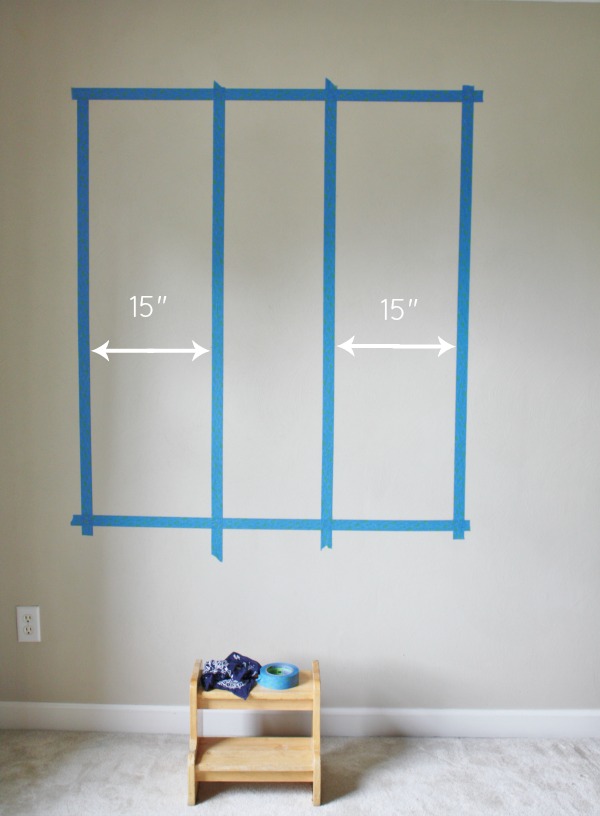
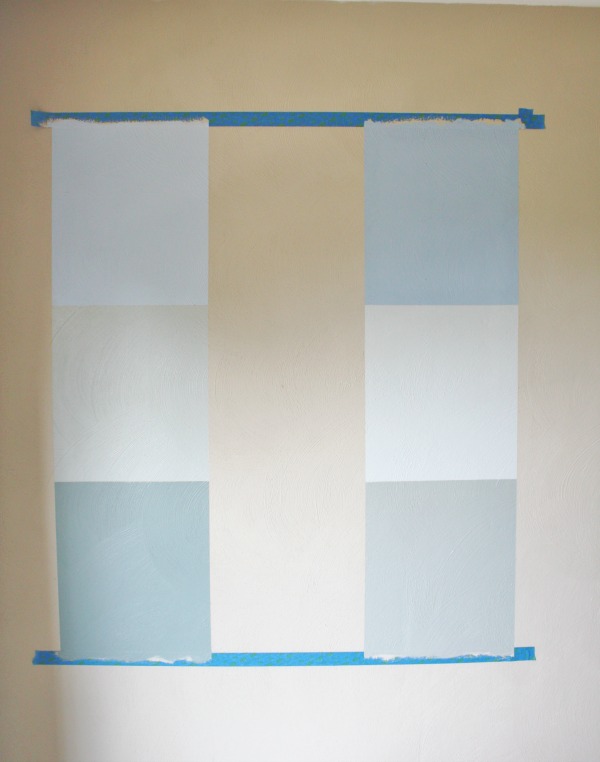
Step 1: Decide how large you want your color block area to be. I wanted 9 blocks total and each block needed be a 15″ x 17″ rectangle. So my width ended up being 45″ and the height was 51″. Mask off the overall size of the color block rectangle with your ScotchBlue™ Painter’s Tape . After taping, double check the interior measurements, and make adjustments as needed.
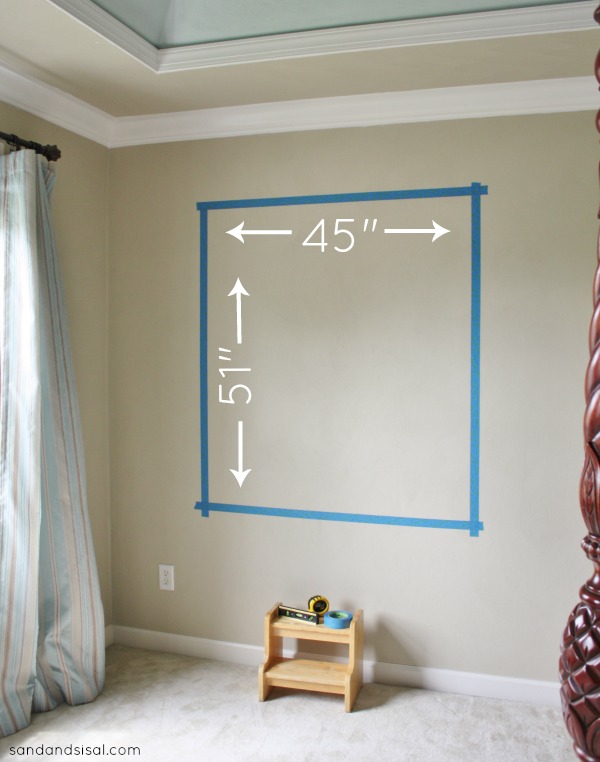
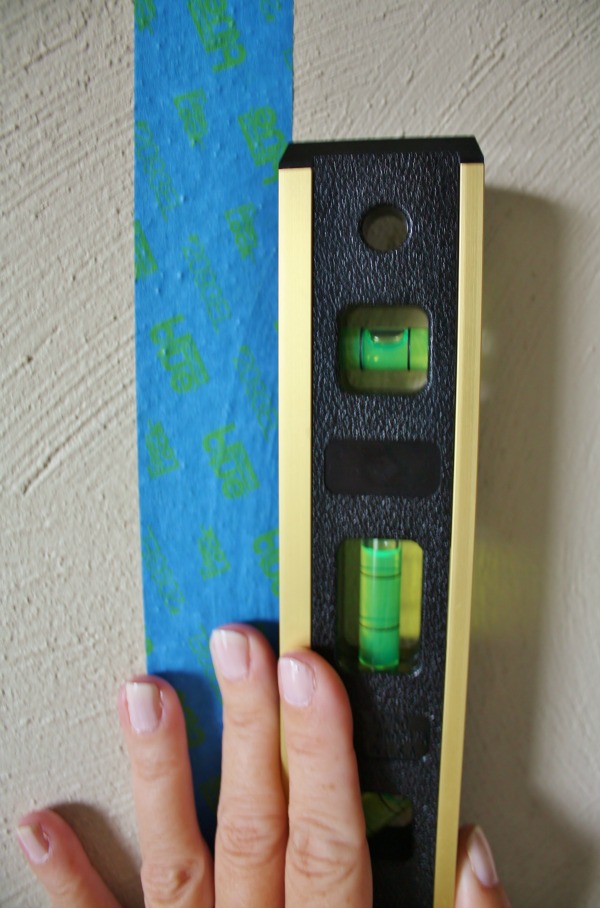
Tip: Use a level to ensure straight perpendicular and horizontal tape lines. Rub the tape thoroughly and firmly with a soft white towel, pressing out any air bubbles.
Step 2: Measure and mark 3 columns, each 15″ wide. Tape off the outer 2 columns. Make sure that the interior measurements (between the tape lines) are 15″ wide.
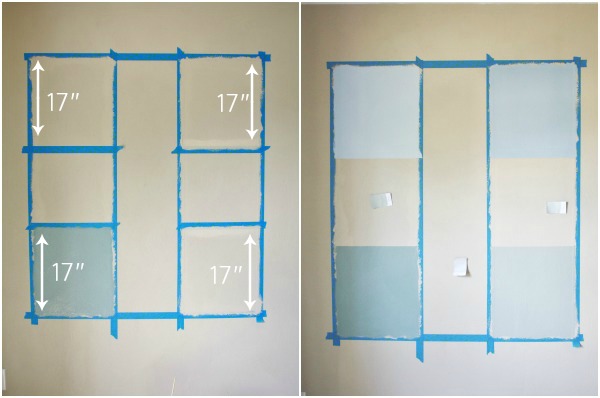
Step 3: Divide the outer columns into thirds (17″) and mask off with the tape. You will now get ready to paint all 4 corners.
My walls are heavily textured and getting crisp paint lines is can be difficult. But there is a secret that painters and designers use! It is called a base coat/topcoat method. If you have textured walls then you will be so happy with your results using this technique.
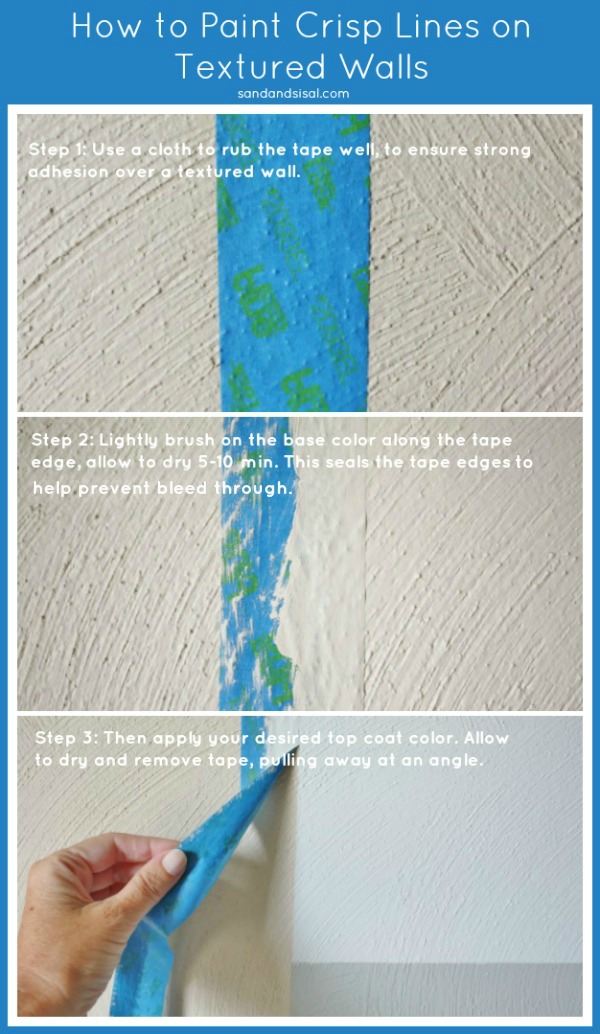
How to Paint Crisp Lines on Textured Walls
- Use a white cloth to firmly rub the tape well, to ensure strong adhesion over a textured wall.
- Very lightly brush on the base color along the tape edge and allow to dry for 5-10 minutes. This seals the tape edges and will help prevent bleed through.
- Now apply your desired top coat color, allow to dry, and then remove the tape, pulling at an angle.
Step 4: After painting all 4 of the corners and allowing them to dry completely and removing the horizontal tape pieces, you will apply new horizontal tape pieces over the freshly painted corners. You are now able to paint the center rectangles of the outer columns.
Step 5: Repeat the taping and painting process until all the rectangles are filled with color. Your color block wall is complete! 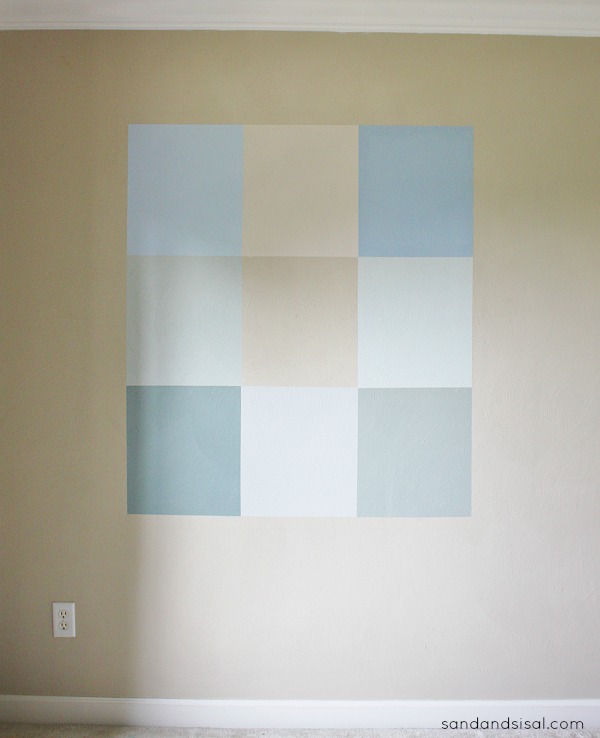
Hang your family pictures in the center of each color block, step back and enjoy your Color Block Family Gallery Wall! 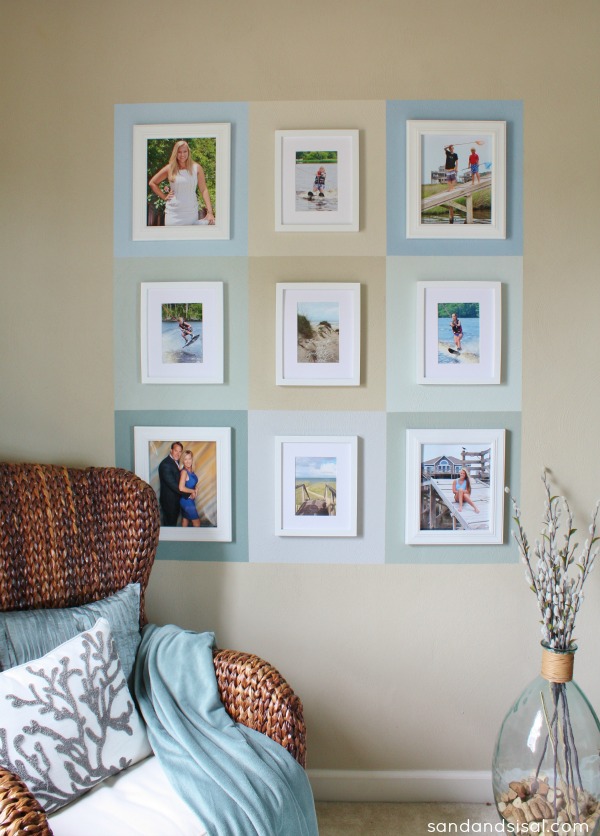
Because the gallery wall is on multiple color blocks, it is wise to choose frames that are all the same color. This keeps the collection from looking cluttered or chaotic. It also allows the family photos to be the focus.
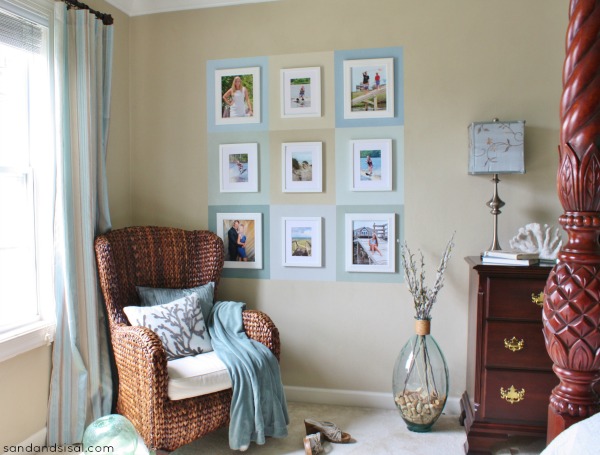
Now I can cozy up with a book in the corner of the room and enjoy gazing at my beautiful family! 😉 What mama wouldn’t enjoy that?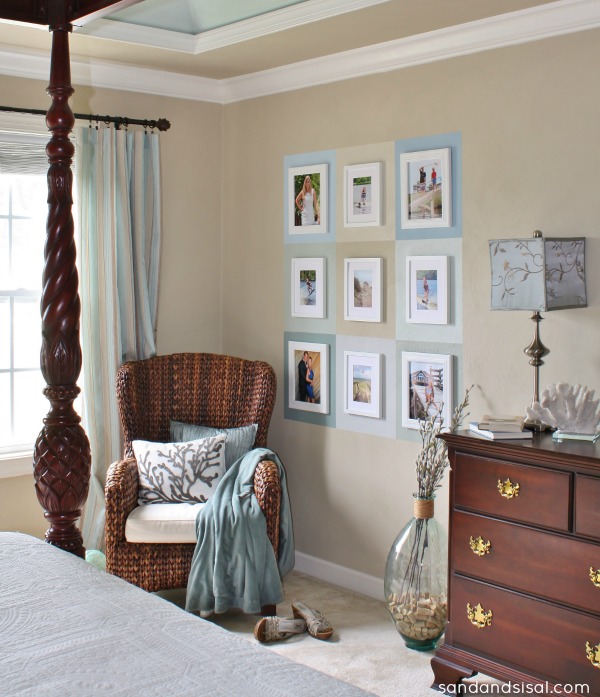

Enter the Home of ScotchBlue™ Painter’s Tape Contest at www.scotchblue.com/homecontest October 1 through November 15, 2014 and you could win $5,000 to put towards a home makeover! The first 500 to submit an eligible entry will receive one (1) roll of the new ScotchBlue™ Painter’s Tape with Advanced Edge-Lock™ Paint Line Protector!
Check out this project as a featured project example in the contest!
Contest open to legal residents of the U.S. and D.C. (excluding AZ, MD, NJ, ND, TN and VT), who are 18+ (19+ in AL & NE and 21+ in MS) at the time of entry. Void where prohibited. Enter from October 1, 2014 at 12:00:01 a.m. CT through 11:59:59 p.m. CT on November 15, 2014. All contest communications, entry/judging criteria and details subject to the full Official Rules. To enter and for Official Rules, visit www.scotchblue.com/homecontest. Sponsor: 3M Construction and Home Improvement Markets Division, St. Paul, MN.
Connect with ScotchBlue:
Happy Painting!
KIM
I am proud to be a 3M sponsored blogger, and, as part of my responsibilities, I get the opportunity to evaluate ScotchBlue™ Painter’s Tape. Opinions are my own and additional products used in the project were selected by me.

What a fantastic {and simple} way to add interest to a gallery wall! Love it!
~ Ashley
Love this, Kim! It gives more weight to those small frames and really makes an impact!
It looks fabulous! I cant wait to see the rest! I am building a cottage style home and those pictures are a great beachy/cottage feel. Thanks for the tips.
Hugs
Maria
Thanks Maria!
hey kim, I really love this idea of the color block. as just enough interest without competing with the pictures. Looks amazing!
Thank you Laura!
beautiful! i’d love to see the whole room! can you share your tan paint color name with us?
Thank you Tammy! I’ll be showing the whole room soon. It’s Urban Gray by Sherwin Williams.
I love your color block gallery wall! So creative! I’m pinning!
Thanks for the pin Leslie! 😉
I love this!! It brings all those beautiful coastal colors together perfectly! Pinning and sharing! XO
Thank you Christy!
This is gorgeous Kim – love the color combo!
Thanks Amy!
Love how this gallery wall spiced up the boring wall!
That looks “ah-mazing,” Kim! It fills your wall beautifully and add such cool interest! The colors you chose flow so well together and are perfect for your space!
Thank you so much Becca!
Pretty! I think I use to have that same bureau a few years back! 😉
THank you Jess!
Can you tell all the colors you use? They are all my favorite and I use similar colors throughout our house! Emmy H.
Thanks Emmy! Hang tight, I will be writing a post very soon showing all the colors. 😉
Kim Wilson,
I have been waiting forever to find the colors I like and the color block family gallery just make them stand out even more. I am 73 but still feel young enough to want a bedroom like that. I love the ceiling paint, the wall paint and the color of the gallery block. I am really anxious to get started, would you please share all the colors and paint. Thank you, your ideas are amazing !
Hi Mary!
Sorry for the delay… your email was buried. The wall color is Urban Putty and the ceiling is Rainwashed. Both are colors by Sherwin Williams. I’ll be writing a post soon about all the different shades I use in the house.
Thanks!
KIM
Thank you so much, Kim. Now I am ready to redo my bedroom. Always love your posts!