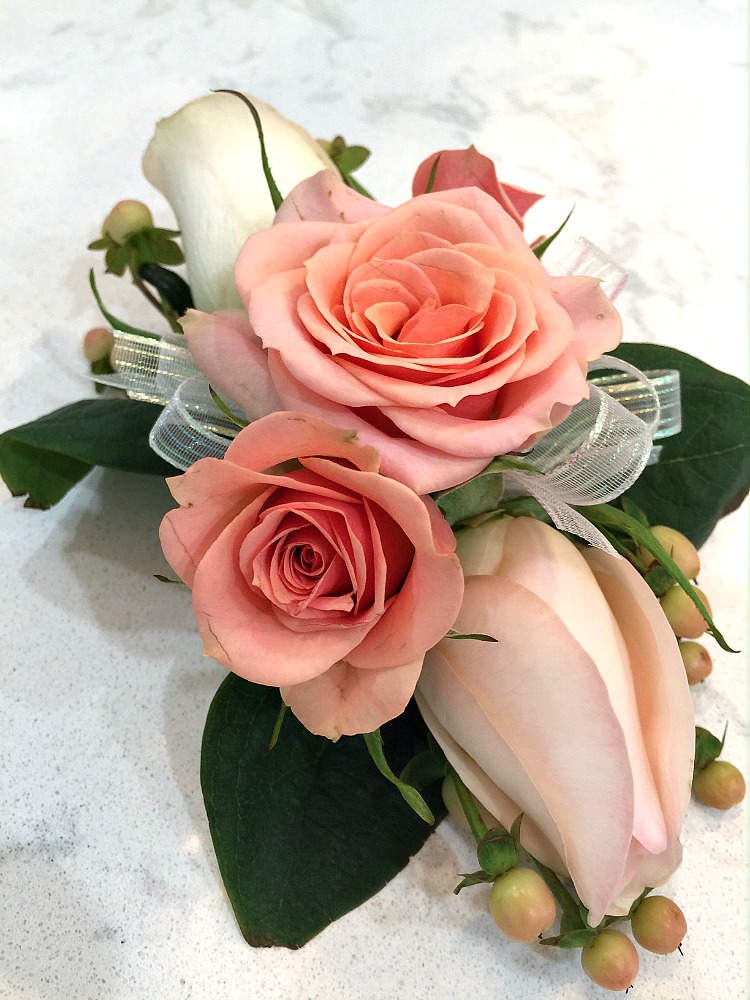
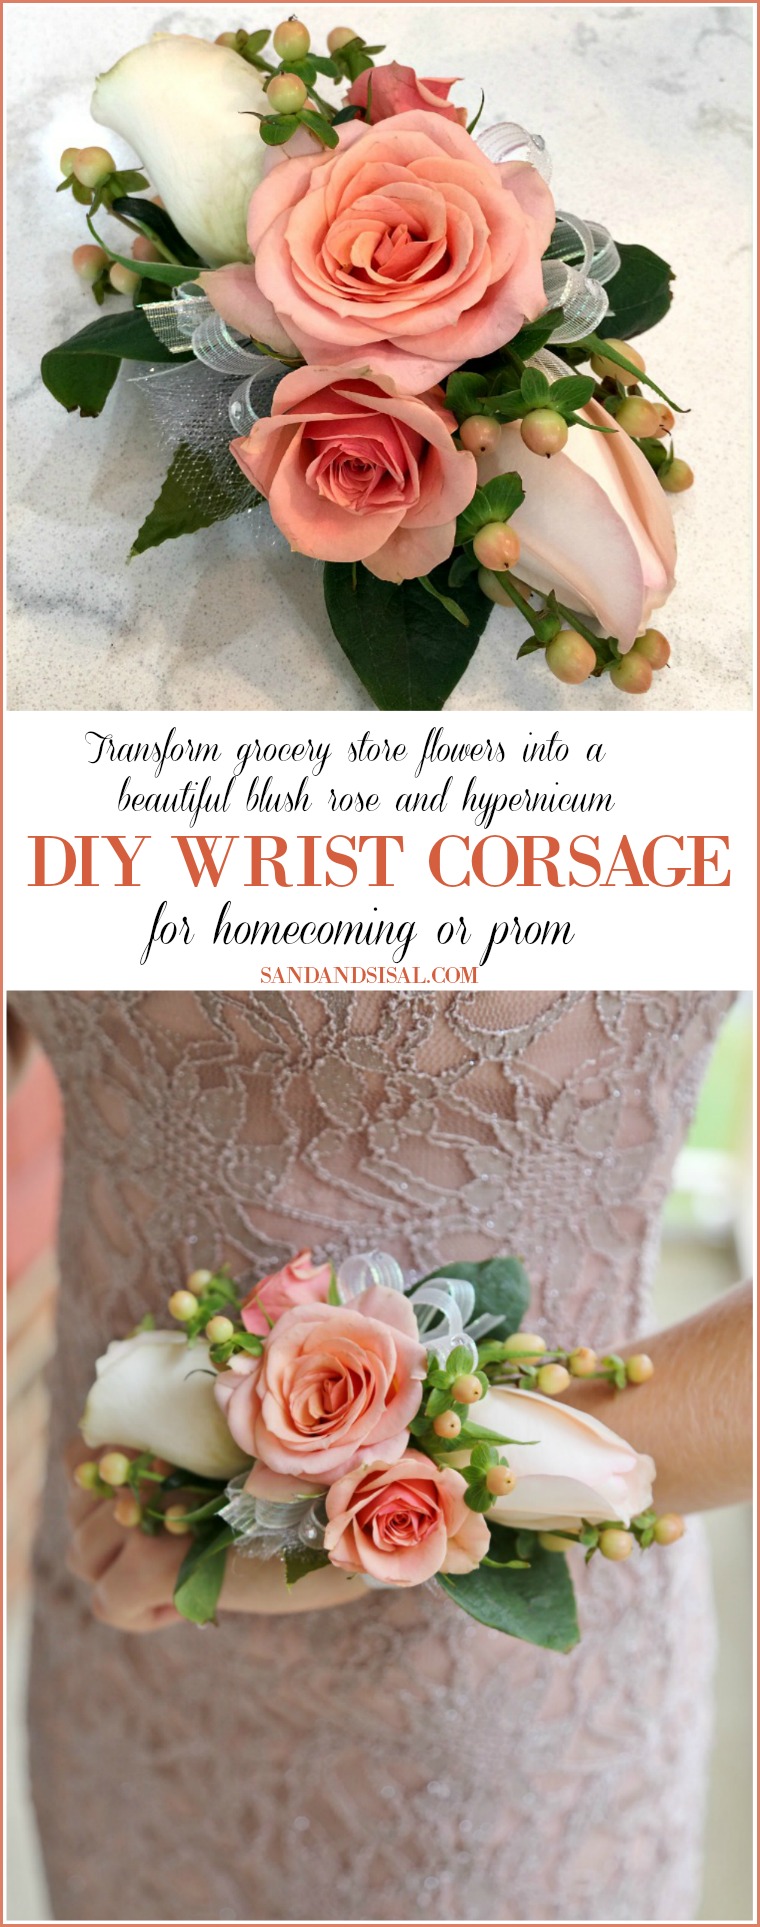
This past weekend was a special one! My son attended his first homecoming dance. We spent last week finding just the right outfit and shoes. This being Matthew’s first dance, he was unaware that his date needed a corsage. Here comes mom to the rescue! With two older daughters, I have made a few corsages and boutineers in my day and really enjoyed creating them. Corsages can be quite expensive and yet they are quite easy to make with simple bouquets from the grocery store. Today I’m happy to share with you how to make a blush rose and hypernicum berry DIY Wrist Corsage, perfect for homecoming or prom.
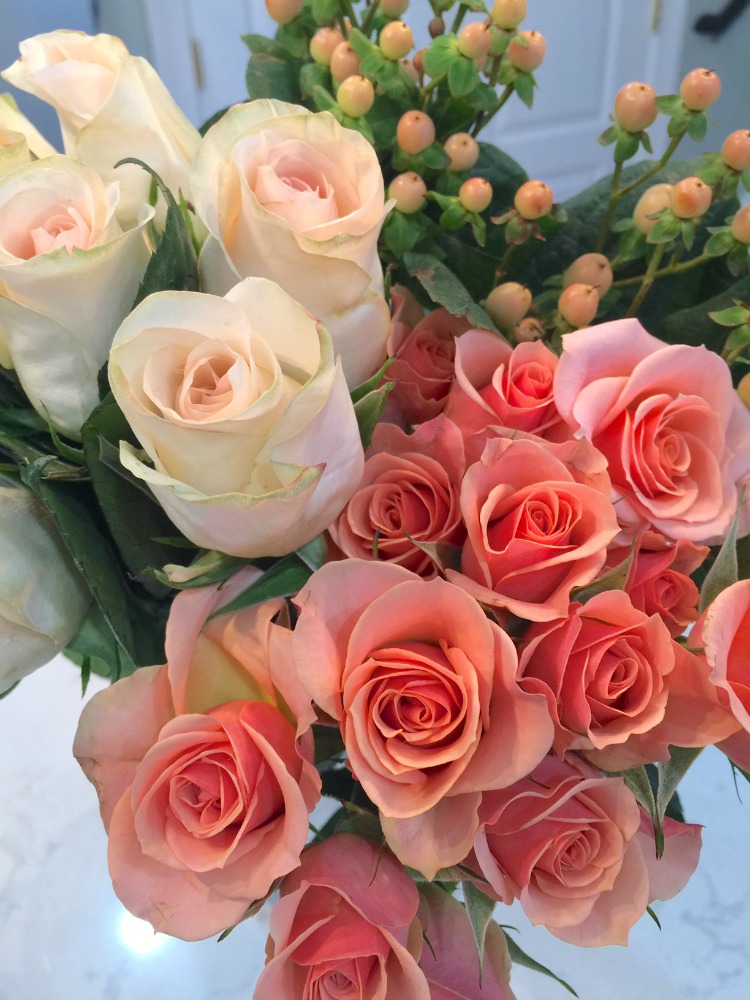
Corsages can be as simple or as elaborate has you desire! The first thing to find out is the color of her dress and then go from there. I love buying a few small floral bunches from the grocery store to work with. I know only a few flowers will be required for the corsage, but then I am left with a lovely bouquet for myself afterwards! Call it mama’s payment! The bunch of 10 ‘Senorita’ blush tea roses cost $8, the spray roses were $4 and hypernicum berries were $6.
How to Make a Wrist Corsage
You will need the following items to make this rose and hypernicum berry wrist corsage (affiliate links provided for your shopping convenience):
- velcro corsage wristlet band
- 2 blush tea roses (‘Senorita’)
- 3 blush spray roses
- 3 hypernicum berries
- ribbon
- craft rhinestones
- floral tape
- floral wire
- craft rhinestones (optional)
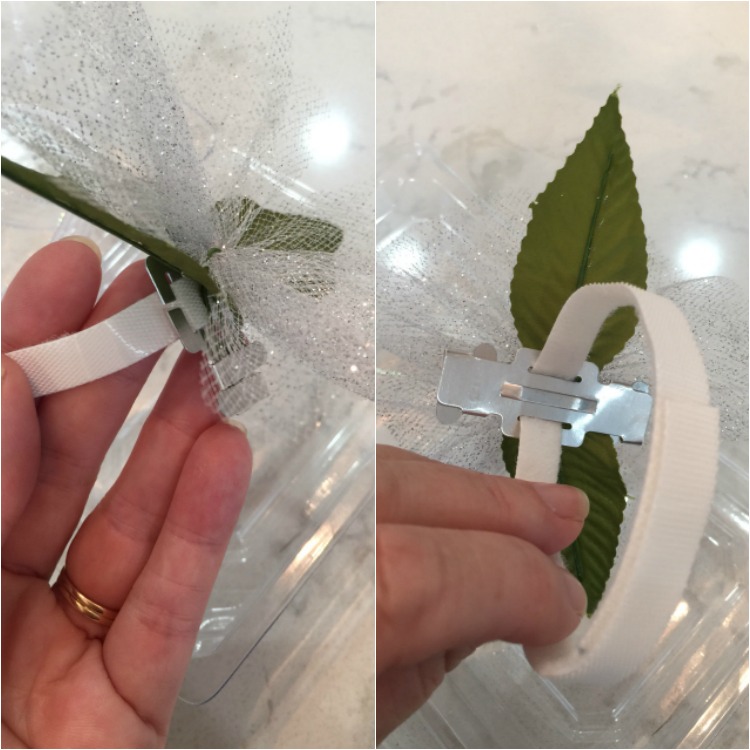
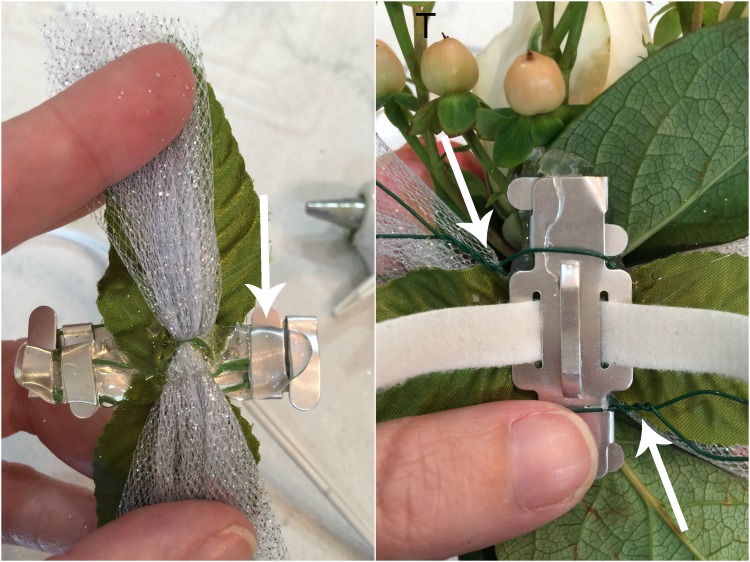
Most grocery store florists will be happy to sell you corsage wrist bands but you can also buy them online for even less (link provided above). Some can be elastic or velcro. All come with a metal clasp that has 2 prongs on each end. These are where you can fasten stems or wires to. I use the prongs in different ways depending upon the type of corsage I’m making.
For this corsage I chose sturdy tea roses and spray roses. Roses keep their shape well and don’t wilt as quickly as some other types of flowers. I buy my flowers the day before the dance and try to keep them in the refrigerator if possible, unless the buds are tightly closed and you want them open, then leave them out at room temperature for a bit.
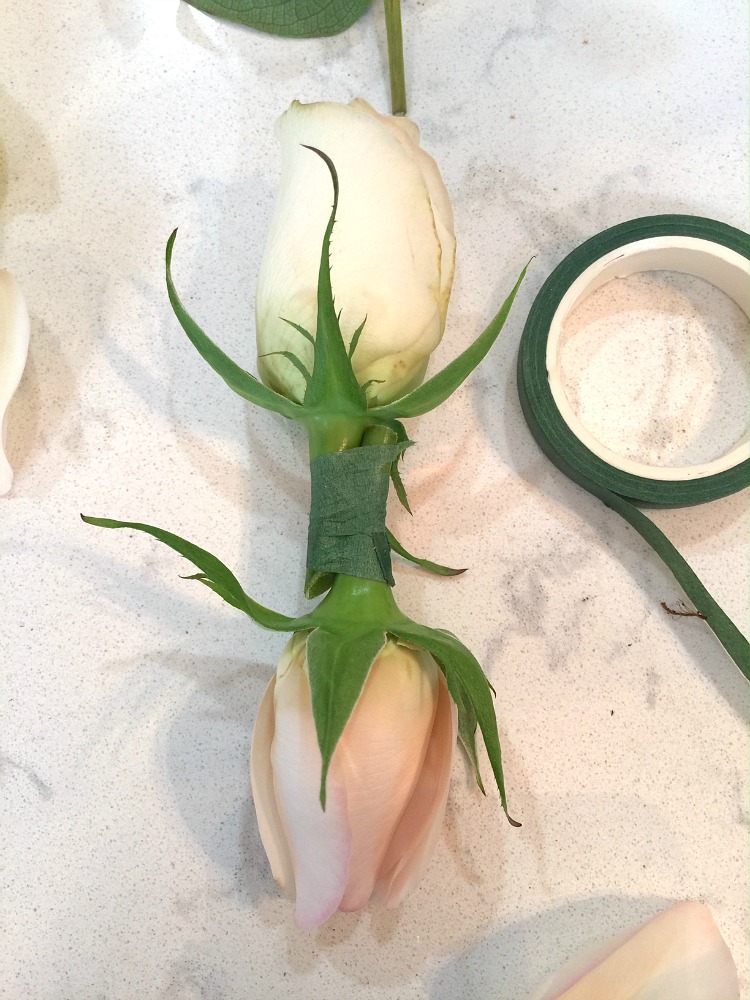
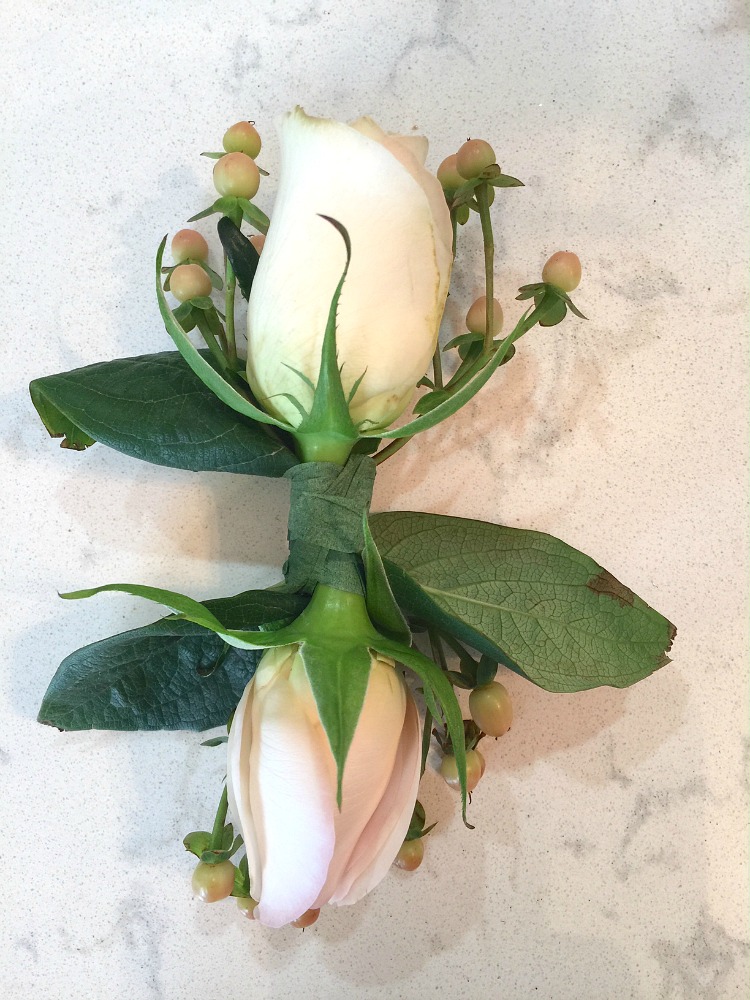
Step 1: I chose two ‘Senorita’ roses that are creamy white with just a hint of blush, and cut their stems to one inch. Remove any exterior petals that might be blemished. Feel free to also remove multiple petals to get the rose buds down to the size you desire.

Step 2: Wrap the two cut ends of the roses together with floral tape.
Step 3: Clip 2 hypernicum berry sprigs and lay them behind each rose bud and wrap again with floral tape.
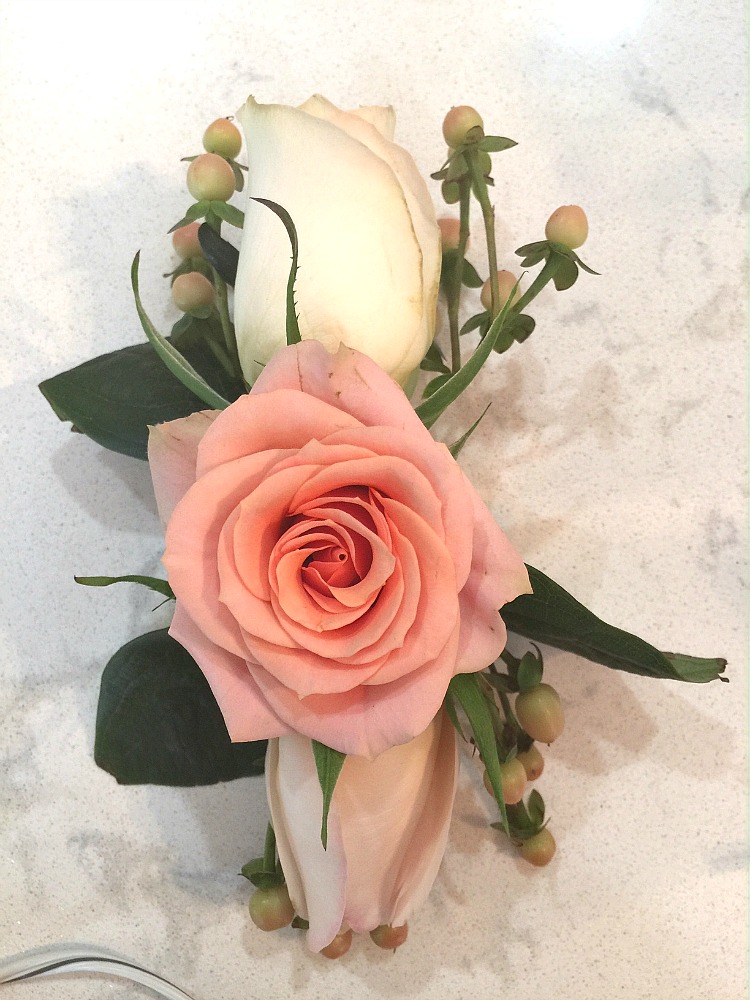
Step 4: Clip a larger, open, blush spray rose bud, leaving 1/4 inch stem. Put a large dollap of hot glue on the stem and place in the middle of the two creamy roses. Allow glue to cool a minute or two.
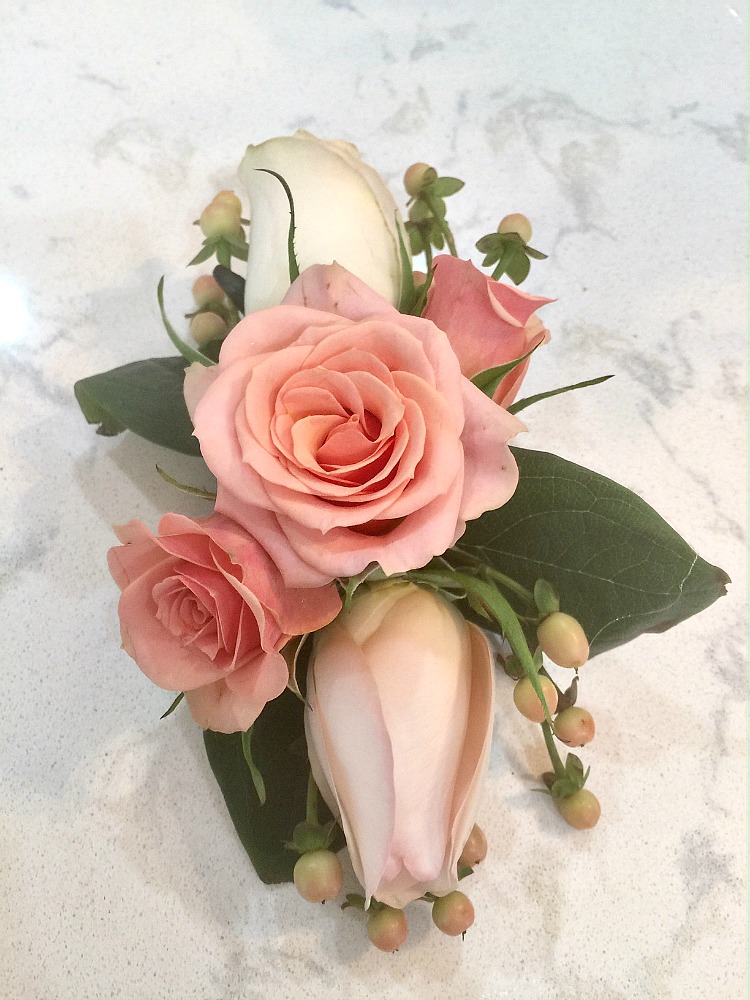
Step 5: Clip 2 smaller spray rose buds and hot glue them in a diagonal pattern on either side of the center rose.
Step 6: Create 2 bows. Take a coordinating piece of ribbon and fold it on itself, accordian style and secure in the middle with floral wire.
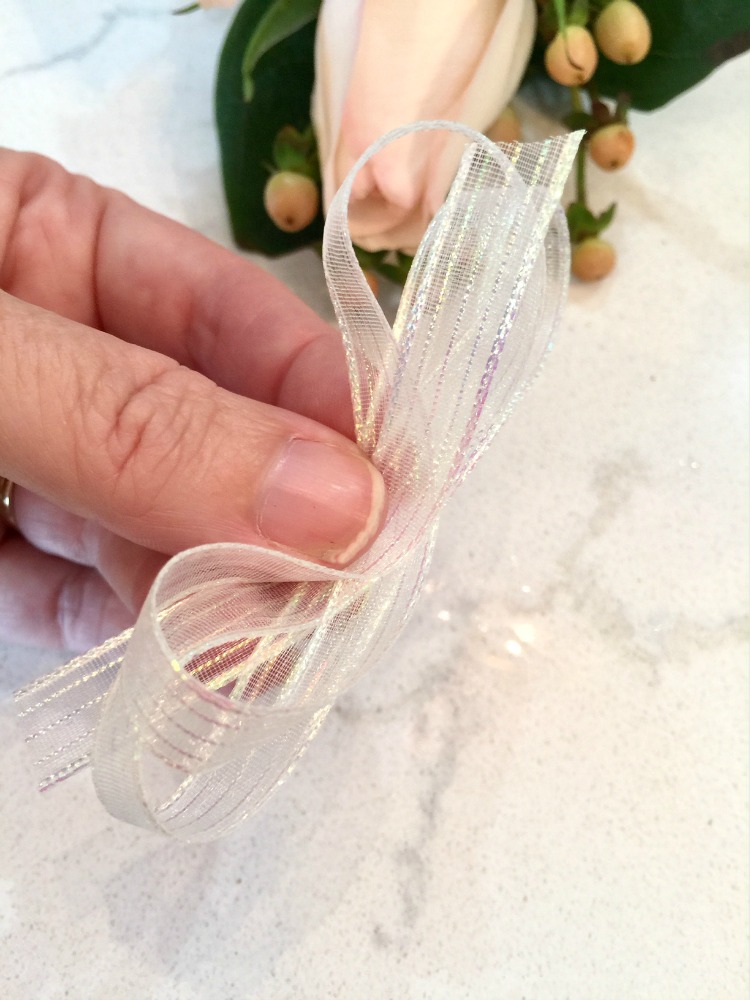
Step 7: Hot glue the bows on opposite sides of the spray roses.
Step 8: Cut 2 long pieces of floral wire and thread each wire over the stems of the large tea roses. Twist each wire together.
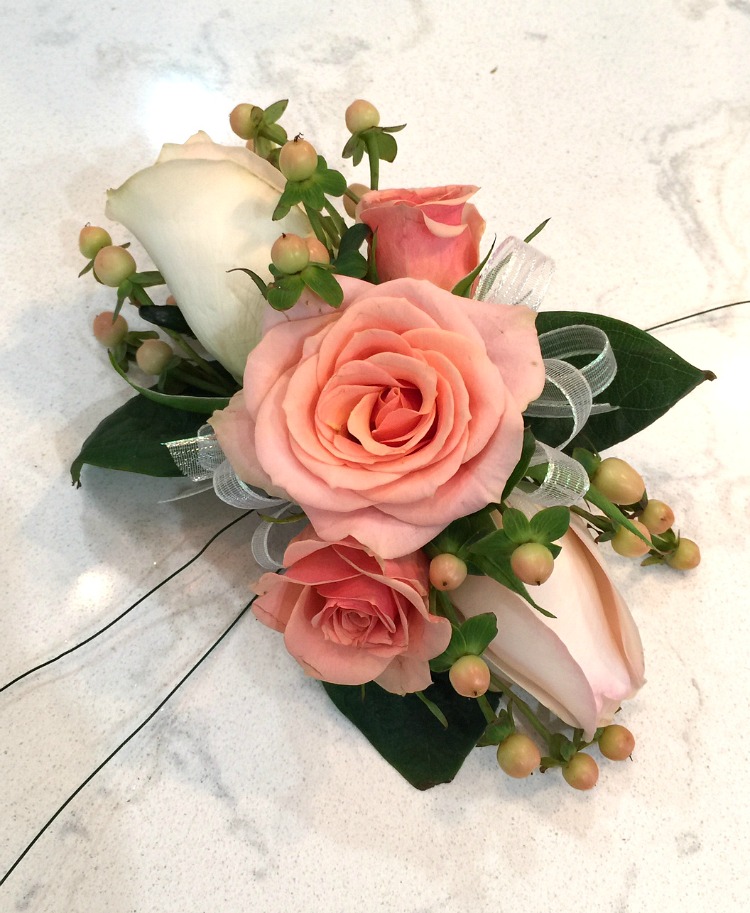
Step 9: Now is the time to attach the corsage to the wristlet. Put a generous amount of glue onto the metal wristlet clip. Press the corsage onto the clip and allow it to cool completely. Next, wrap the wires around each end of the metal clip and use scissors or wire cutters to clip the ends and tuck under the flowers.
IMPORTANT TIP: Give your corsage the shake test! Hang onto the wristlet strap and gently shake. If everything feels secure then you are good to go! If not, then add more wire or hot glue where needed.
Feel free to embellish the DIY corsage even more with rhinestones. Store the corsage in the fridge until the event.
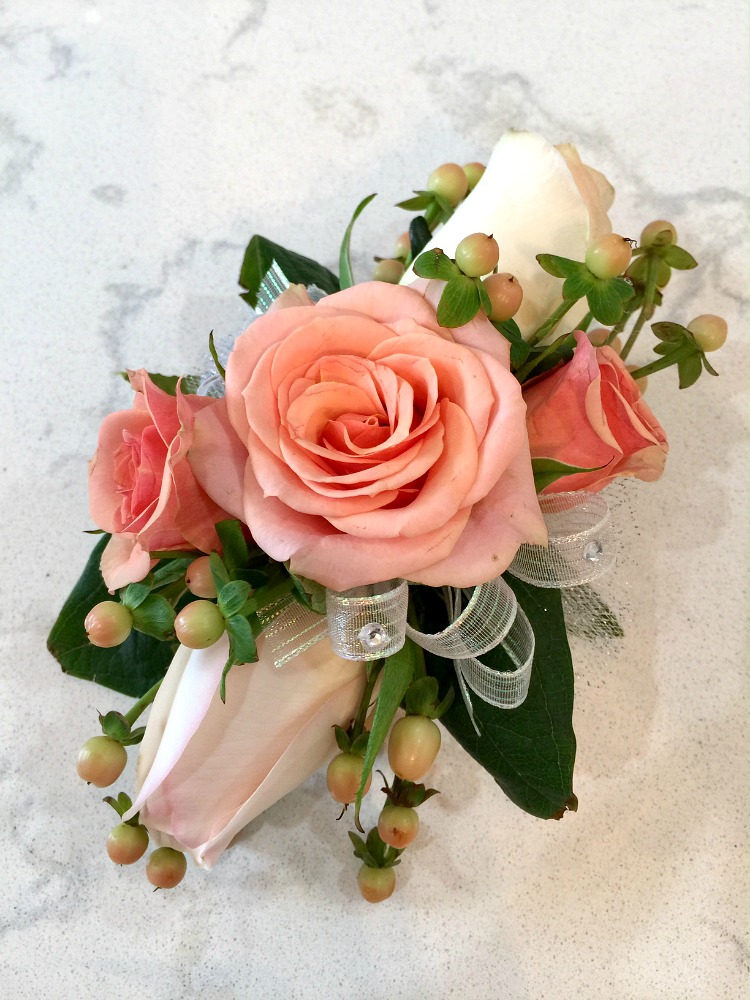
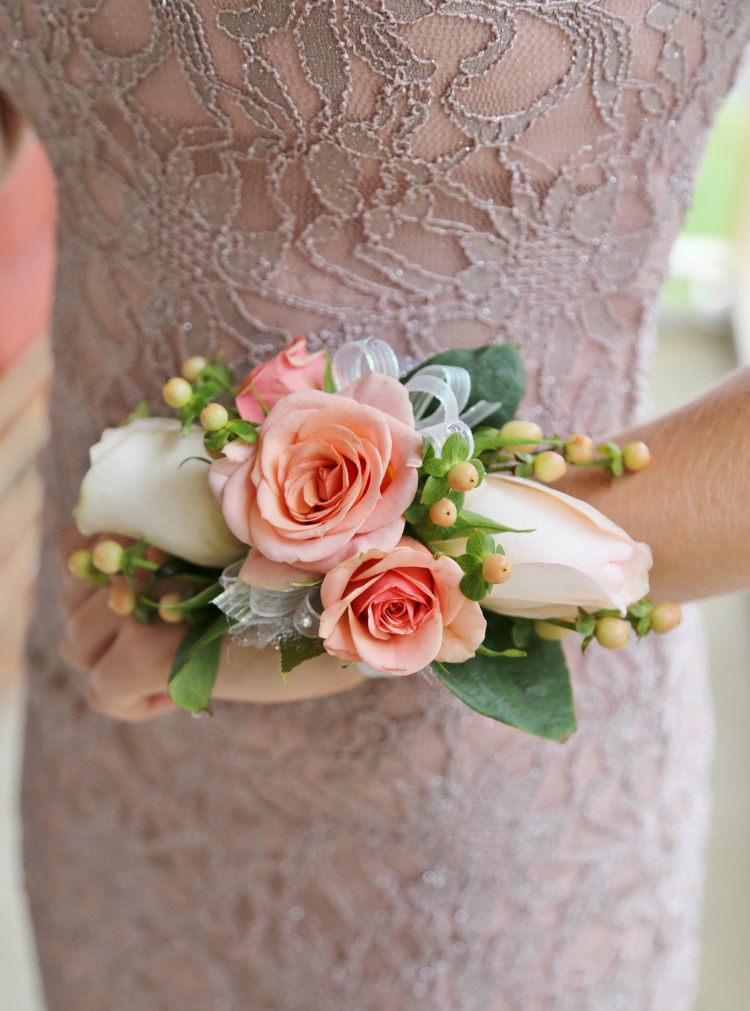
I absolutely love how this blush rose DIY Wrist Corsage turned out! Best of all Matt’s girlfriend loved it. Doesn’t she look beautiful? They are such good friends and such a cute couple. She is an amazing athlete and has a heart of gold. She loves to bake and brings friends, neighbors or anyone in need fresh baked goods to cheer them up! I think I’ve gained 5 pounds since they started dating. Ha!
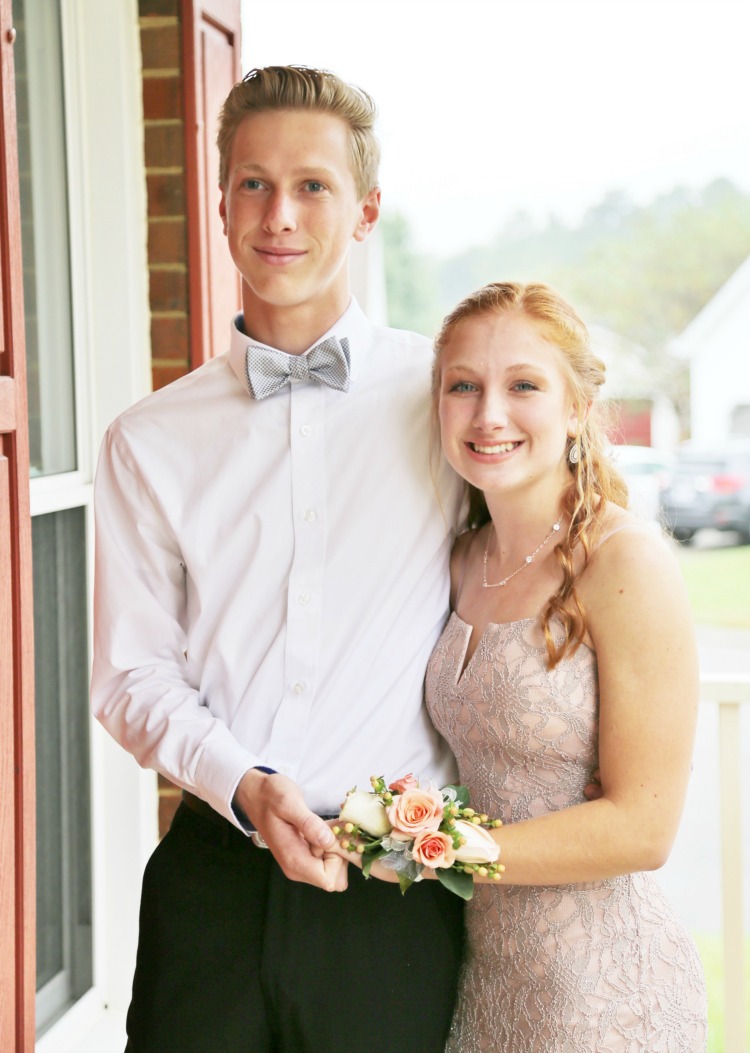
Here’s a little pic of my hubs and I with our son. They grow up fast don’t they?

I hope this post gives you confidence to try to make a DIY wrist corsage some day!
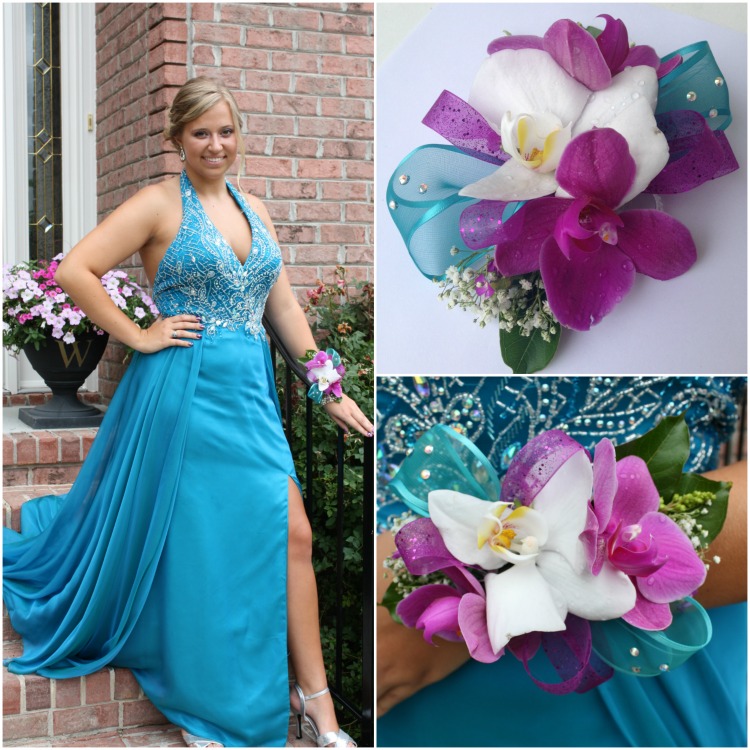
PS- Here’s another corsage I made for my oldest daughter’s prom in 2014. I used orchids from my household orchid plants. Morgan was crowned Prom Queen that evening! 😉
LOVE IT? DON’T FORGET TO PIN IT!
Believe in your beautiful, creative self!
KIM
Lovely! Thanks for sharing.
Thank you Nancy!
Kim beautiful!!!! Plus beautiful family family
Thank you so much Kay!
So right they are a cute couple, very handsome son and daughter, wow. No wonder she was crowned prom queen. Those orchids are gorgeous
Great job making those corsages, saving some money to get something a lot nicer is worth the effort. Wish had known could do this when my sons were still dating in high school.
Your corsages are so well put together, glad your son’s date liked hers so much.
Happy week
Thank you JaneEllen! They were so cute together and have a really lovely friendship. Playing with flowers is so fun and brings me a ton of joy! Have a great week! ~ KIM
Well done! This looks so professional!
Lovely post. Shared!!
I love the corsage lovely
Thank you!
Made one today for my daughter’s homecoming today-looked beautiful and was so much fun! Took me about an hour, which included me making my own wristlet. Directions were clear, pictures were a huge help. This was very last-minute (boyfriend broke up with her Monday night!), so I made it work with mini carnations & three tea roses. Could not tell the difference from the pros!
Hi Bridget! Thank you so much for sharing this with me! I’m so sorry he broke up with her last minute… uhg. But I’m even more happy that she went and had fun regardless!!! I would love for you to share a pic with me if possible (sandandsisal@gmail.com). Once you start making corsages, you realize how fun and easy they are to make! I make all the boutineers too. Those are even easier! Have a beautiful week! ~ KIM
Beautiful! I’m going to give it a try!
Any idea what the total cost of this was? Obviously, there are leftovers of tape, wire, and ribbon, but I’d like to know what the initial investment of those materials would cost (assuming equal flower cost). Thanks!
Hi Tanya!
I listed the prices in the post and links to all the supplies are listed too. The bunch of 10 ‘Senorita’ blush tea roses cost $8, the spray roses were $4 and hypernicum berries were $6. But because I used so little out of each bunch the overall price for the corsage was under $5 and mama was left with a gorgeous bouquet for my kitchen table!!!! Yay! You can find the rhinestones for 99cents at walmart and also the wire and tape are about a dollar each. They are fun to make! I hope you give it a try!
Have a great week!,
KIM
Great tutorial. Did a test one last night and it came out nice. Now to make 5 of them on Saturday for my daughter and her friend group prom.
Oh that is so awesome Patrise! You are an great mama! Feel free to send me pics! I’d love to see them!
Now that I made 5 of them, there are a few things I changed. I bought the wrist bands from Amazon and about 20%of the reviews said the elastic pulled out, so I dimpled the connection and ran a bead of hot glue at the connection. I had to measure the width of the metal on the wrist band and make the tea rose stems a bit longer so it fit my specific wristband. The last thing I did differently was that I attached it to the wristband after the tea roses were together with the berries. I found it easier to get a good wire wrap before the spray roses were on. I couldn’t have done it without this page, thank you so much for sharing!
Your tutorial was so helpful to me yesterday! I started trying to make a traditional corsage and wrapping wires and was so frustrated!! Your method worked great! I made 4 corsages for my son to give to his friends who made sure to include him at homecoming.
Thank you so much for this clear tutorial. I am appalled at how much florists charge for a simple (and not very appealing) wrist corsage! I am definitely going to be courageous and do this for my son’s dance!
Awww thank you Sara!
Corsages are rather simple to make and once you make one, you will quickly realize how you could make so many beautiful variations. I know yours will turn out great and I hope your son has a wonderful time!
Have a great week ~ KIM