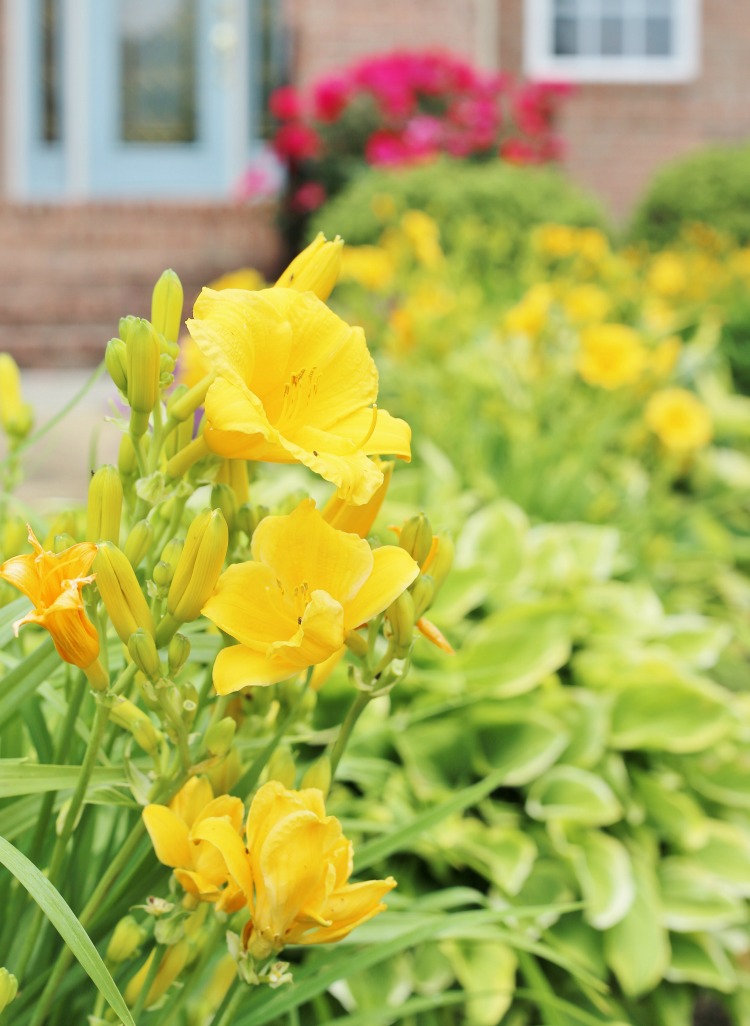
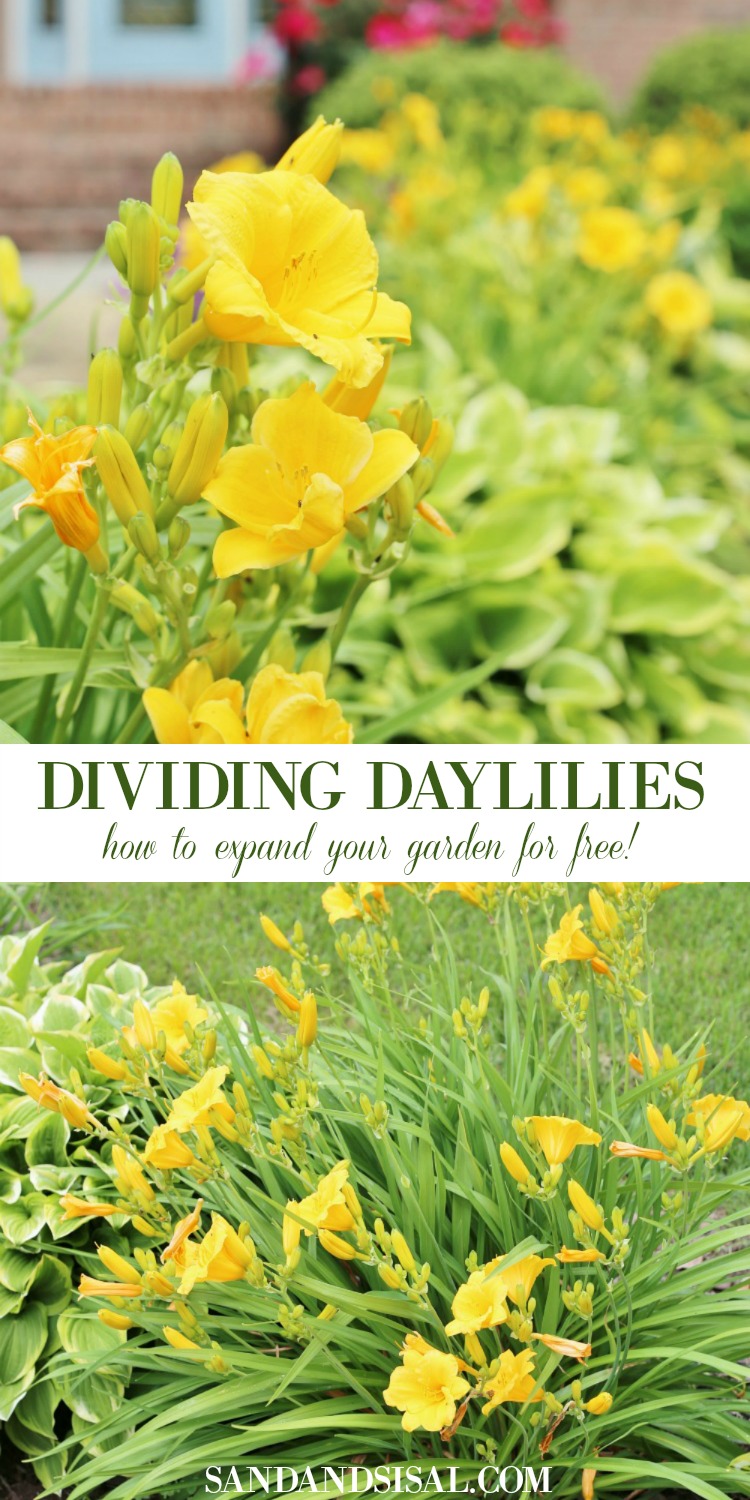
Daylilies are the gifts that keep on giving! After years of wasting time and money with annuals, I have resolved to invest in perennials for my foundation plants. Today, let’s talk about dividing daylilies and how to expand your garden for free! The beauty of perennials is that they are a one time purchase, yet they yield years of repeat beauty. In this post I’ll show you how to divide and transplant daylilies so that you have a jaw dropping garden that boosts your curb appeal on a dime.
Dividing Daylilies
How to Divide Daylilies
Step 1: Choose a plant to be divided and dig it out.
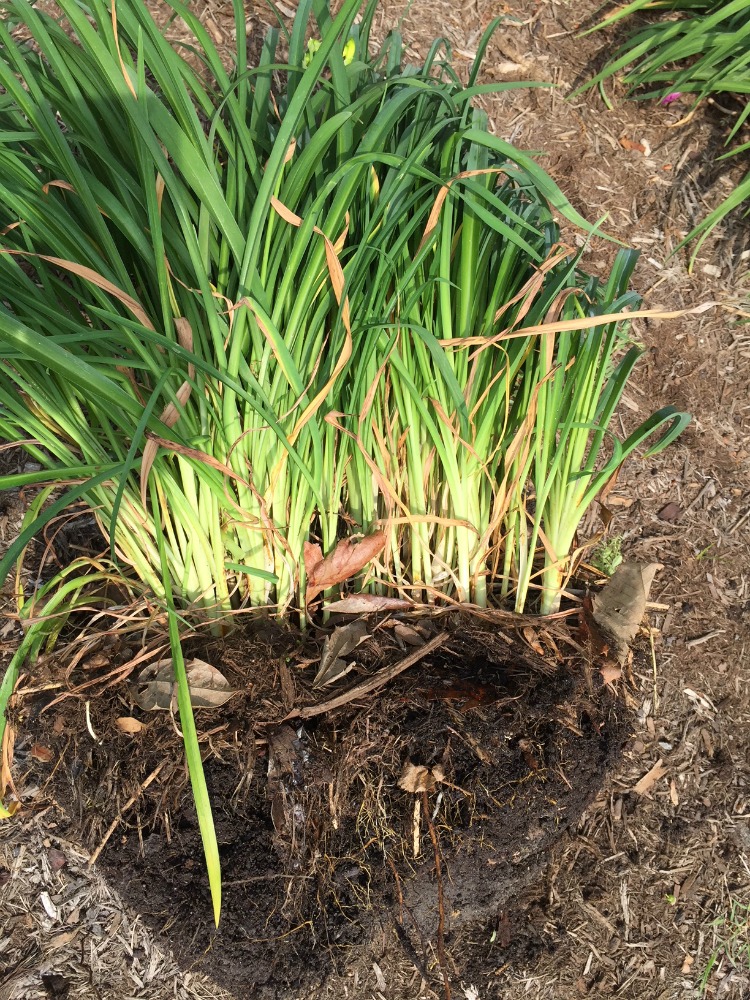
The first step is to recognize when you have a daylily that is large enough to be divided. Choose a daylily that is large and healthy. Dividing daylilies is beneficial to the plant. If you find that your plant is becoming large and overgrown or is not producing the same amount of blossoms that it used to is an indicator that it might need to be divided.
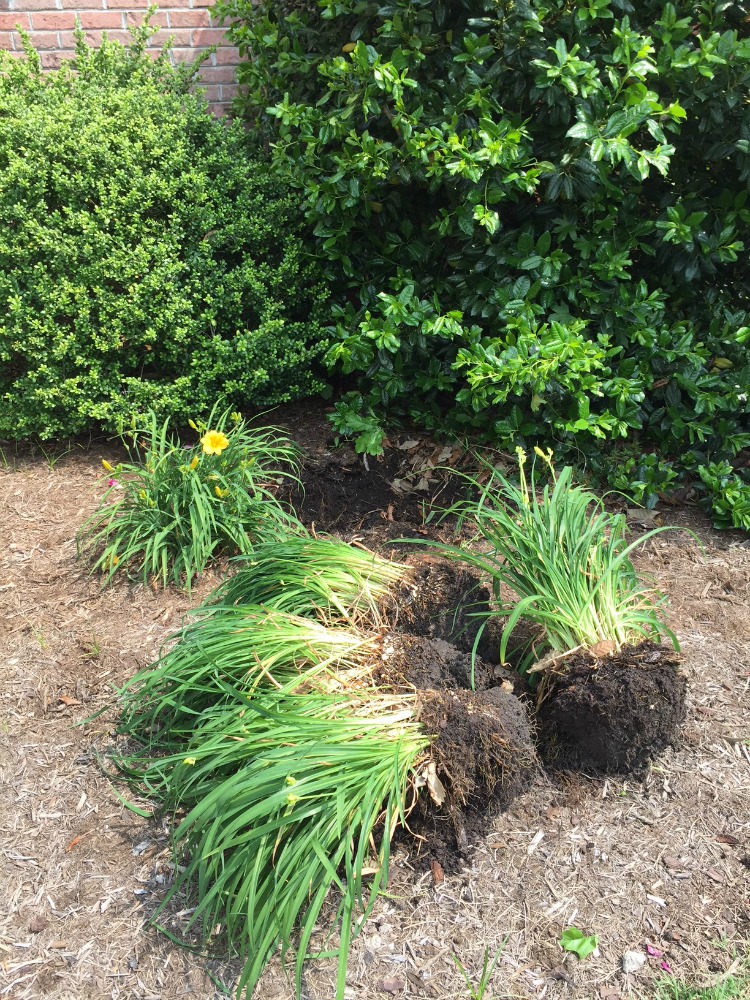
Daylilies techinically can be divided at any time of the year. The optimal time though is in late summer when all the blooms have deceased. Choose a daylily that is large and full. Rake away any mulch surrounding the plant. Dig 6-12 inches around the plant and lift the entire daylily out and lay it on its side, exposing the root system.
Step 2: Dividing daylilies
Depending upon how large your daylily is, you can divide it into 2-4 sections. Pierce the root system with a clean and sharp shovel, dividing the daylily in half. In this situation, we divided this daylily into four sections. The object is to do as little damage to the root system and yet still divide the daylily. Using a clean tool helps prevent any disease or fungus from being transfered from one part of the garden to the other.
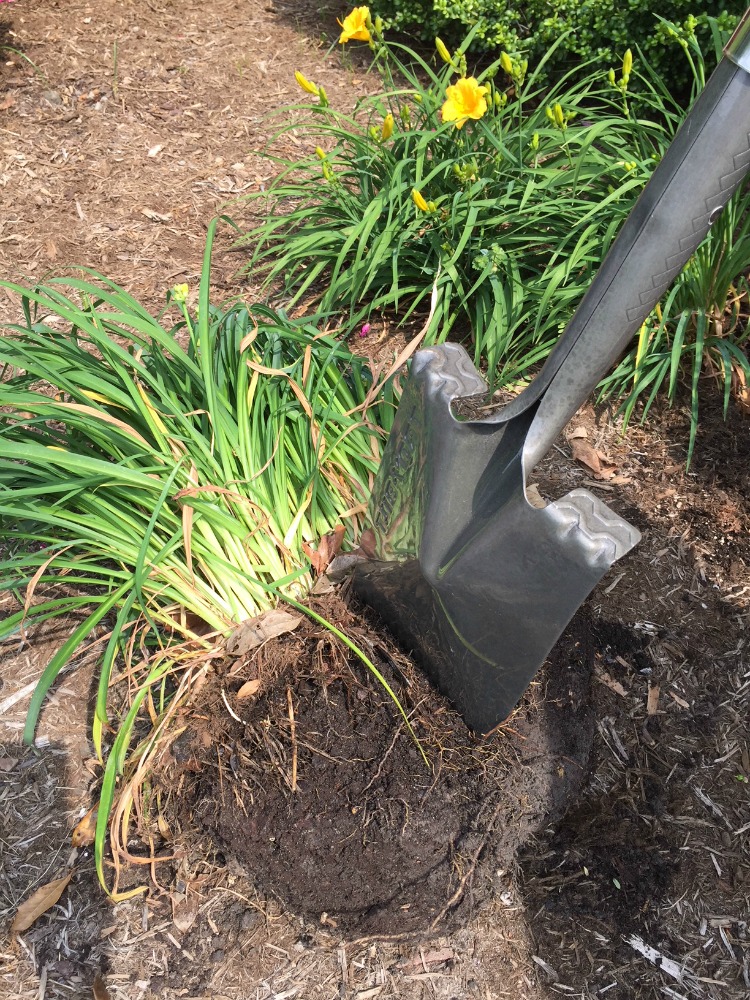
Dividing daylilies into 4 sections will give you 4 new daylily plants for free!
Step 3: Transplanting Daylilies
These plants are very resistant to dividing, but understand that when you transplant them, they might not “perk up” the way you would expect right away or for several months even. It is for this reason that the optimal time, visually, for transplant is late summer/early fall.
To transplant daylilies, prepare an area for the new divisions. Choose an area that is in full sun. Daylilies are quite tolerant to any type of soil. Loosen the soil and dig a hole a little larger than the size of the transplant. Place the plant in the hole and cover with soil only to the base of the plant. Water immediately after and maintain a watering schedule for the weeks after.
Some people recommend cutting back the foliage to the base. I personally do not practice this unless the foliage is already faded and dead for the season. I like to allow the foliage to soak up all the sun’s nutrients for as long as possible before cutting the foliage down. This will ensure a healthier plant and root system for the next season.

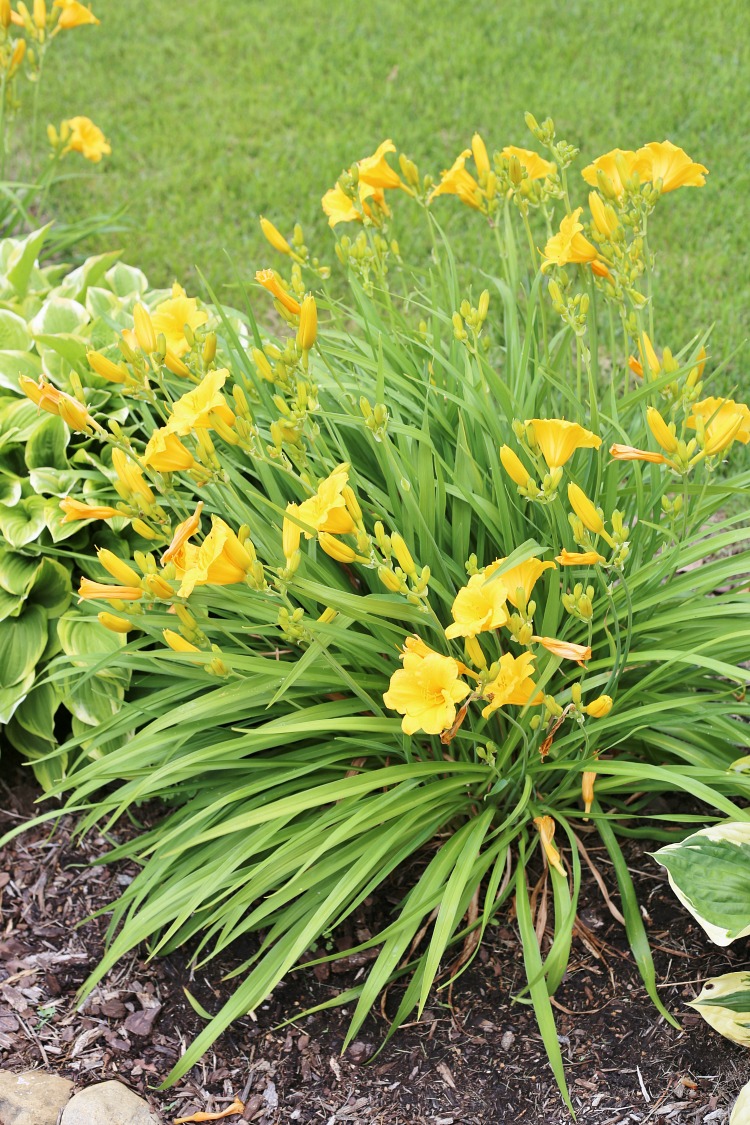
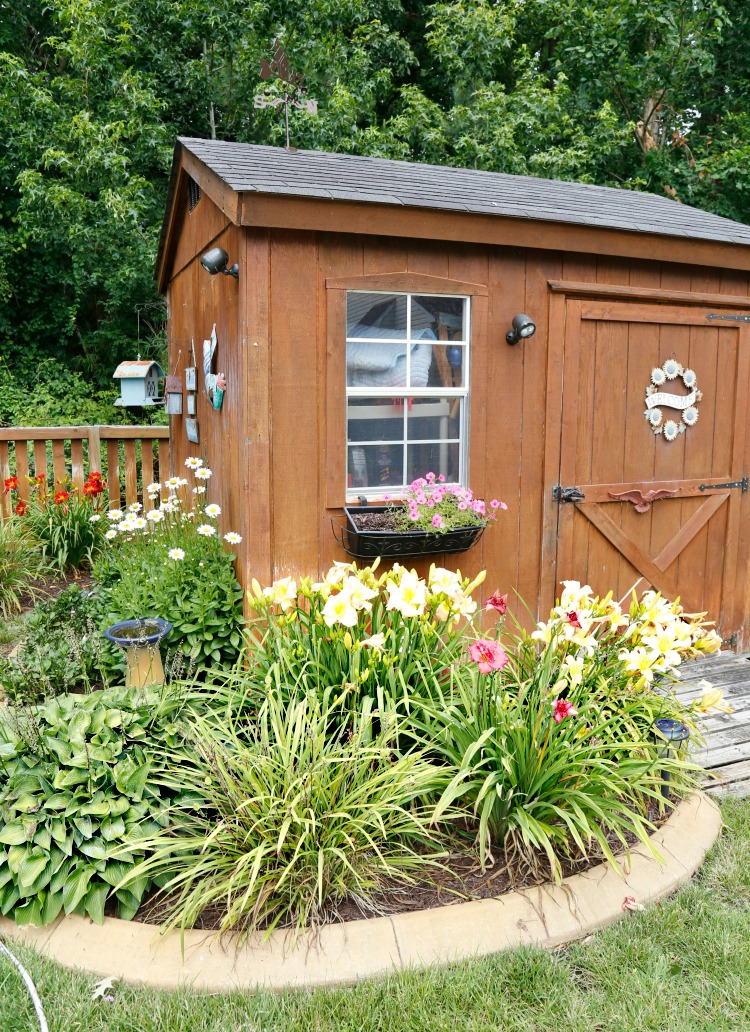
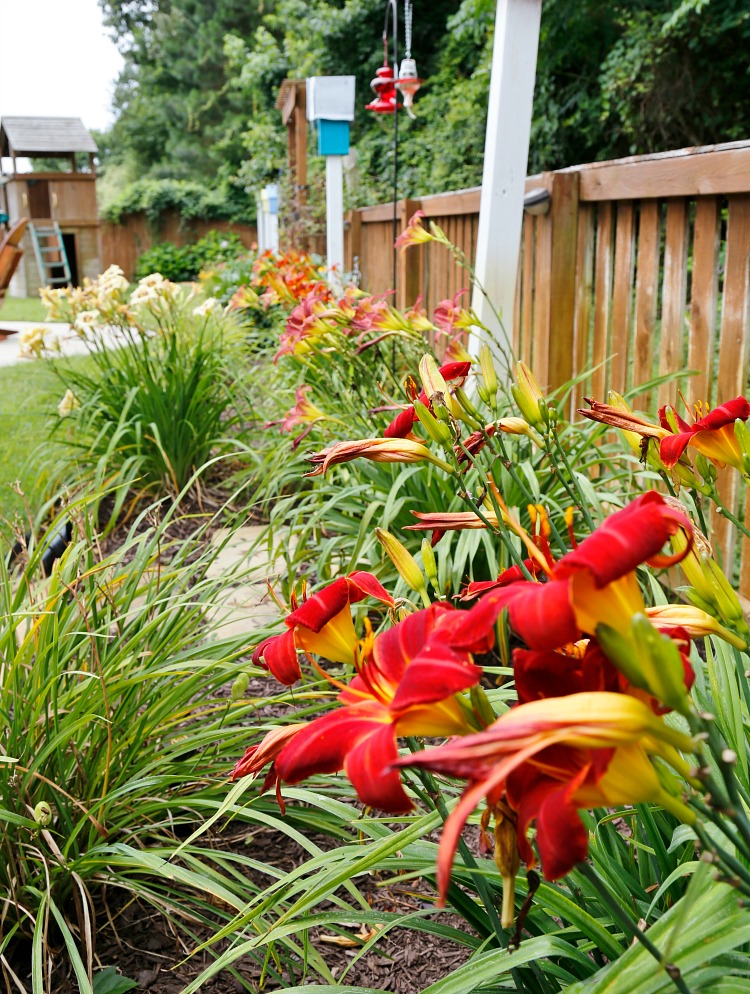
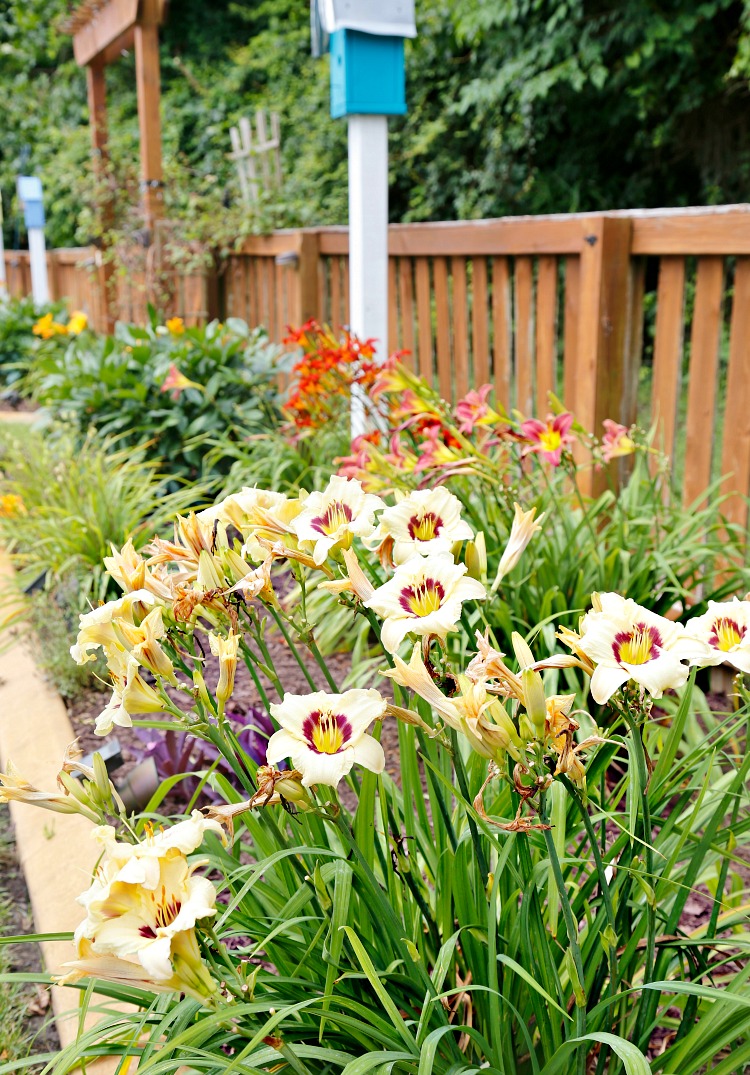
Here are some photos of our transplants which we divided just last year and how they look now! They are huge and thriving!

The beauty of dividing daylilies is that you can share and trade plants with friends! My neighbor Connie has a gorgeous garden filled will a variety of daylilies that bloom from spring until fall and she generously gives me divisions for my garden.
So much beauty for so little cost! I hope you get out into your garden this summer and either plant some new daylilies or start dividing daylilies and expand and share your garden for free!
Love it? Pin it!
Thanks for this post. Sadly I never thought to do this. I love love your pathway lined with your lilies, beautiful. I will be doing this early fall. Thanks again.
Janet
Thanks so much Janet! That is how I got all those lilies down the pathway, just by dividng a few older ones! It’s such a great bargain. 😉 You can do this with hostas also.
Beautiful Lilies, Kim. I have them in my yard in several varieties and colors. Your Hostas look gorgeous. I’ve always thought that Hostas were shade loving. It seems yours thrive in the sun. I’ve got to read up on them. I’m in zone 9. Thanks for the interesting post! Enjoy your pathway!
Hi Nancy!
Thank you so much! There are so many varieties of hostas. Some only thrive in deep shade, others like moderate shade, and some are sun tolerant. You need to go to a garden center to find the sun tolerant ones. I have 2 types of hostas in those border beds in the front of the house. They are “Twilight” & “Golden Tiara”. We’re in zone 8b and they are in the full sun all day long. By September they do look a little peaked I will admit but I have a huge snail problem which doesn’t help. They love to feast on the hostas.
Hope that helps!
KIM
Thanks Kim! A special friend gave me all my daylillies from dividing her garden and that has been nearly 8 years ago. Now my daylillies are in need of dividing and they have thrived ever since planting them. I want to divide mine this fall and possibly plant around my trees for pops of color. Any advice for planting around trees?
Thanks again for your advice and post!
April
Hi April! What a sweet friend you have! And yes, after 8 years, it’s time to divide and conquer! I have daylillies planted under some of my crepe myrtles. At first when the crepe myrtles were small the lillies did great, now that the trees are getting quite large, the amount of shade drastically reduced the amount of blooms, yet they were still pretty. So consider how much shade the lillies will be in. They really prefer sun. Hope that helps!
Your walkway with the daylilies and hosta is gorgeous! I also love the way you added texture with the small rocks lining the walkway. Very inspiring. Thank you.
Thank you so much! What I love about the hostas and daylilies is that they multiply and expand quickly! You should see how big everything is now since I wrote that post! Perrenials are worth the investment for sure!
Yes, beautiful, free daylilies! However, dividing clumps can be explaned too include just about all perennials–hostas, peonies, rebeckia, globe thistle, everfywhere I look in my yard I see divided perennials. This is definitely the way to go to share and for oneself.