Give Your Ceiling a Makeover with Armstrong WoodHaven™ Ceiling Planks. These are perfect for popcorn, stained ceilings, or anyone who wants a chic update.

This post is created in partnership with Armstrong Ceilings. All words and expressed opinions are my own.
Give Your Ceiling a Makeover with Armstrong WoodHaven Ceiling Planks
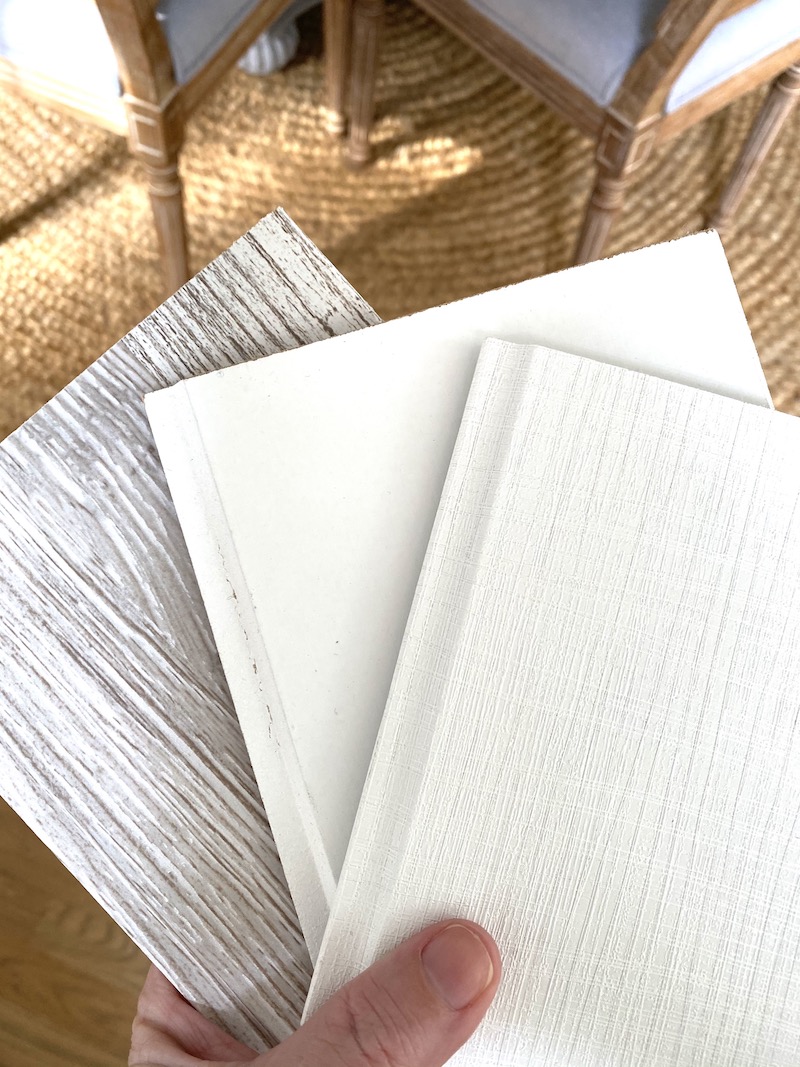
Do you have ceiling that could use an update? Do you have dated popcorn ceilings, ugly water leak stains, or simply a ceiling that you want to enhance to make your room look fabulous? Allow me to introduce you to Armstrong WoodHaven™ Ceiling Planks! I could not have been more excited to install this floating ceiling system that any homeowner can install! Armstrong has developed an Easy Up® track and clip system that makes installing a new ceiling easy! WoodHaven has a huge assortment of colors, wood grains, and textures to choose from. You can see the selection HERE. We narrowed down our choices to 3 and ended up choosing WoodHaven Woven White for the ceiling. It has the gorgeous texture of white linen.
I am happy to share my tutorial below documenting our ceiling installation and a show a video of our installation process. Armstrong provides you with detailed instructions in every box of ceiling planks and even has a tech helpline to contact if you need any assistance.
HOW TO INSTALL WOODHAVEN™ CEILING PLANKS WITH EASY UP TRACKS AND CLIPS
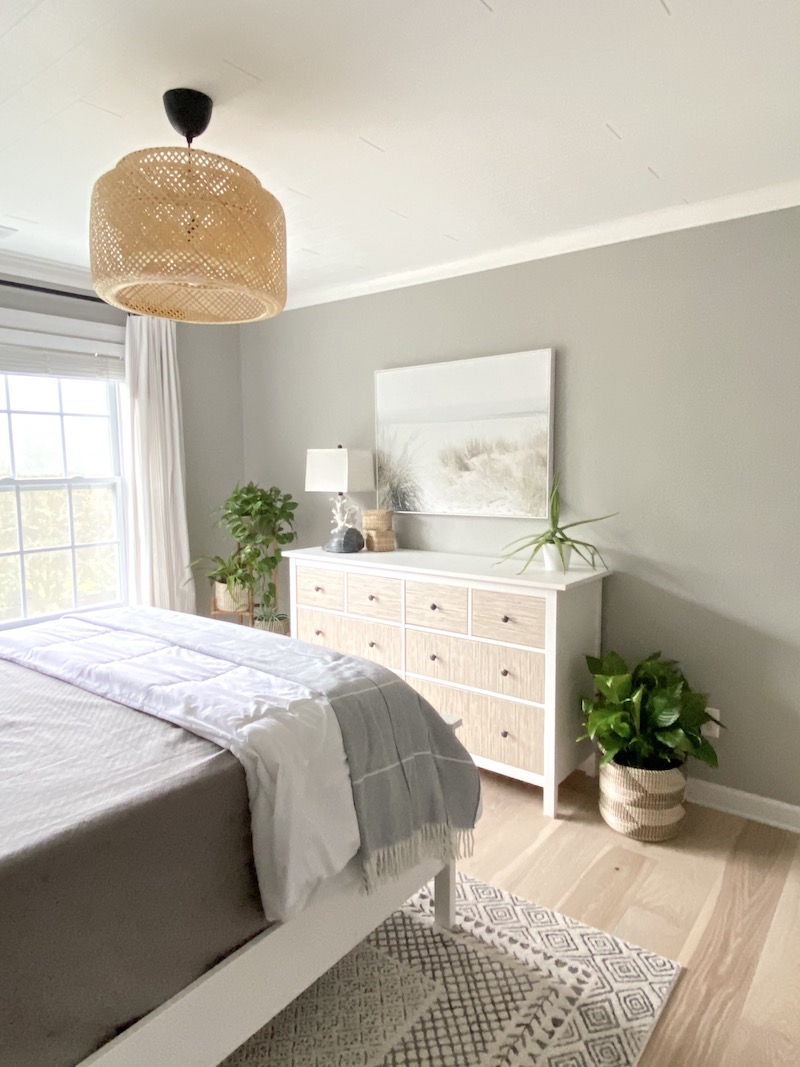
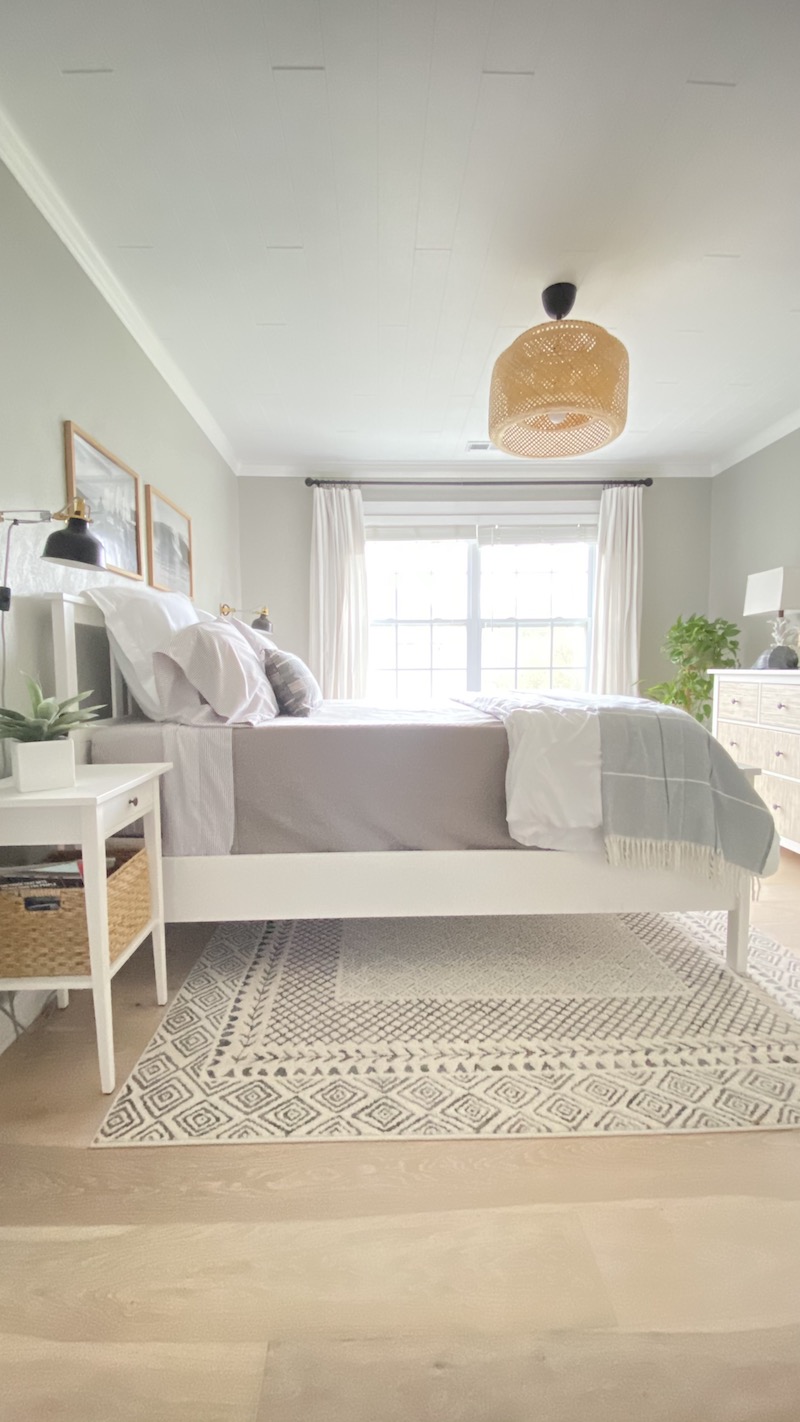
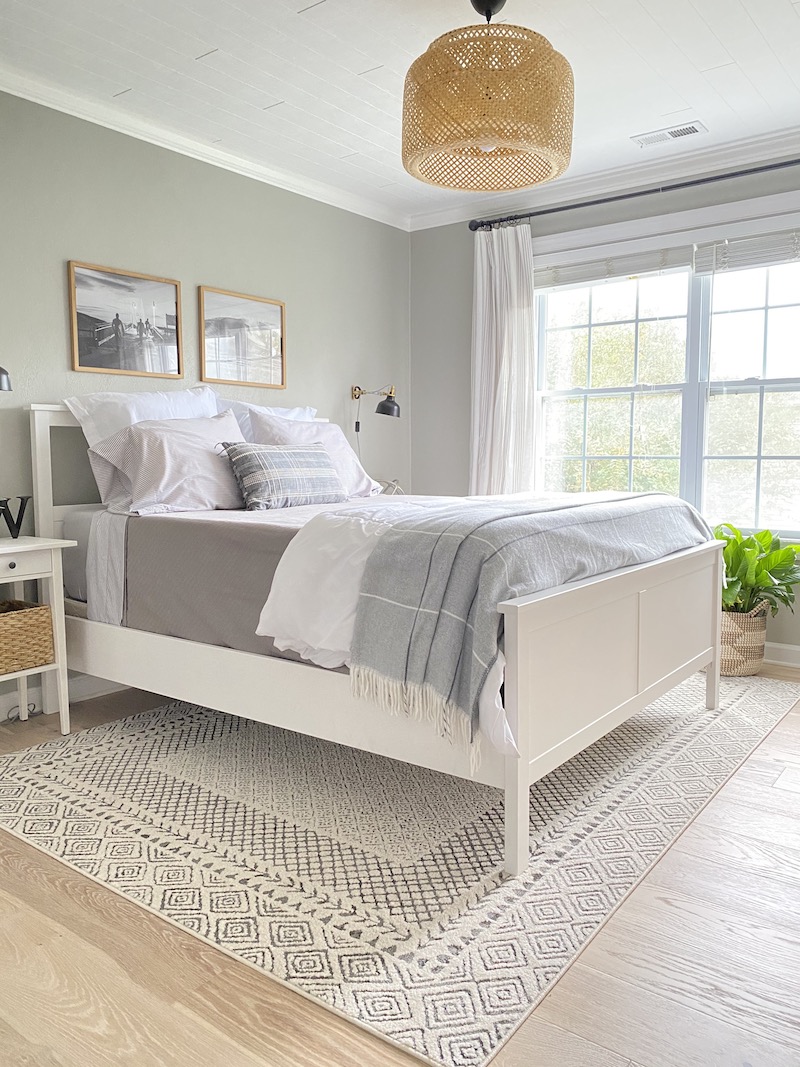
We recently gave our college age son’s room, a.k.a. also our guest room, a mega coastal modern makeover. It still felt unfinished to me. When you decorate with a more modern or industrial vibe, I find it important to make sure the room also has a comforting and cozy feel. Adding the Armstrong WoodHaven Ceiling Planks was the perfect icing on the cake for this room to capture that feeling.
Please note that this tutorial does not substitute in any way the manufacturer instructions, which should always be followed. This post is to illustrate how we installed the ceiling planks and how we want to help you feel empowered to try it for yourself, which I hope you do!
Check out my installation video below!
TOOLS NEEDED TO INSTALL WOODHAVEN™ CEILING PLANKS
Before you start you need to gather your tools. Below are a list of the recommended tools needed and other optional tools we used.
- circular saw (we used our table saw)
- hand saw (we used our compound miter saw)
- saber saw
- Dremel or jig saw (for cutting out circles for lighting, smoke detectors, air vents)
- stud finder
- 4′ carpenters level
- chalk line
- tape measure
- pencil
- safety goggles
- dust mask
- drill/screw gun
- screwdriver
- rubber mallet
- screws
- shims
- step ladders
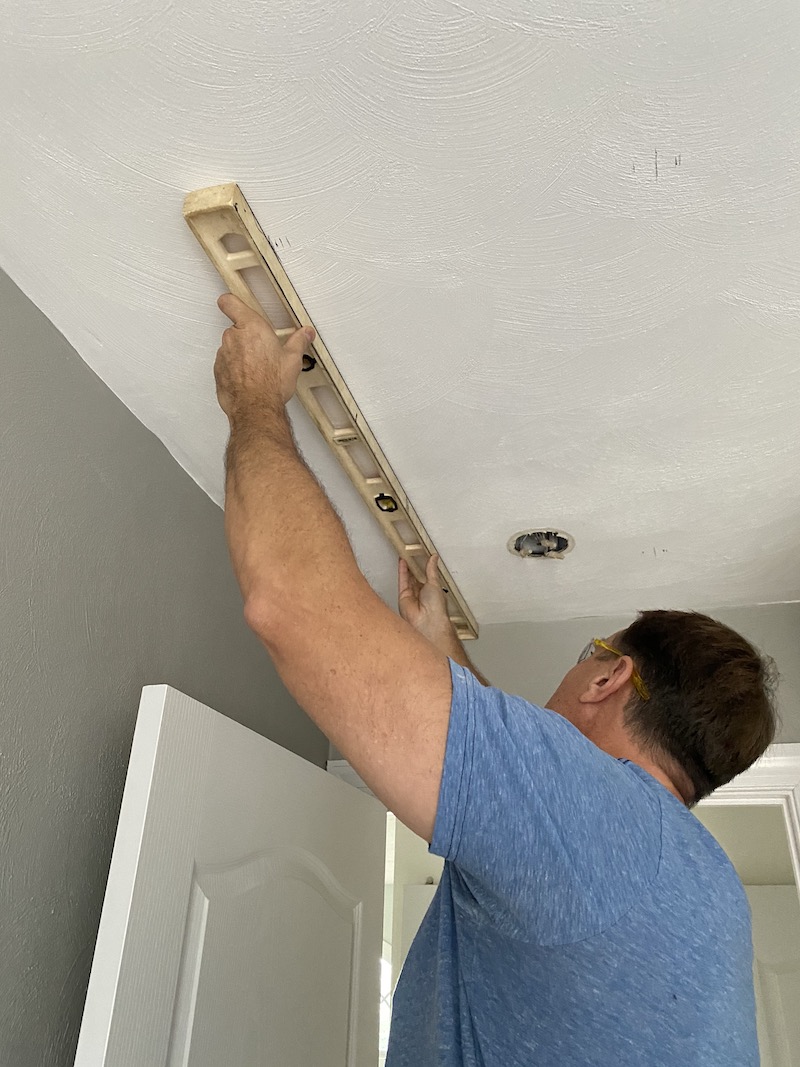
Step 1: Find and Mark Ceiling Joists
Starting at the ends of the room, use a stud finder to locate every ceiling joist. Mark the locations with a pencil. You can use either a long carpenters level/straightedge to draw a straight line down the length of the joists or use a chalk line to mark the joists location.
Step 2: Installing the Easy Up Track
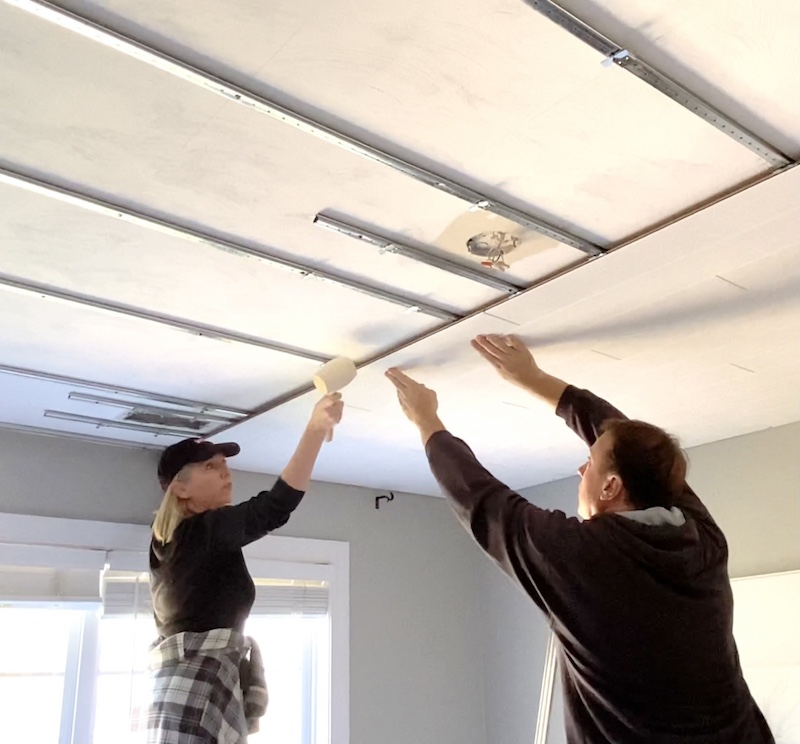
Running perpendicular to the joists, mark where the tracks will be placed. We chose to install our tracks at 18″ apart from each other. The maximum distance recommended is 24″ or less. Starting 2 inches from the wall, screw the track into the ceiling where it intersects with a ceiling joist. Make sure none of the tracks cover light fixture holes or other openings such as heating/air conditioning vents.
We needed 2 ceiling tracks to span the width of our room. The ceiling tracks can be cut to length with a hacksaw, but it’s not necessary. The tracks can overlap each other, laying side by side. Make sure to leave room for clips to slide on. It is also imperative to ensure the tracks are level. Use a bubble level and insert shims where needed behind the tracks.
Continue screwing in all the tracks, putting screws into every joist. Finish the last track 2 inches away from the wall.
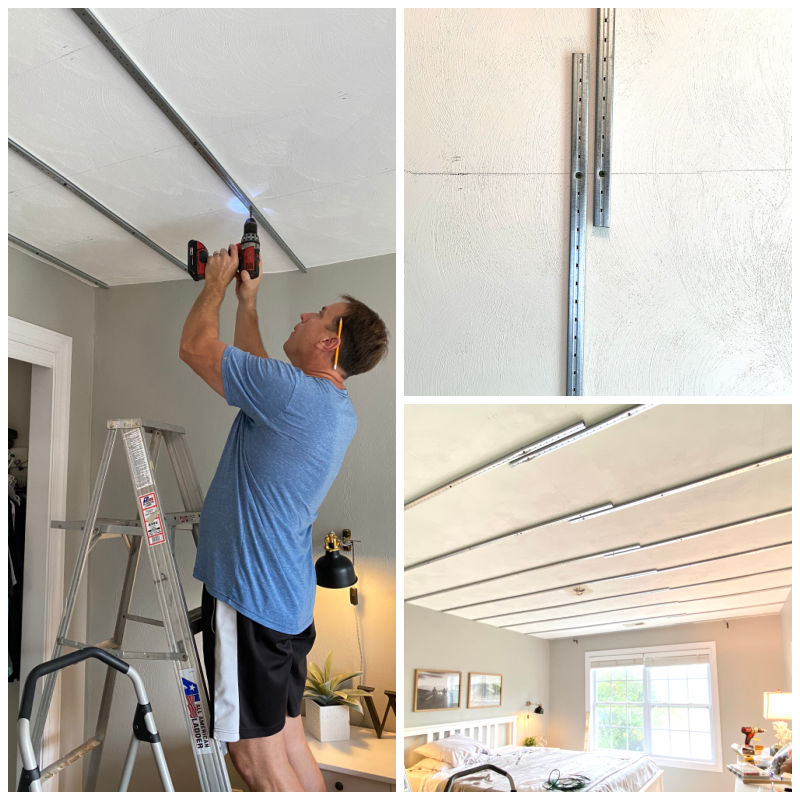
Step 3: Installing the First Ceiling Plank
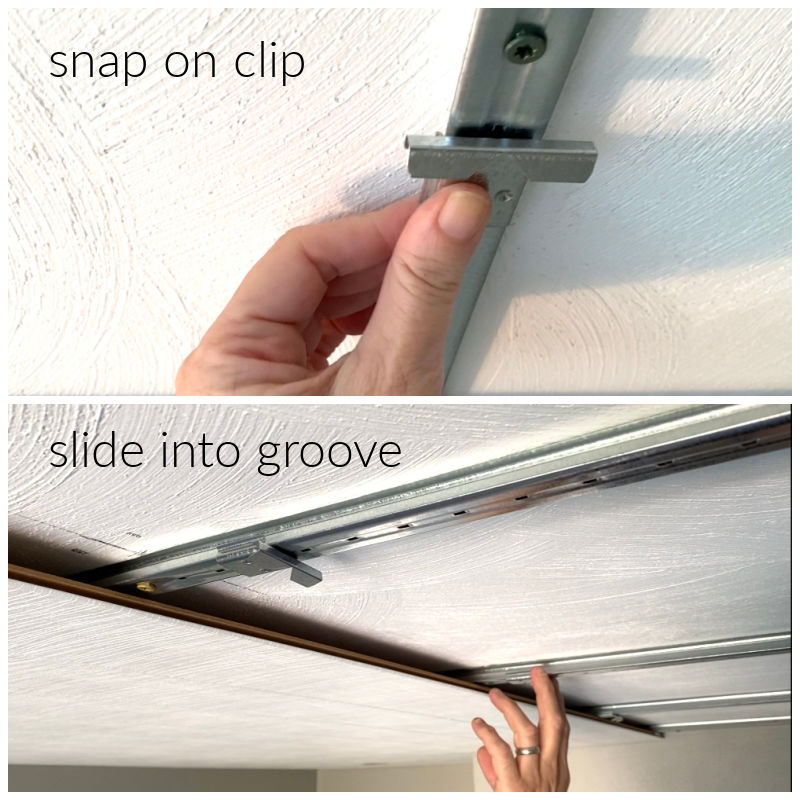
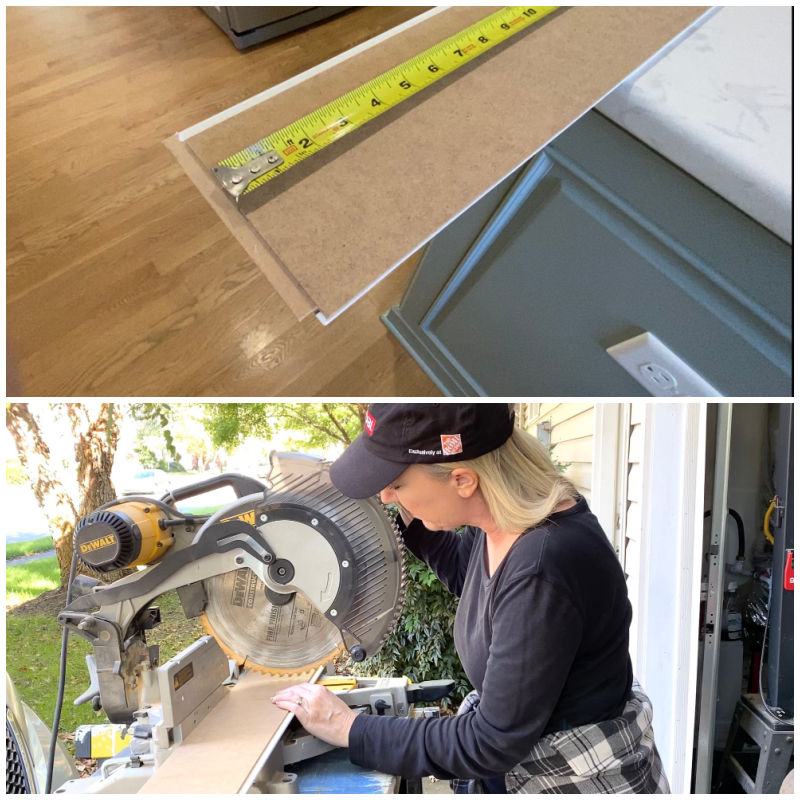
The first row and last row of planks will be the only planks that will be installed with screws. The manufacturer instructions that come with every box provide a mathematical formula to help determine the initial plank width of the first row. That first row needs to be ripped down to size, removing the tongue. You can use a table saw or a circular saw for this initial cut. Once the first row of planks are cut to size, install them 3/4 inch away from the wall to allow for expansion. Use one screw at the track to hold the board in place, snap the clip onto the track and then slide the clip into the plank groove. Don’t worry, the screw heads will be covered by your crown molding, which will be installed later.
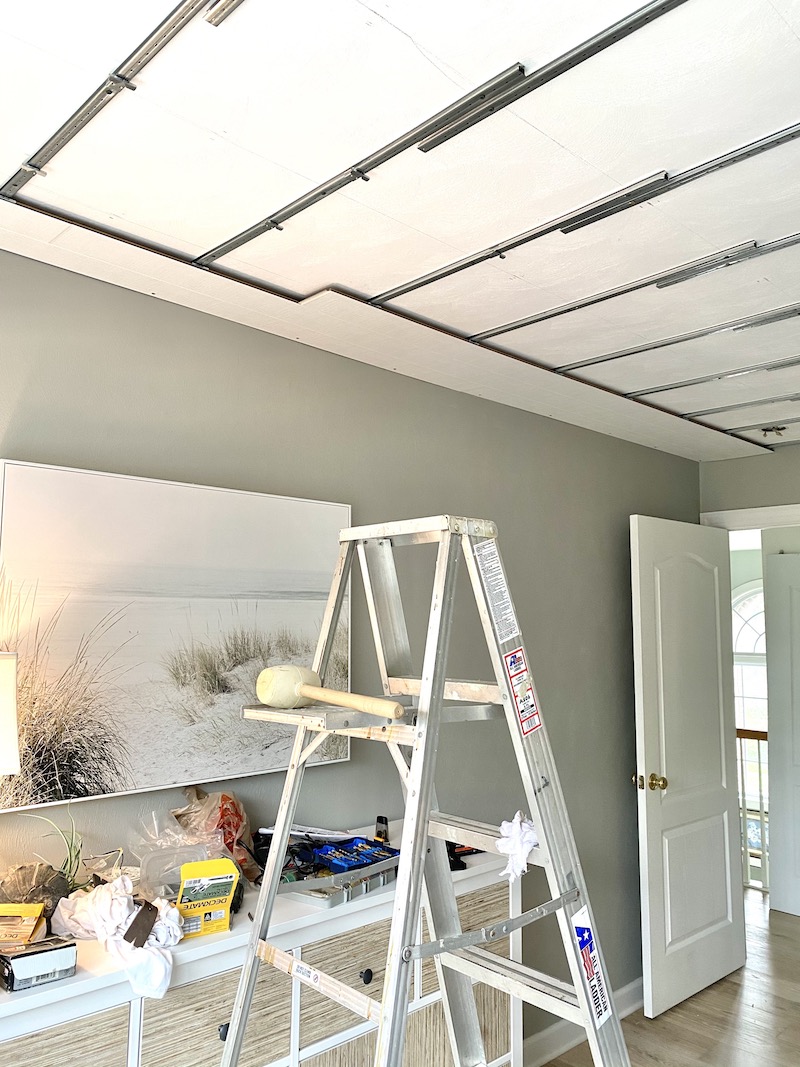
Step 4: Continue Building the Plank Ceiling
Lay out the room with staggered seams for the most appealing appearance. This is similar to how you would install a hardwood floor. In most installations, you should be able to use the leftover cut plank from one row to start the next row. Do not use planks smaller than 26 inches to ensure each board can be attached with two clips. When measuring for a new starting plank, be sure to measure from the inside of the tongue (as pictured below).
The tongue of the new plank will slide into the groove of the receiving plank. We found that using a rubber mallet helps snug the planks in nicely into the grooves.
Tip: Pay attention to lighting fixtures and vents
Think ahead when it comes to dealing with the openings for your lighting fixtures, smoke detectors and vents. My husband has the philosophy, more is always better. We added a few more tracks around our vents and lighting fixture openings, just to ensure we would have tracks to slide and secure our planks into. We used our jigsaw to make the short cuts around the vent opening.

After the Armstrong WoodHaven Ceiling Planks were up and installed, we finished off the room with crown molding. I am so happy with how the room looks. It is subtle and cozy and yet looks so high end! I hope you enjoy seeing the finished results below!

Be sure to head on over to Armstrong WoodHaven Ceilings to check out the huge variety of ceiling plank options available!
LOVE IT? DON’T FORGET TO PIN IT!

What a beautiful labor of love! It really adds so much to the overall design. I was wondering about the gorgeous art work above the white dresser. It’s so lovely and very tranquil!!!
Gorgeous! These planks are perfect for popcorn, stained ceilings or anyone who wants a chic update. Thanks for the useful content.