I have a passion for Capiz shells. I love when the warm glow of the Christmas lights illuminate the wafer thin, translucent, pearly shells. A few oooo’s and ahhhh’s are sure to escape your mouth upon gazing at their delicate beauty. I had made two types of ornaments with the Capiz shell’s for last year’s Coastal Christmas Tree, which I fondly call “Capiz-cicles” and “Capi-zno-balls”! Icicles and snow balls… get it?
Today I want to show you how to make your own DIY Capiz Ornaments and guess what? You don’t have to make them from real Capiz if you can’t find any. I’ll show you how to make Faux Capiz Ornaments too!
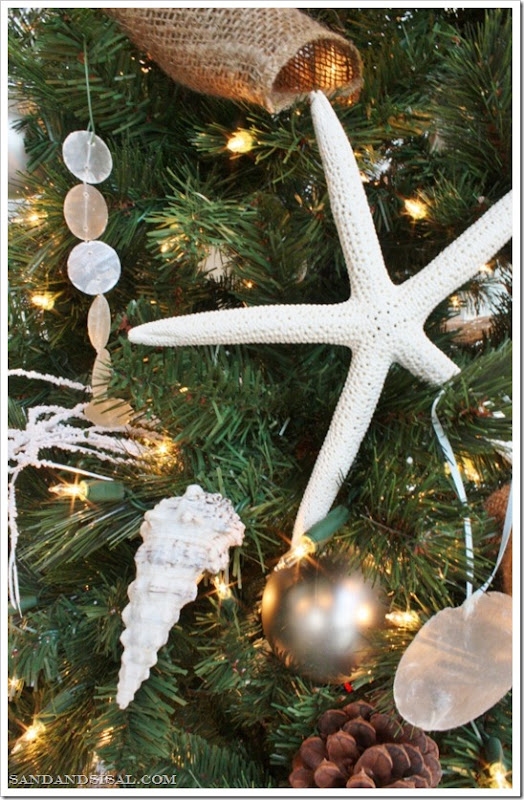
To make your DIY Capiz Ornaments you will need the following items:
- Large Capiz Shells (appx. 3”) & a Capiz strand or garland (appx. 1”)
- Ribbon
- Hot glue
- scissors
- Wax paper (for faux Capiz)
- Iron (for faux Capiz)
- Needle and thread (for faux Capiz)
I get my Capiz shells from a local garden store, but you can find many resources online if you Google “Capiz Shells Bulk”. For the Capiz-cicles simply cut your Capiz strand into desired icicle lengths. Most strands have a knot in between each shell. Cut above that knot.
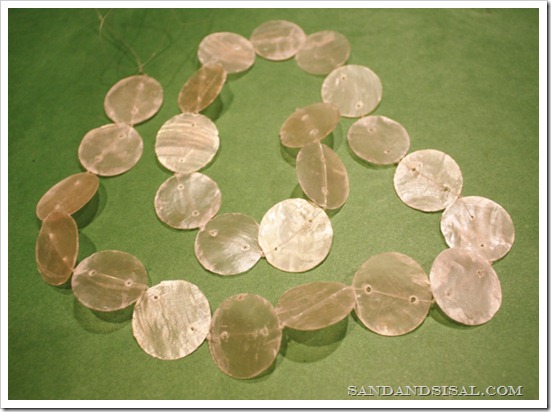
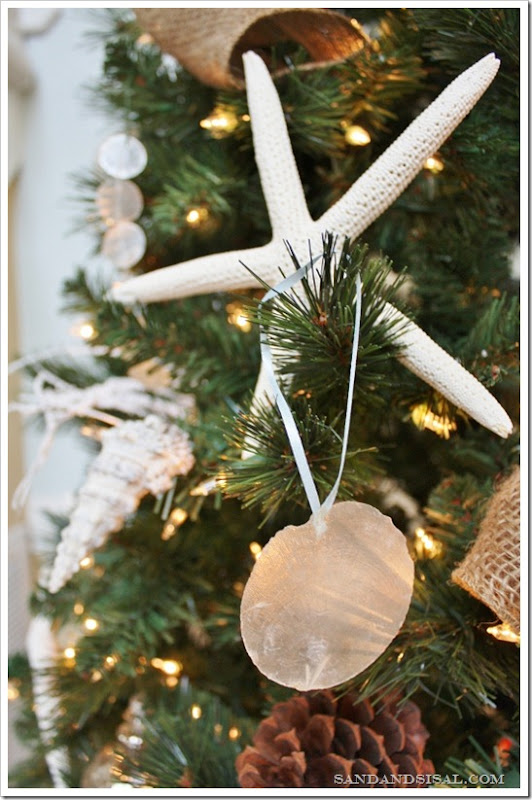
Hot glue on a ribbon loop or thread an ornament hook through the top hole in the Capiz. For your Capiz-cicles that’s all there is too it. Easy!

For the single Capiz shell ornaments, simply hot glue loops of ribbon to the shell.
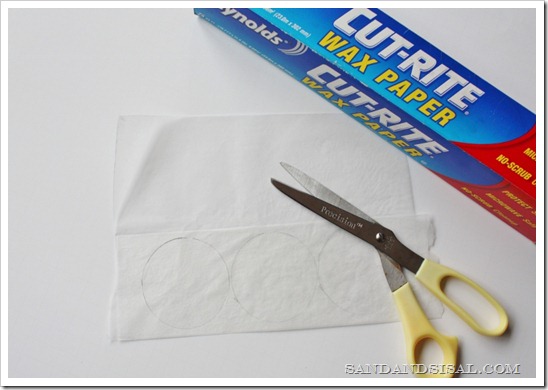
To make Faux Capiz Shells, fold wax paper into 3 layers. Set your iron on low and turn off the steam. Iron the 3 stacked layers of wax paper for a few seconds. Allow to cool and cut out 3 inch circles or use a circle paper punch. I recommend using a punch if you want to make small circles for the icicles. It will save to time.
With a needle and thread, stitch through the top and bottom of small circle, creating a small icicle strand. For the larger Capiz, just hot glue on a ribbon loop. The picture below shows both real and faux DIY Capiz Ornaments and I’m telling you, it’s hard to tell them apart unless you are close up!
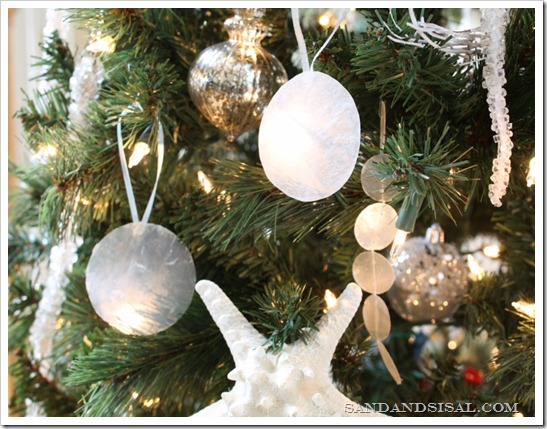
You will love how magical you tree will look all adorned in Capiz! Be sure to check out Sand & Sisal’s Christmas Project Gallery for more holiday décor ideas, crafts, and recipes!
Don’t forget to come and join the Countdown to Winter party which I will be kicking off this Friday!

Kim
Join Sand & Sisal on FACEBOOK, TWITTER, PINTEREST, G+ or SUBSCRIBE.
linking up to: Homework, HomeStoriesAtoZ, Craft-o-Maniac

What a wonderful idea … I LOVGE capiz shells and I have three or four capiz garlands somewhere. I did not know where to put them so I might cut one or two and hang them on the tree this year. THANKS!!! It’s gorgeous!!!
Jule from inside9B
I’m about to head out to get more capiz garland (to chop up!). One strand makes a ton of Capiz-cicles!
I see…, this year you’re having again a super awesome coastal tree!! I love the faux capiz ornaments. So simple and lovely! I actually never buy real shells…, only use what’s washed ashore. Happy Holidays!!
Thanks Maya. It’s so hard to tell the real from the fake. The faux are a great alternative if you can’t find real. 😉
So beautiful! I wish we had capiz-cicles on our house in the winter instead of icicles!! I do love them….they remind me of pearls..only bigger!
Real icicles are rare around these parts (so glad about that!). Thanks Danni!
These capiz pieces are interesting holiday hangings that are elegant and classy.
Wax paper?? Who knew? Love the look of these, Kim! Thanks for sharing ~ xo Heidi
Creative and lovely!
I saw these in Pier 1 a couple days ago and thought “oh, I bet I could make those” but hadn’t really thought of how to do it and here is your tutorial. Thinking alike!! I couldn’t get your pin it button to work on your site but my pin it from my bookmark bar works fine so not sure if there is something wrong with the one on your site. I used the one near your title.
What a pretty idea–the capiz shells look wonderful on your beach-inspired tree!
S0 pretty! The capiz shells look amazing on the tree.