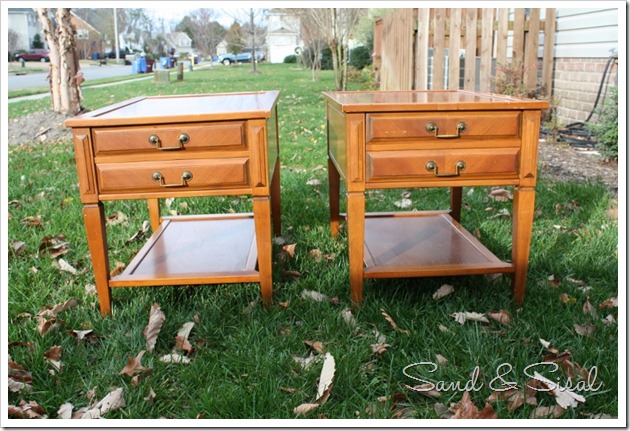
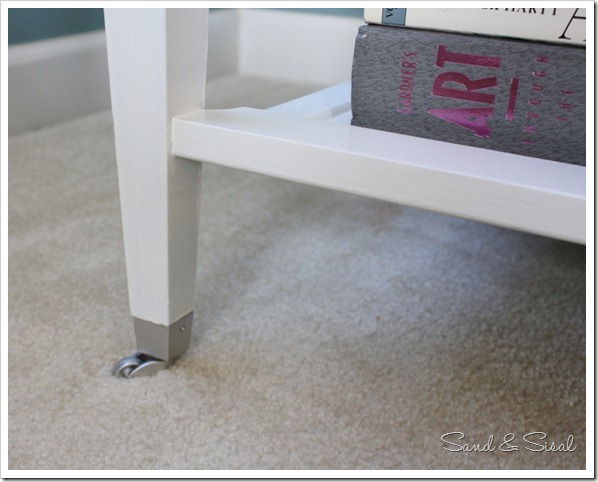
I perused the aisles of a local thrift store and came across two Mersman side tables. They looked to be in good condition and my guess was they were from the 1960-1970’s. I liked their clean lines and hardware and especially their caster feet, but best of all their price! All they needed was a little makeover.
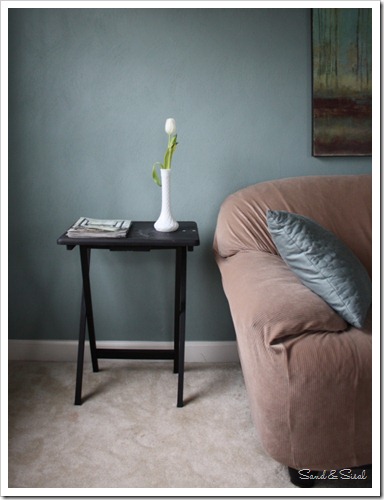
We used to live in a very small Cape Cod, and didn’t need much furniture, but now that we’ve upsized, I find we are sorely lacking in furniture. To make due with what we have, we were using very sad, 20 year old, spray painted TV trays as side tables. Hey, a girl’s gotta do what a girl’s gotta do! They definitely aren’t pretty, and were not very stable to say the least. These side tables have resided in the kids playroom, and with four kids, I did not want to invest too much money in furniture I knew would take a beating. I keep telling my self the table looks cuter with fresh flowers…. is it working?… hmmmm, I didn’t think so…..
The tables came home and received a good scrub down. I should have taken pictures of the cleaning rags, but I wouldn’t want to upset your stomach. They were disgustingly filthy! Two hours after having them in the house, a strange odor wafted downstairs. A dirty little secret these ol’ tables were hiding from me was that they were the casualties of some second hand, chain-smoking owner. No amount of scrubbing was going to remove the 40+ years of nicotine permeated deep within the wood! I never noticed their smell at the thrift store, because, let’s be honest, don’t all thrift stores have an “old” smell to them? If you’re a thrifter, you know what I’m talking about.
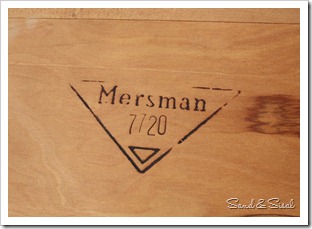
The manufacturer’s stamp was inside the drawers and under the table. I tried to do some research on what the numbers mean on the Mersman stamp, but all I could find was that it was one of their later models. The 100 year old American furniture company closed it’s doors in 1977 after producing millions of tables. Mersman was a brand seen in most American homes.
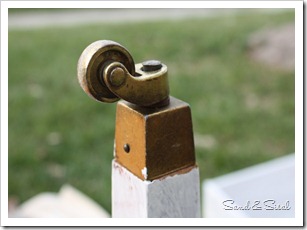
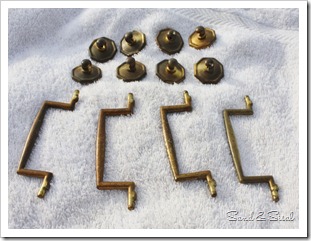
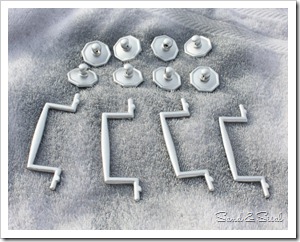
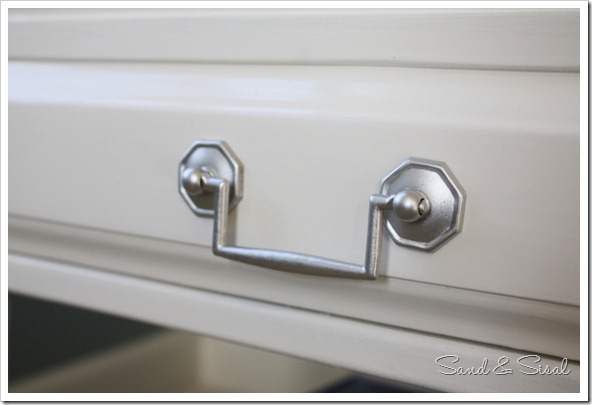
The hardware and casters are brass, but had truly seen better days. I could have polished them and I know some of you all will be horrified to see what I did to the hardware, but I love how they look after a quick spray of silver!
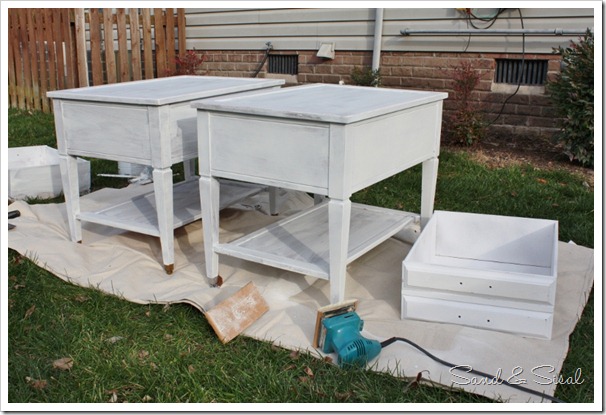
I did what all wise DIY-ers do and hired my teenager to sand the tables! She did a great job too! Money is a wonderful motivator with teens! After sanding and wiping the tables down well to remove an dust, we moved on to priming. Primer was the only solution to mask the smoke stench. The problem was that EVERY part, inside and out, needed to be primed to hide the smell. I hate priming and covering every square inch of two tables was not fun. After priming and drying, the tables received a light sanding to smooth out any roughness and drips.
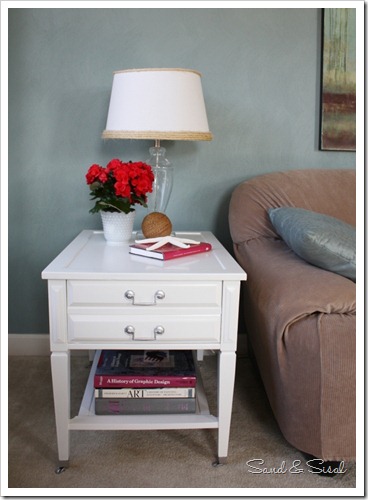
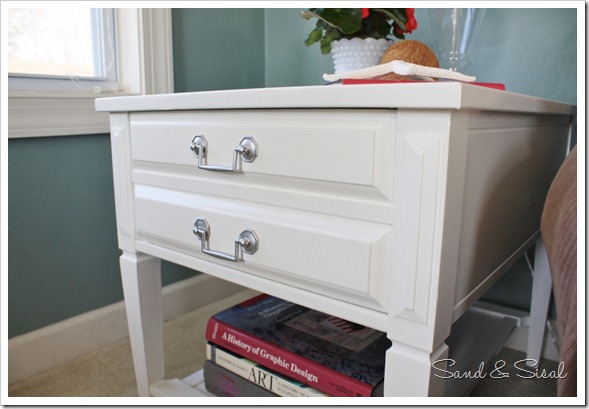
I applied two coats of white satin latex paint to the tables with a 2.5 in beveled edge paint brush. I added a latex extender to the paint also. The extender is also a flow/leveling additive which means, it helps reduces brush strokes and extends the paint’s workable time. You can pick up latex extender at any paint store.
The “new” silver hardware looks so clean and bright against the white paint! I love it!
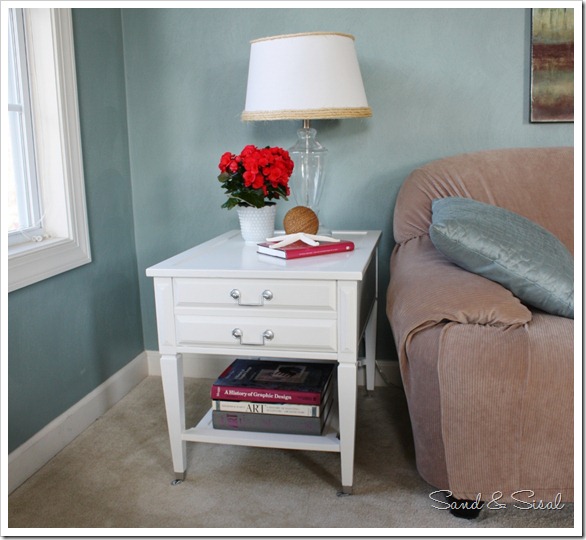
Say buh-bye TV trays! Hello sleek side tables!
Now, that the side tables are looking all suave, the poor slipcovered couches look even more pathetic. Again, it’s just the kids’ playroom and whatever we replaced the couches with will have to be able to take some wear and tear! For now I’ll just focus my eyes on the pretty side table makeover!
Kim
For the latest updates, join me today on FACEBOOK, TWITTER, or RSS Feed!
linking up to:
 |
 |
 |
 |
 |
 |
The tables turned out really well and look so much more substantial there. Too bad about all the extra work, but it looks like it was worth it in the end.
Thank you! It was definitely worth it! Have a great Sunday! ~ KIM
The tables look awesome. Hey Kim, where did you get the lamp on the table? It’s really cute.
Thank you! The lamp was from Target a few years ago. I added the sisal, you can see the lamp tutorial along with all the other sisal in my home in the post “A Sisal Obsession” https://www.sandandsisal.com/2011/01/sisal-obsession.html.
You did an awesome job.
Thank you Donna! I appreciate that!
The tables look fantastic! A lot of hard work but definitely worth it!
XO,
Jane
Thanks Jane! They turned out better than I thought they would! (so glad!)
They look fabulous! I have Gardner’s History of Art, too — brings back some memories!! Kudos on a great job. 🙂
Haha! I wondered how many art school students would recognize that book! Thanks so much Heidi! 🙂
They look fabulous! I have Gardner’s History of Art, too — brings back some memories!! Kudos on a great job. 🙂
love the new side tables…I love upcycling stuff!
http://www.budgetfriendlydecorating.com
Sarah
Thank you Sarah! Upcycling is always a good way to go!
These turned out beautifully! LOVE what you did with the hardware!
Thank you Lauren!
Wow Kim! I’m impressed! They turned out beautifully. Great job.
~Judy~
Thank you Judy!
Great transformation!! love the casters too. I had slipcovers in my basement and hated the way they always slipped around and I had to readjust whenever someone got up!!
Kelly
Haha! OMG Kelly, that’s the story of my life! I’m tucking and stretching the darn slip cover every day!!! #TimeToBuyNewCouches! Thanks for your comment!~ KIM
Kim, you did a beautiful job with the tables! It’s a win-win-win-win, thrift store got some $, teenager got some $, you have beautiful new tables, and somebody, somewhere will ultimately gain some TV tables to upcycle!
Exactly!! Thank you Liz (especially for not making me feel like such a cheap skate!)
I couldn’t help but laugh upon seeing your TV tray end tables! We have been known to use a TV tray or 2 as a nightstand for our boys’ rooms prior to getting them their new furniture. Great thrifty minds think alike 🙂 Glad to see you too moved on up to an actual nightstand…ha ha Even happier you transformed them as they look AMAZING!!
Thanks Kim! I’m finally feeling like a “big girl” now, with real furniture!
The end tables look SO nice! Definitely worth the hard work and TLC. 🙂
Thanks!
Awesome! I love the bright white and silver!
Thank you!
Hi Kim-
Great find! The hardware and wheels really make them look modern. I have two pieces of furniture in my house that were hand me downs from a favorite, but chain smoking uncle – so I know the smell you are talking about. Thank goodness for teenagers who need a bit of spending money and their sanding skills 🙂 They look like brand new tables.
Thanks Diane! Those casters and hardware is what made me fall in love them too!
Too funny b/c I just picked up two Mersman side tables at a local consignment store!! I’m doing mine in white too. I bought semi-gloss paint, which I’m sure is probably wrong, but the coffee table I have from IKEA is glossy, so I wanted them to sort of blend a bit.
Love how yours turned out…the hardware is great!!!
They’re really beautiful! Changing the brass to silver was really smart. Can you tell me if you needed to do anything to prep the brass first? And what product did you use for the silver paint? Thanks!!
These tables are great! I love the way you changed colors and designs. You can really see the modernized look of these new table. You can even use this as your laptop or computer desk.
Awesome! They looks so nice!
The extra work is definitely worth it! Look how it turned out. They look fantastic. You simply did a great job!