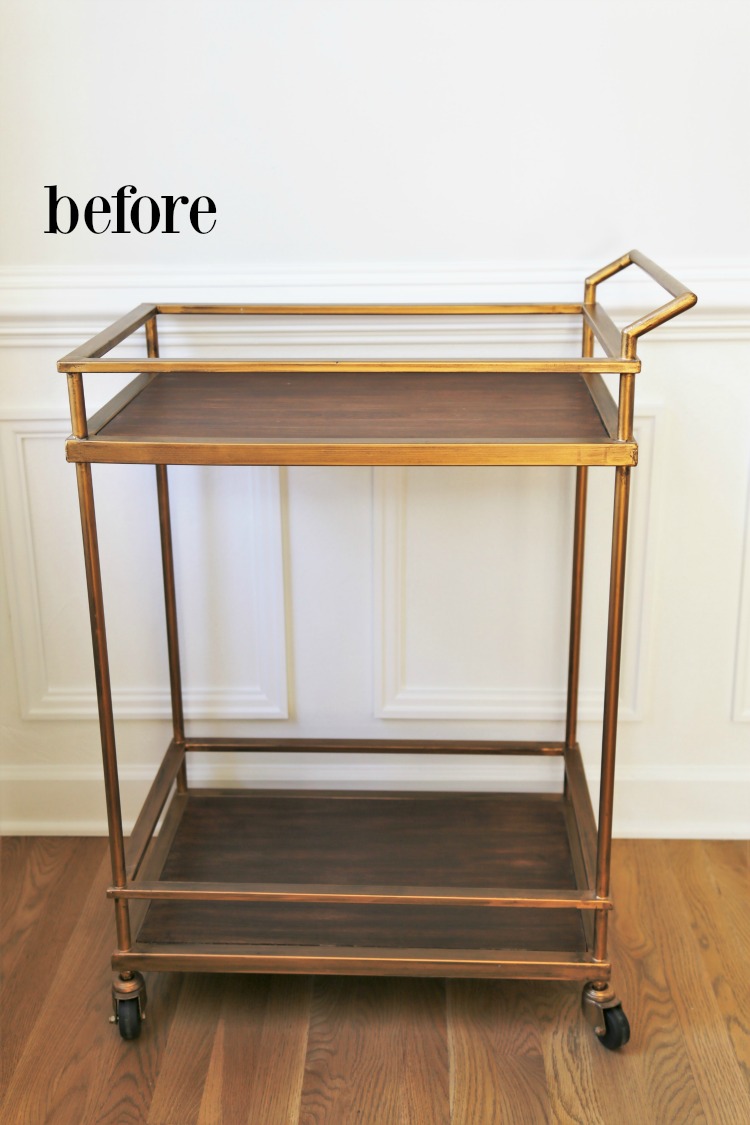
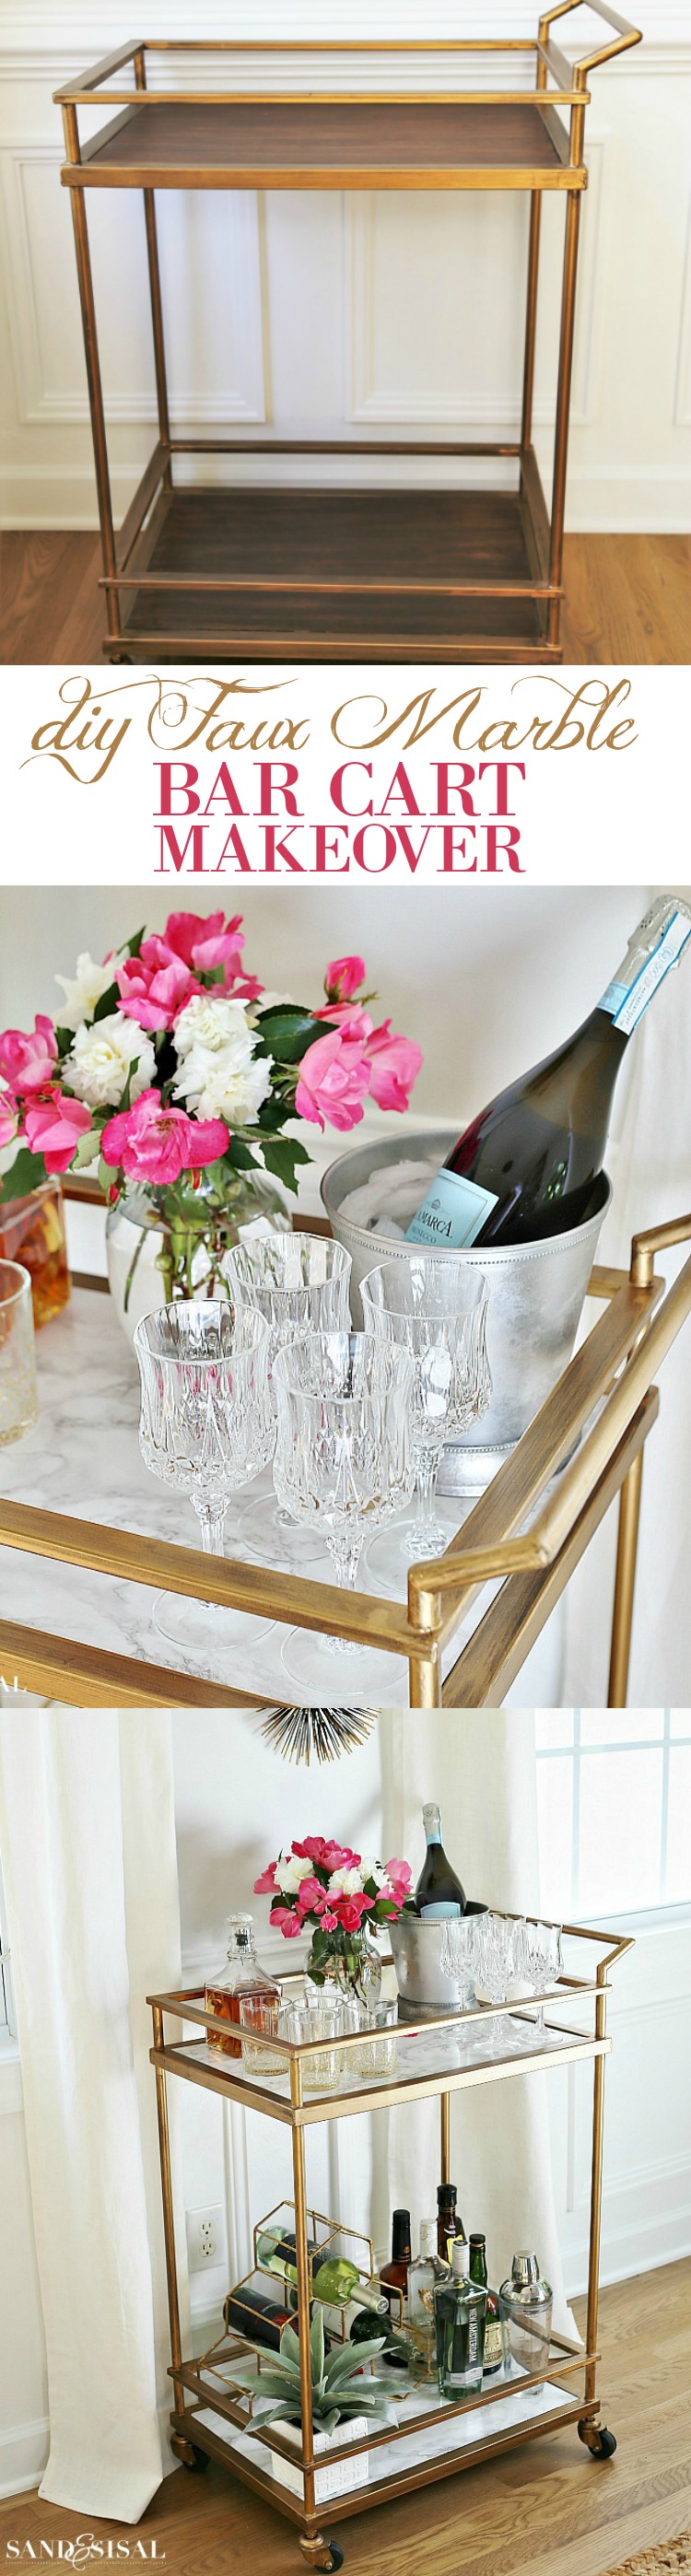
Last year I bought a simple brushed gold and wood toned bar cart from Target. I wasn’t thrilled with faux dark brown wood. It especially didn’t coordinate well with our new family room and kitchen and the new lighter and brighter dining room makeover that is almost complete. All the countertops in our kitchen and family room are Cambria quartz Torquay which looks like Carrera marble, so why not add marble to the bar cart? I’m so excited to share with you my DIY Faux Marble Bar Cart Makeover!
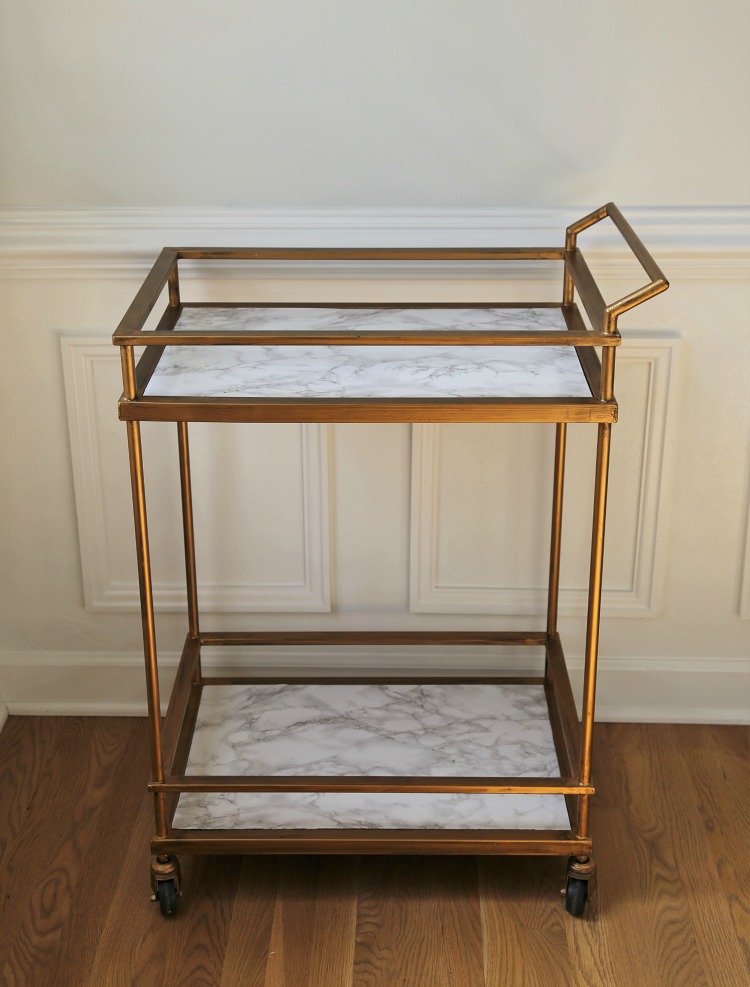
Below is a pic of how the bar cart looked like before its mini-makeover.
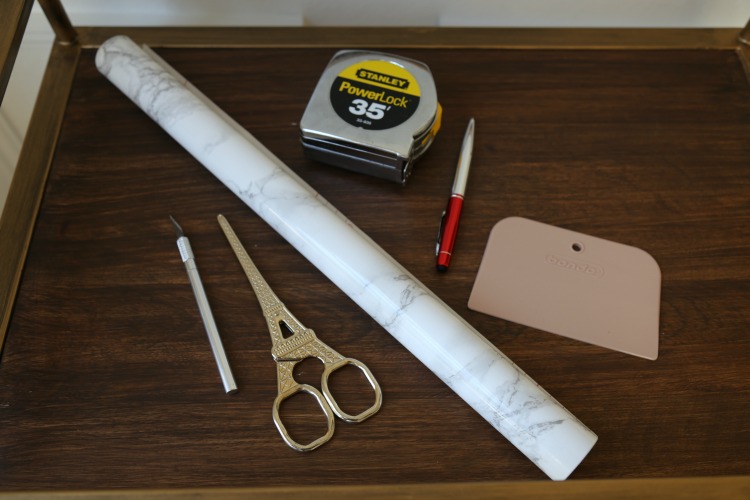
DIY Faux Marble Bar Cart Makeover Supply List:
(affiliate links provided below for your shopping convenience)
- Gray Marble Adhesive Film
- X-acto Knife
- Measuring Tape
- Scissors
- Beveled Edge Plastic Spreader
- Bar cart
I have to tell you, this was one of the most fun and esay projects I’ve done in ages! I LOVE IT! The secret to the faux marble is high quality gray marble adhesive film! Think of the possibilites. You could use this marble film to cover side tables or console table tops, dresser tops, shelves, etc.!
The marble adhesive film comes with a grid patterned paper backing which makes for easy measuring. All you need to do is to measure the area you need to cover and cut that measurement out on the vinyl. I left a 1/4″ -1/2″ allowance on two sides which I will later cut off.
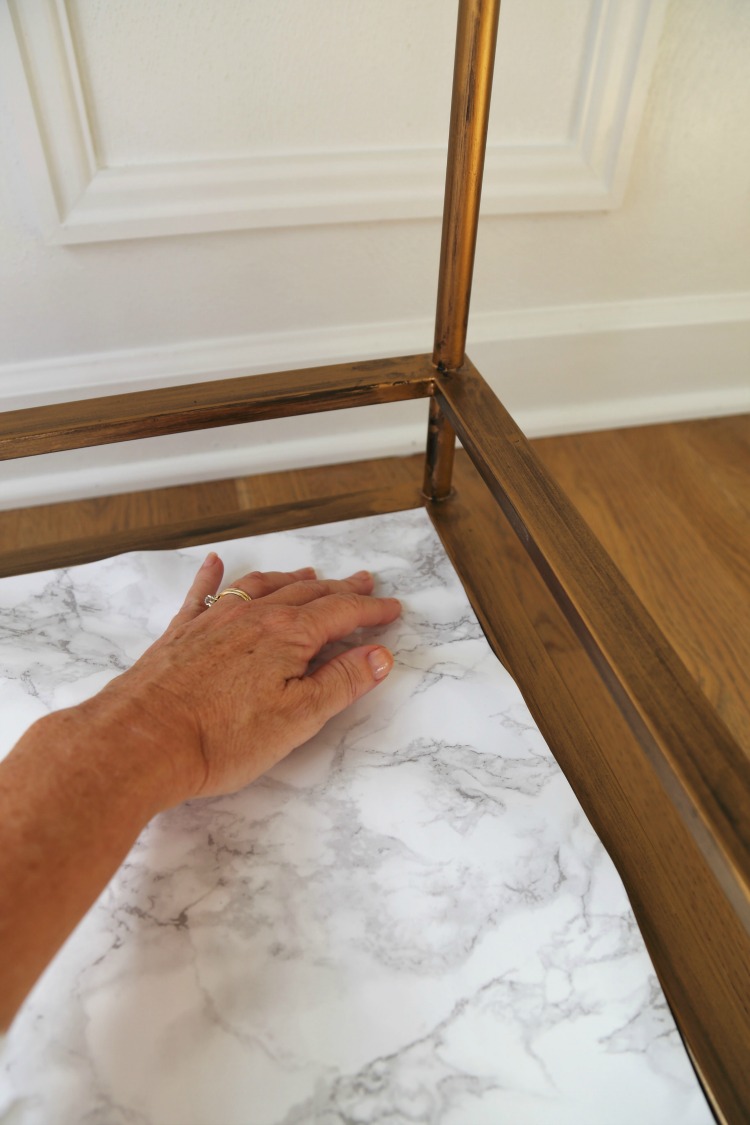
Start with a clean and dust free surface. Peel back a corner of the vinyl and set it on the corner of the area you want to cover.
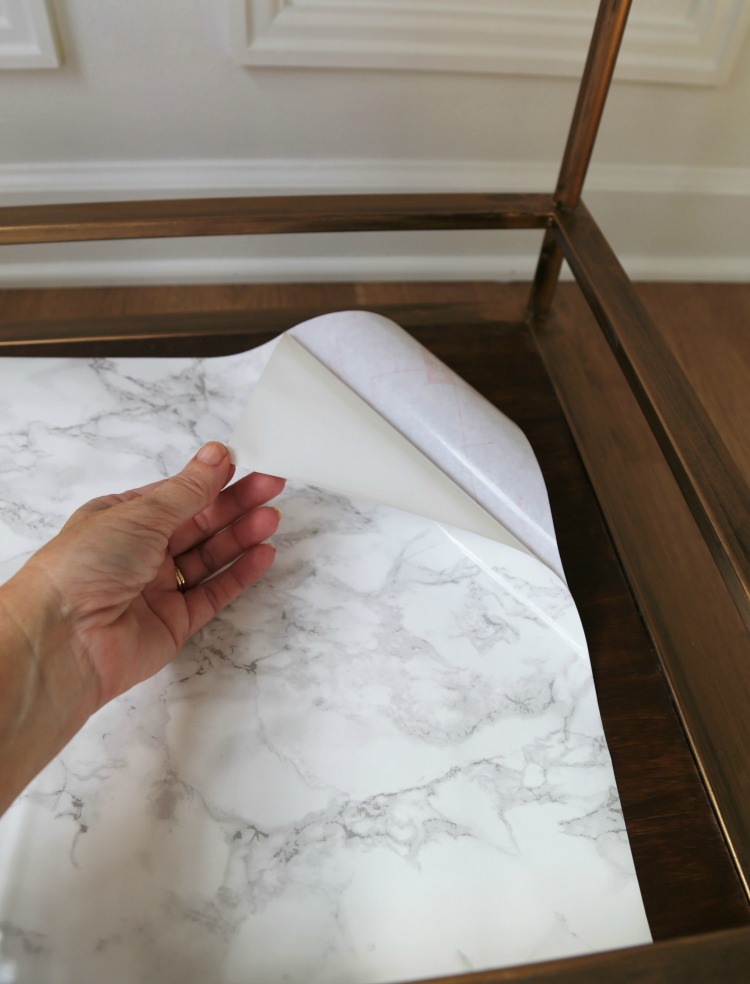
Now don’t worry, if it isn’t in the right position you can easily peel it up and place it correctly again. The vinyl is very forgiving.
Slowly start smoothing the vinyl with the plastic spreader. Pull the paper backing back a little bit as you continue to smooth any air bubbles out. 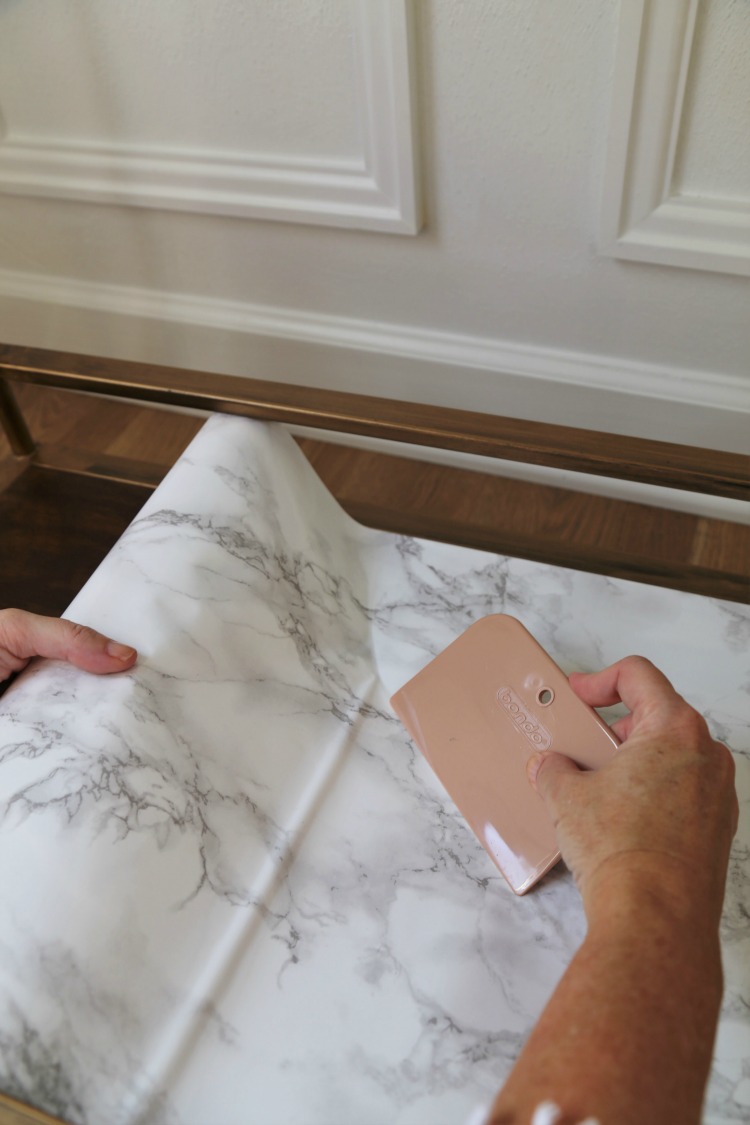
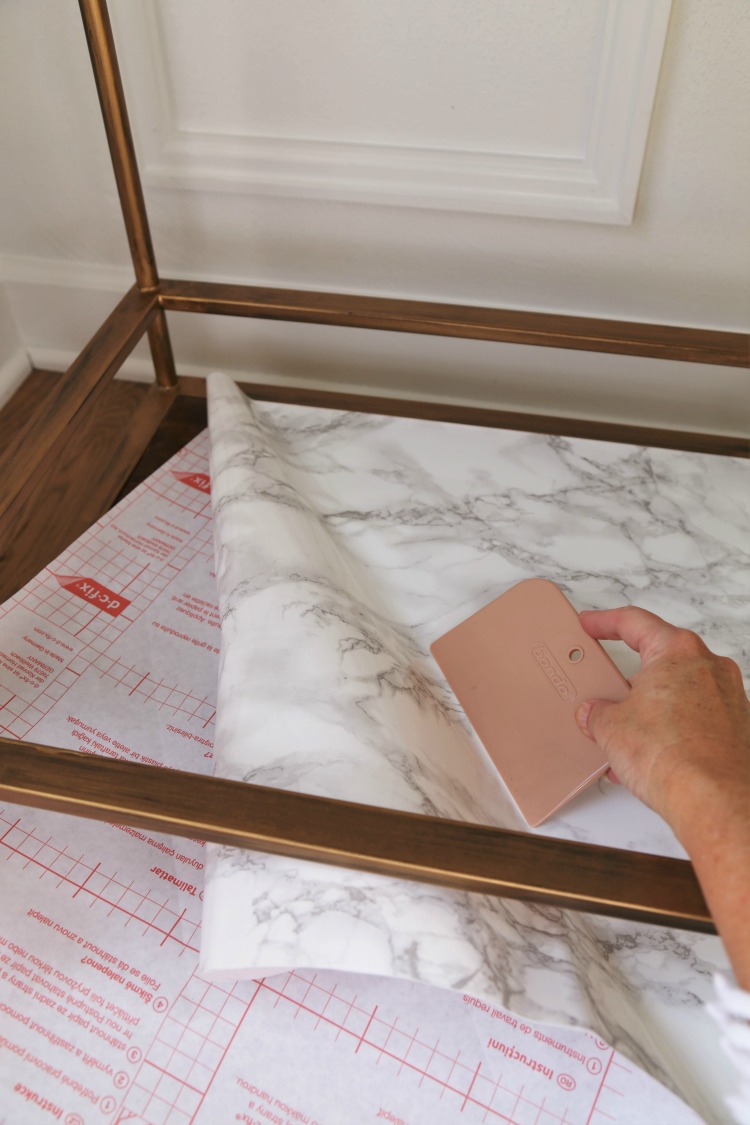
Carefully use the x-acto blade to cut off any excess vinyl. Keep smoothing until all air bubbles are out.
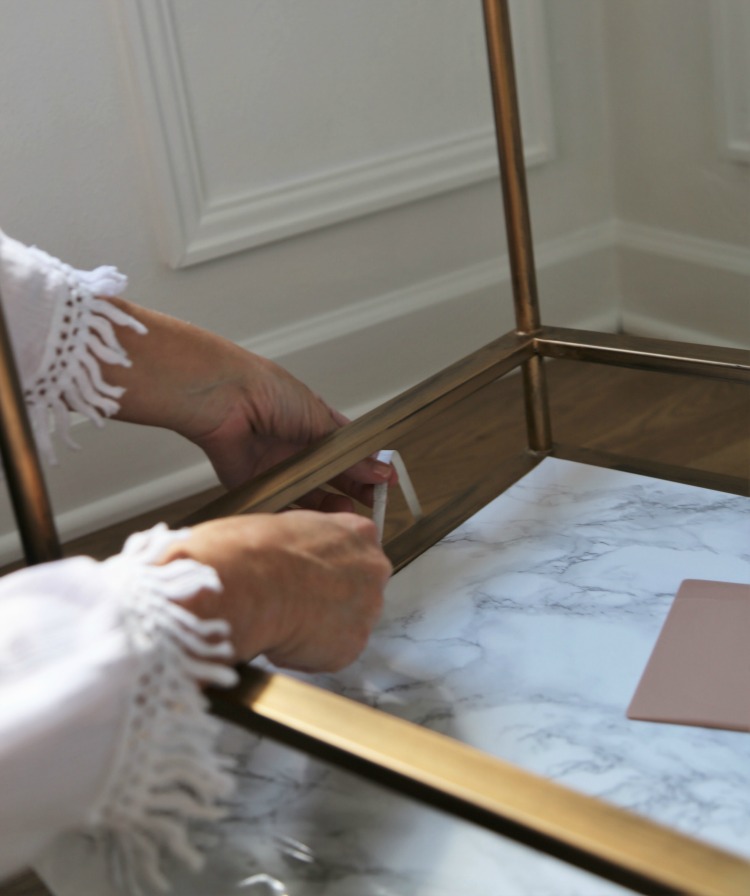
Ta-da! Doesn’t it look so much better?
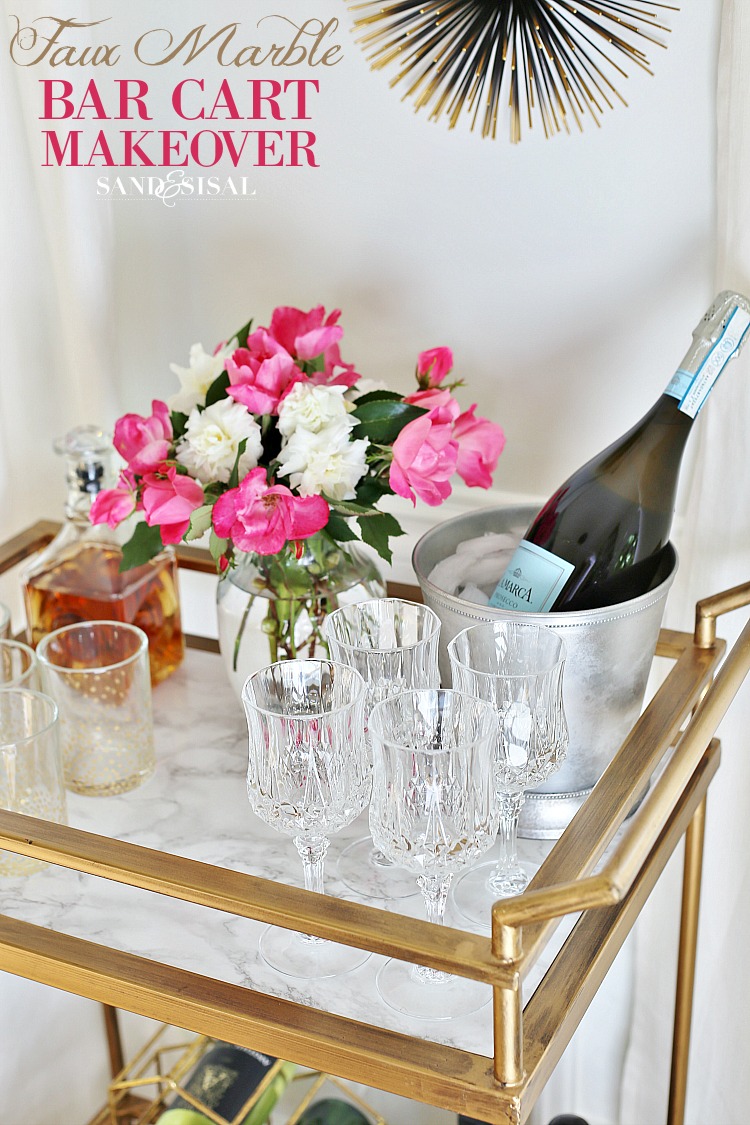
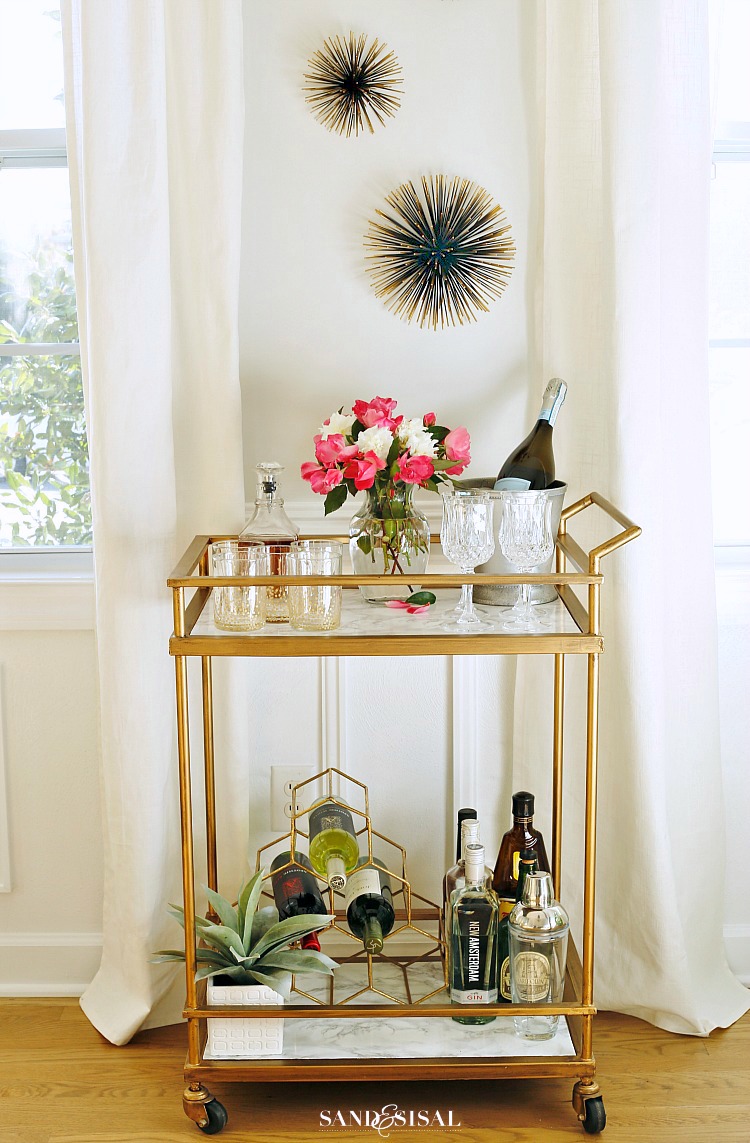
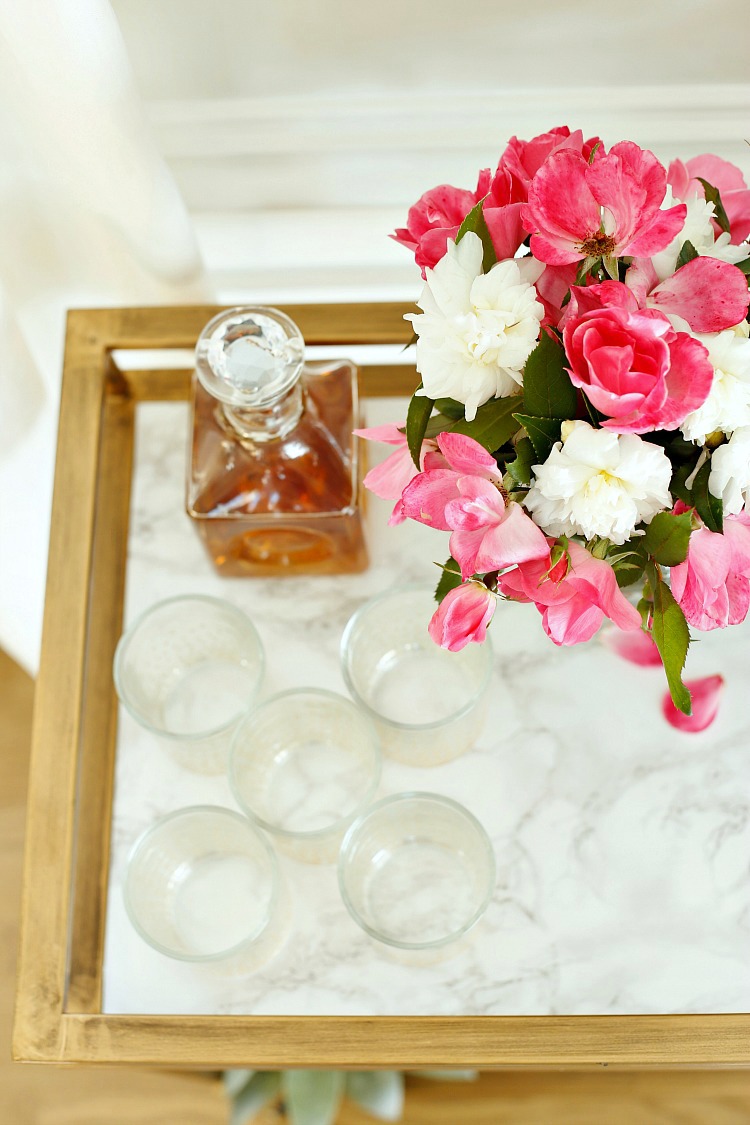
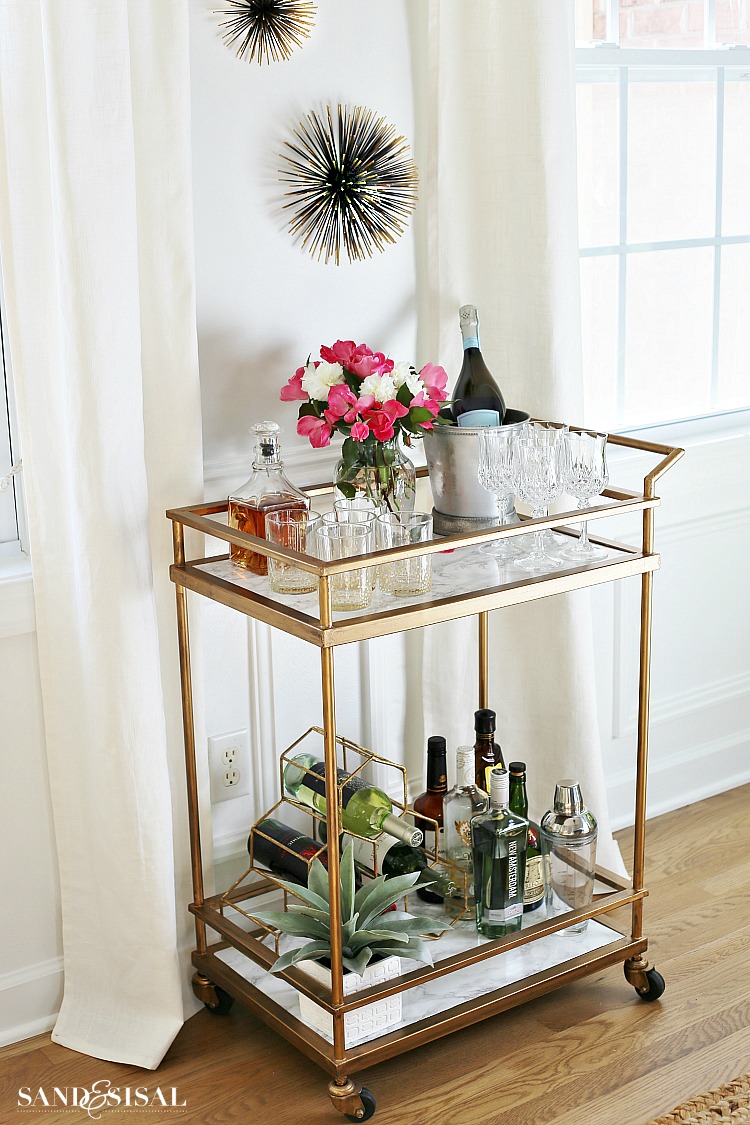
Let’s dress up the DIY faux marble bar cart for some entertaining!
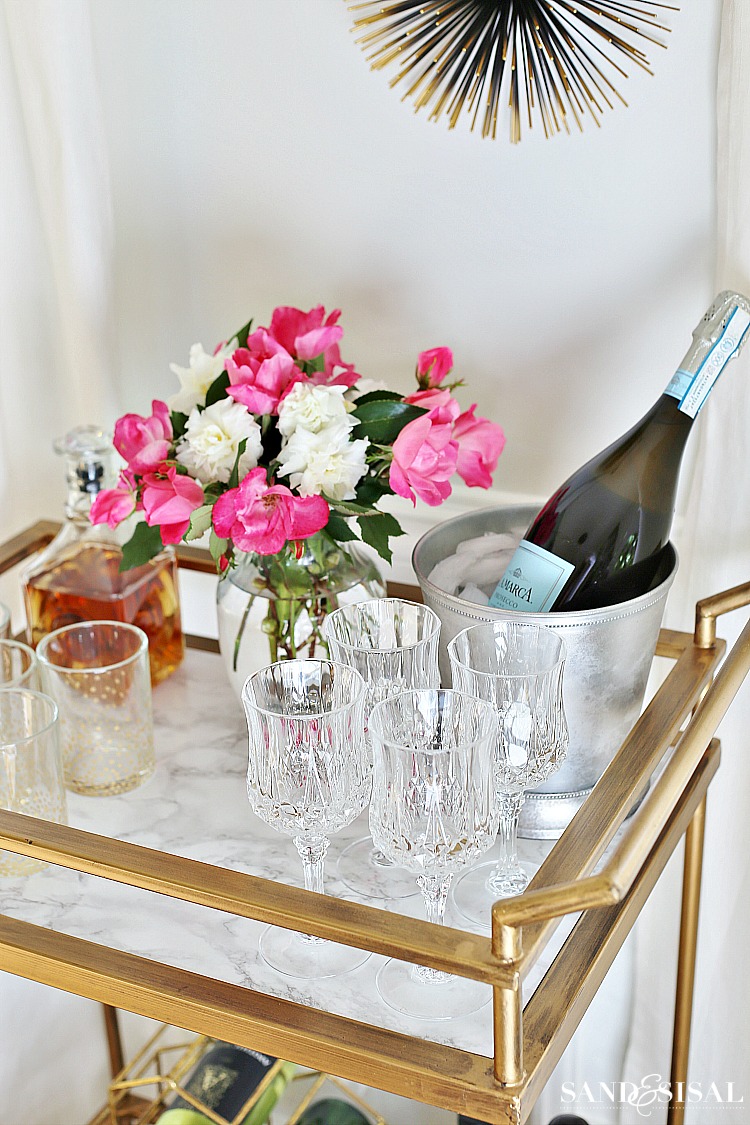
The Cristal D’Arques Longchamp goblets (real crystal) were an amazing thrift store find, only $1.85 each, but you can buy their new line HERE.
I found some gold confetti glass tumblers from the clearance section at Target for $1.25 a piece.
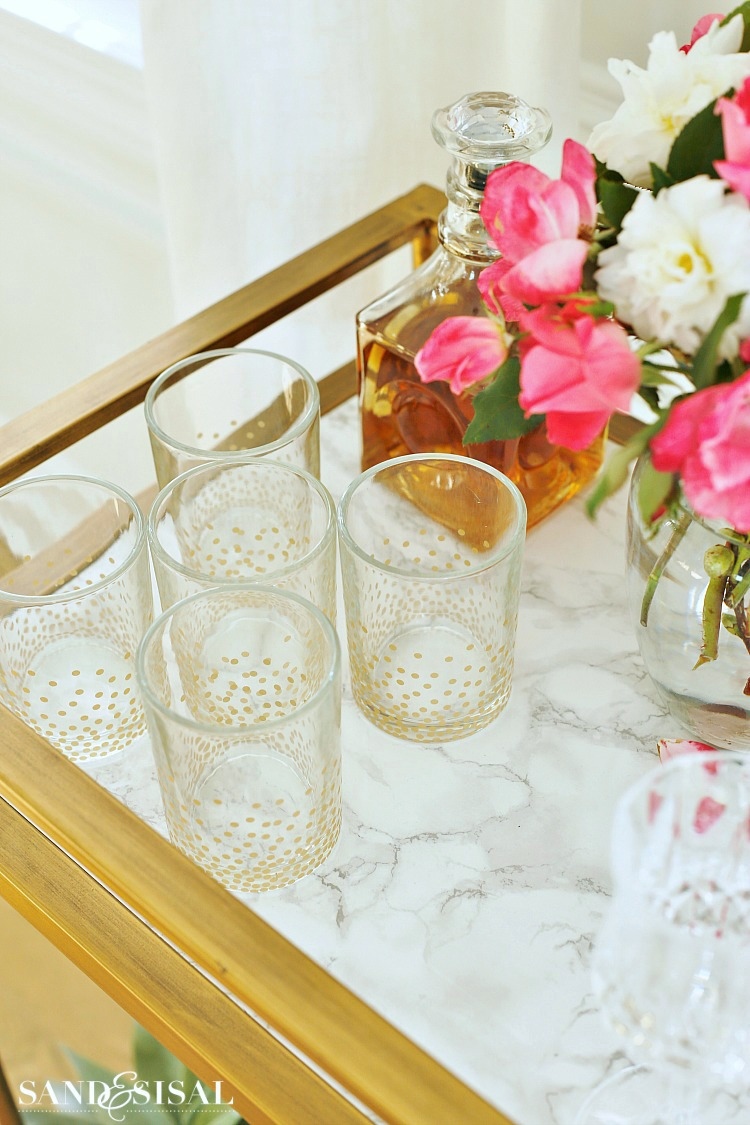
Aren’t the flowers lovely? The roses and white camellias are from my back yard.
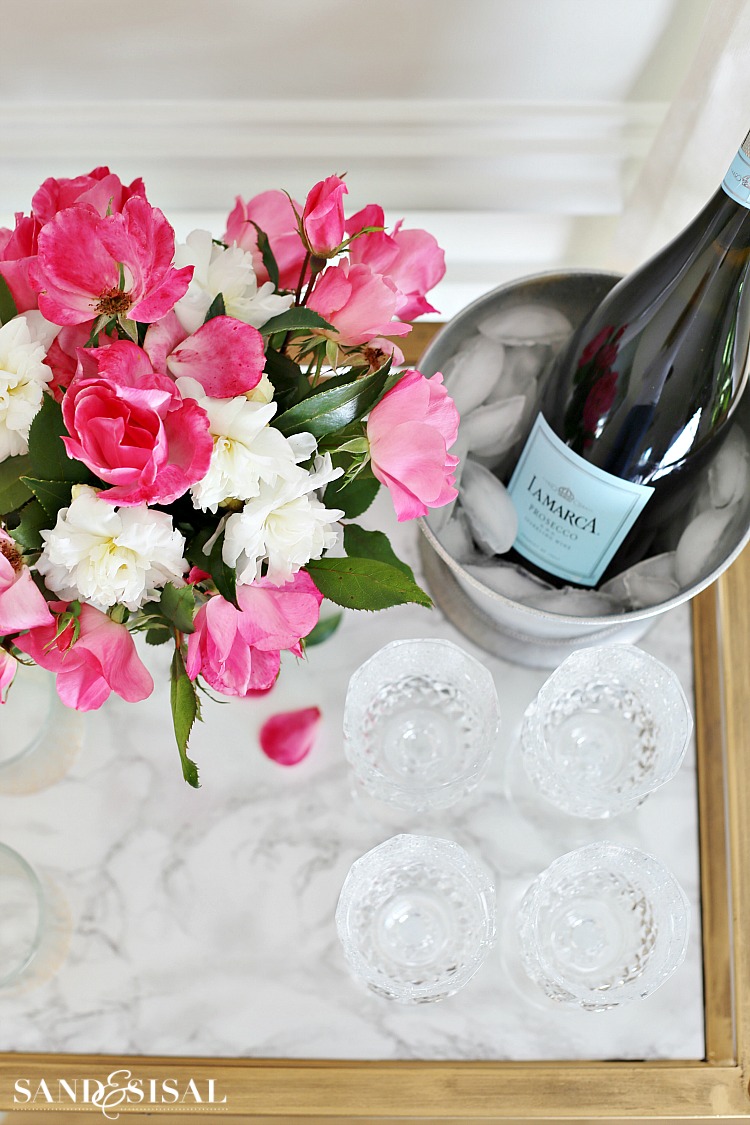
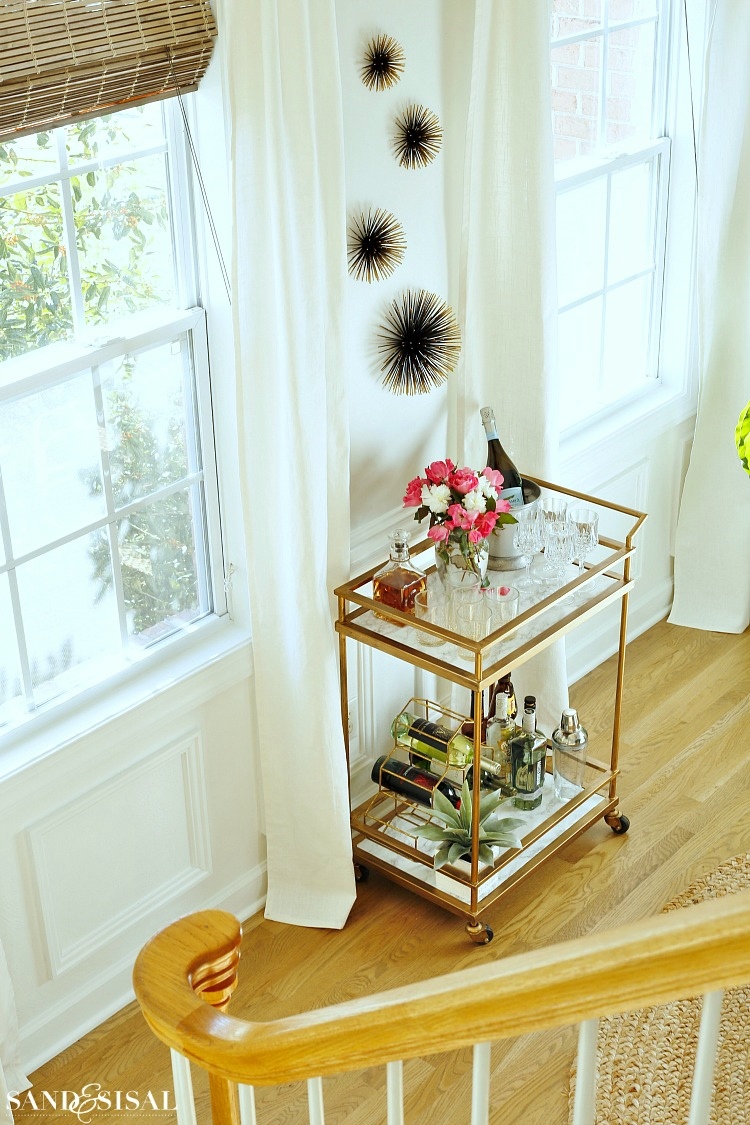
You are getting a sneak peek of my dining room makeover for the One Room Challenge. I don’t think I’ll have the room finished on time but oh well. I’m happy with how it’s turning out. The brass sea urchins on the wall are an unexpected dash of whimsy, keeping the room from getting to formal and stuffy.
If you’ve loved this little DIY Faux Marble Bar Cart Makeover then I hope you’ll pin it or share it with a friend!
Cocktails and dreams will be served at 5:00 PM. I hope you can join me!
Cheers!
KIM
Kim
I am usually impressed with your creativity and style… but this time I think you should have replaced the wood with glass not contact paper. Very disappointed with the look it just doesn’t impress nor work.
Roberta, do you know how expensive and complicated it can be to have custom glass panels made for this type of cart?! You can’t just waltz into a store and pick them up off the shelf for $10.99. I think her solution is excellent. Plus, who the heck wants to dust and clean glass every 5 seconds?? No one.
I cannot believe how rude people can be, Roberta! If you haven’t something nice to say, then don’t post it either…. I LOVED the bar cart. I’m brand new to your blog. Roberta was the first post I read. Ignore her.
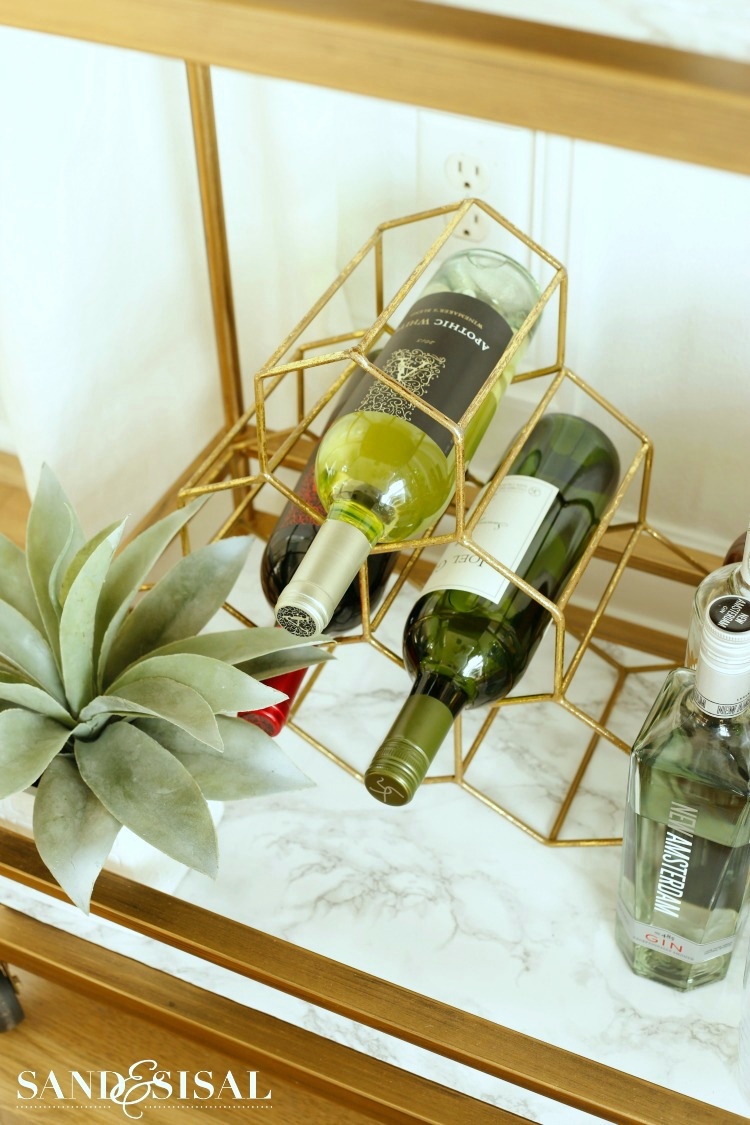
I like the small wine rack on the bottom shelf. Can you tell me where you found that? The bar cart is styled wonderfully 🙂
Thank you Deanna! It’s from AtHome. I saw a similar one at HomeGoods this week also.
I also loved the wine rack. I found it here: https://www.athome.com/14in-gold–6-bott-wine-rack/124180932.html#q=wine+rack&start=1
Wow, Kim, really impressive! I cannot get over how much that small change really took the cart from simple to chic! As usual, your styling never ceases to amaze me! You have such an eye for design and are always a source of inspiration for my own home. Thanks for all that you do!
You are too kind! Thank you so much for your sweet comment!
Whoa! I thought it made a drastic improvement. What a good idea.
Thanks so much Debbie!
I def love it. I have seen this product (or similar) used before & want to try it myself. Great job. You always make things look so easy….until I TRY it for MYSELF, haha!.
Despite the RUDE comment above, it looks beautiful! I would have done the same thing. The marble looks great!
this is so beautiful! i am kicking myself because i sold an amazingly chic bar cart with a faux wood top and i should have thought to do this!
I absolutely love it! It looks great and love the way it turned out. A small change that made a huge difference. PS love the sneak peek and can’t wait to see the finished dining room! 🙂
Wow, love the transformation Kim! It looks like it was easy to do and it looks great. Impressive and it definitely works!
Superb, I have been following your blog for several years and have always enjoyed it. yup A small change that made a huge difference. I think i will do that.
Love it! It really does brighten up the look of the piece!
Thanks Kristin!
You did a fabulous job that is well within budget. It’s perfect for my taste.
Thank you Deidra!
This was genius! I’ve been looking for years for an “upscale” bar cart that is sturdy, large enough to be truly useful, and attractive enough to be wheeled between our formal living and dining rooms; and didn’t cost a fortune. Your ingenuity is inspiring. Thank you for solving my dilemma!
Awww, thank you so much Susan! It was a very easy DIY project. I hope you find one you love!