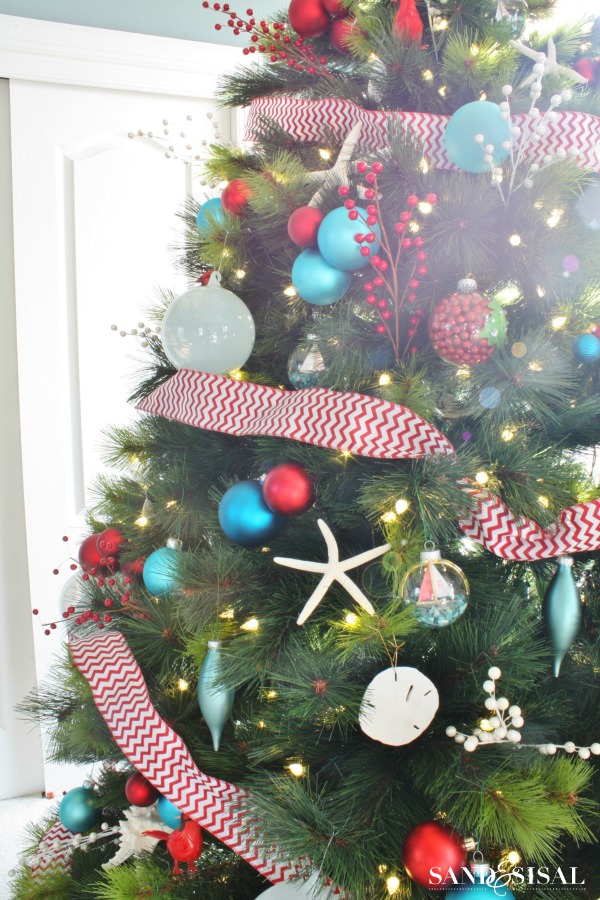
For the past few years I’ve enjoyed making a coastal ornament for my coastal Christmas tree. This year I went with a more nautical vibe for the kids’ turquoise and red tree in their playroom and I made some cute DIY Sailboat Ornaments! They remind me of the ships in bottles and they are easier to make than they look!

To make the Sailboat Ornaments you will need the following items:
(Amazon affiliate links provided for your shopping convenience)
- (6) Glass Ball Oraments 3 inch
- 1 bag Crushed Shells in an Opalescent Mix of Blue Shades
- Bamboo Skewers, 6-inch
- Small Clear Elastic Rubber Bands (or orthodontic bands used for braces)
- a piece of white cardstock or printer paper
- Temperature Glue Gun
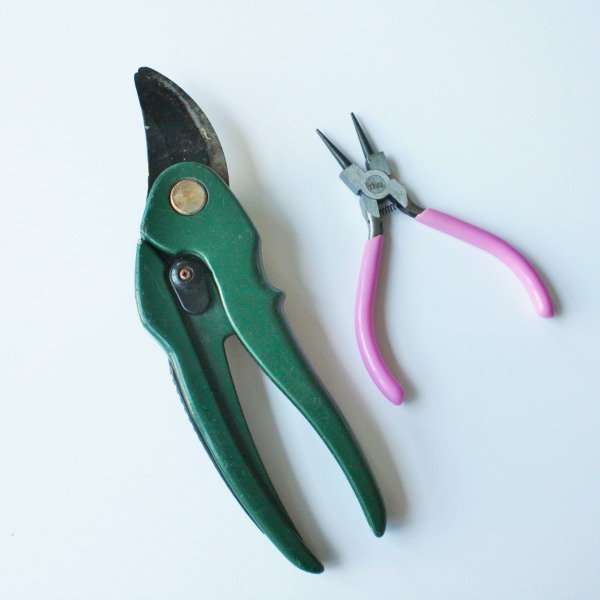
- Pruning Shears
- very narrow Tweezers – or a Jewelers Tool
Step 1) Use your gardening trimmer to cut wooden skewers into 2 lengths. One will be 5 cm. (that will be the mast) and the other skewer should be cut to 3 cm. (this will be the boat).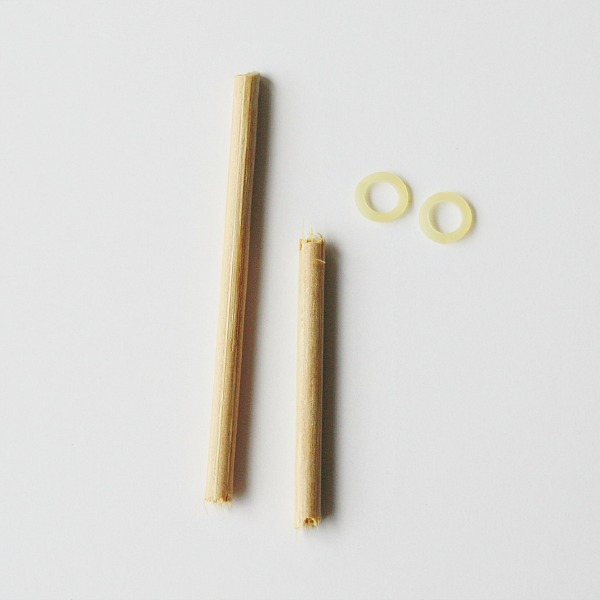
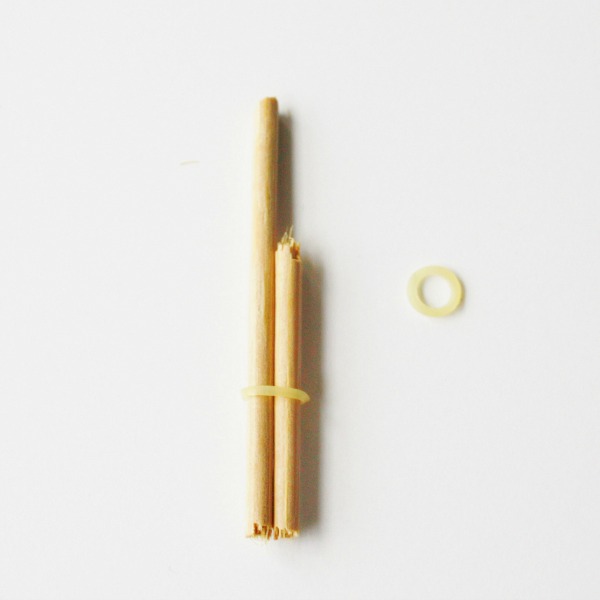
Step 2) Now grab 2 tiny rubber bands. I used my kids’ leftover bands from their braces! You can also find small elastic bands in the beauty section of any store, but braces bands work best. Slide one band over the 2 skewers exactly as pictured below.
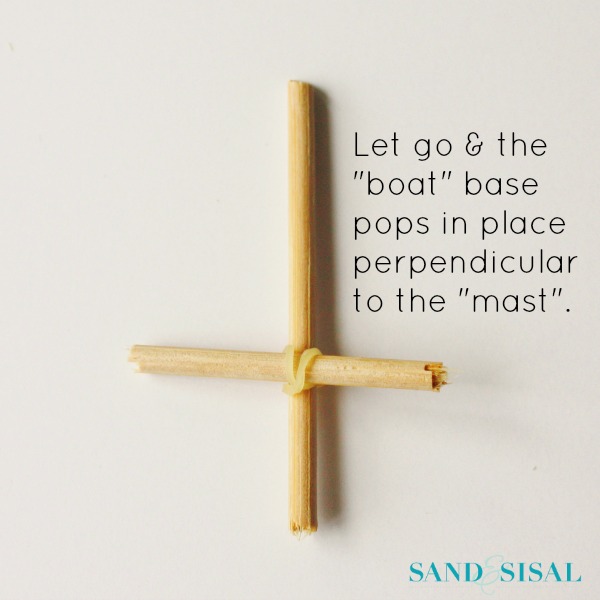
Step 3) Rotate the shorter skewer one full turn and hold securely. 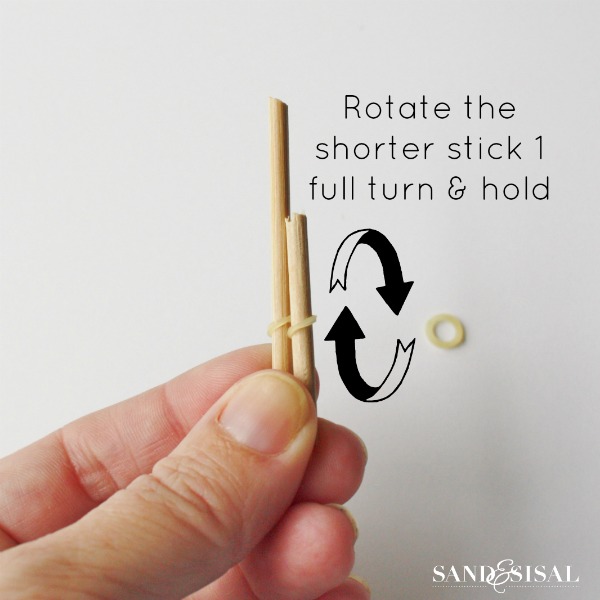
Step 4) Still holding the skewers securely, slide the 2nd band over the two skewers as pictured below.
Step 5) Let go and the boat base will pop into a horizontal position, which should be perpendicular to the mast.
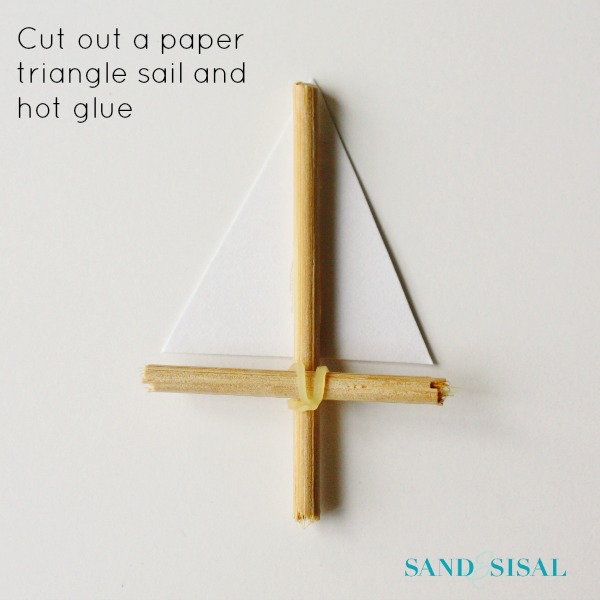
Step 6) Cut out a paper triangle sail out of card stock or printer paper. Feel free to color it if desired. Place a small amount of hot glue to the back of the mast and glue the sail to it.
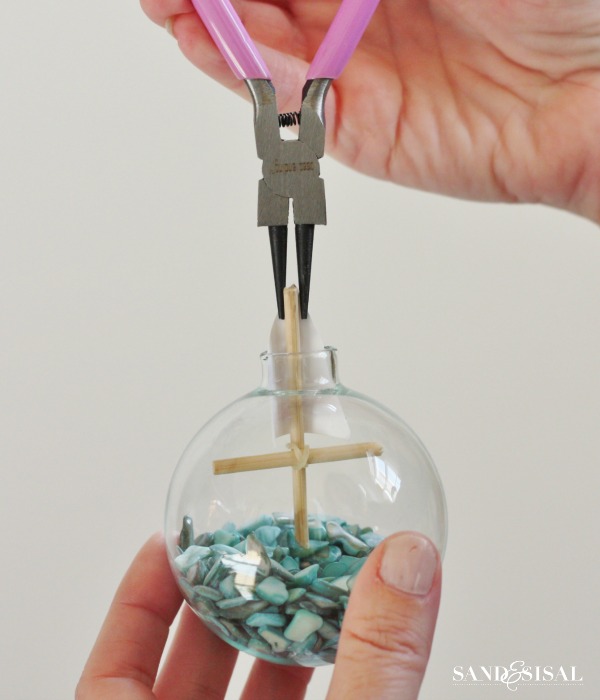
Step 7) Fill the bottom of your ornament with the crushed shells (Don’t add too much at first. You can always add more later). The reason why I used 3 inch glass ornaments vs. larger ones, is because these shells will make your ornament heavy!
Step 8) Twist the “boat” skewer so it is aligned with the mast (like in step 4) and start inserting it into the ornament opening. It will pop back in place as soon as it clears the opening.
Gently bend and tuck the paper sail so it will fit into the opening. Hold the top of the mast with your needle nose pliers or tweezers and insert the sailboat into the shells, pushing all the way to the bottom or until the “boat” part is sitting on top of the shells (water). The shells should hold it in place. Use the pliers to adjust the position.
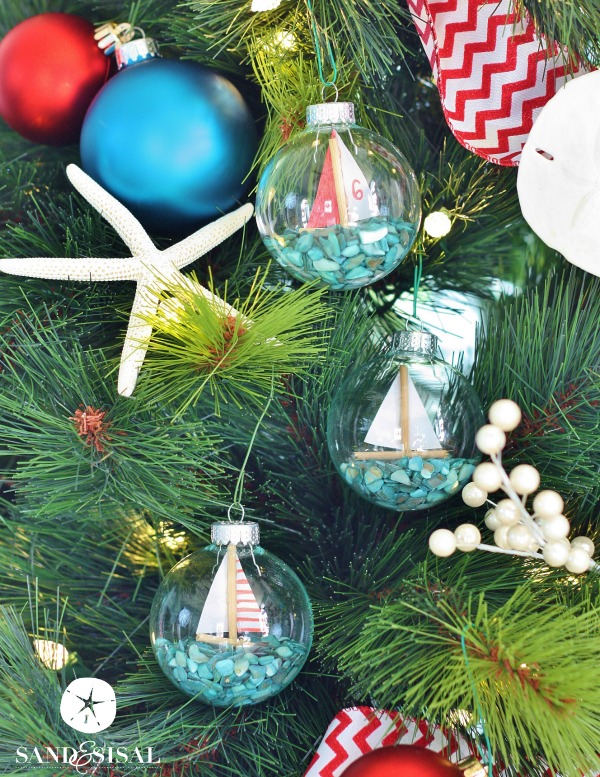
Are they adorable? I hope you try making some Sailboat Ornaments for yourself sometime!
Merry Christmas!
KIM
You might also like these posts!
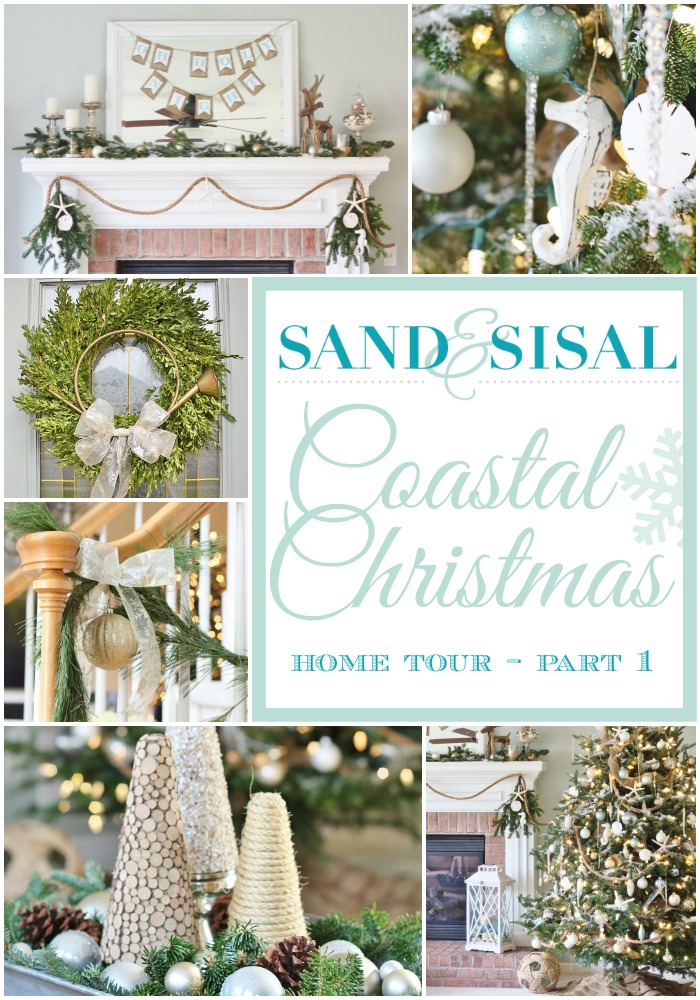
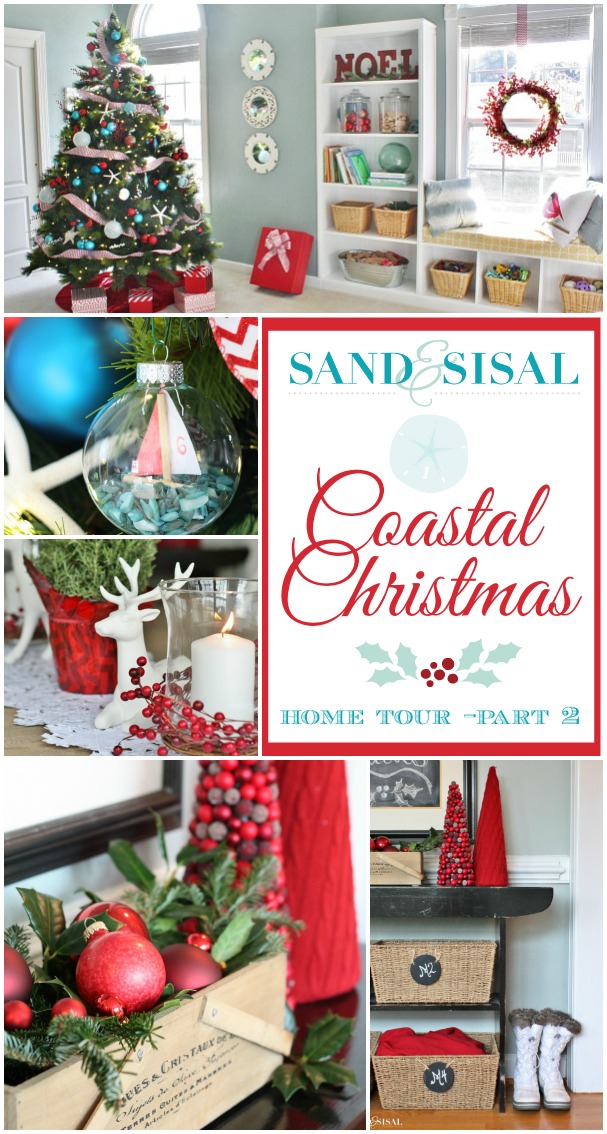
Coastal Christmas Home Tour Part 1
Coastal Christmas Home Tour Part 2
Kim,
Love these!! I have to wait until my girlies are grown to do my coastal tree. They won’t let me stop our all things Disney themed tree! I did start making the coastal ornaments and will definitely have to make a dozen of these!! I just posted a jellyfish ornament that I made!
Wishing you a happy holiday!
Jenny
Renovardesign.com
Thank you Jenny! I’ll have to pop over and check out your jellyfish ornament!
Smartypants! They look great, and you’re brilliant for figuring that out. The entire tree is perfect – the colors are fabulous. Nauticus and some of the other local museums should hire you to decorate their trees!
Oh wow, now that could be a fun job! Thank you Karin!
These are ridiculously adorable!! LOVE!
Thanks Anele!
Thanks for sharing…adorable! This is my 1st year going coastal…love it!
Thank you Pamm!
I love your coastal touches. Now that we are living a mile from the beach I need to do incorporate more coastal decor. Thanks for the inspiration!
THank you Morgan!
Kim, these are amazing! Every Christmas you make something that just delights my coastal soul! 🙂
Thank you Dana!
love this! cute idea!
https://www.etsy.com/shop/wnbrunk
These are so stinkin cute. Kim! Pinning for next year…hope you had a wonderful Christmas! XO