An intervention might be required. I’m obsessed with glass tiles. If I can find a place to use them, I will! My boys’ beach themed bathroom was almost complete and a finishing touch was to make a frame for their mirror. But this time I wanted to try something different with it. What about adding glass tile?! My palms started to get sweaty from excitement! Strange you may think, but when the creative juices start flowing there’s no holding me back! Decorating a mirror with tile is so simple you just won’t believe it!
If your mirror doesn’t have a frame then click my tutorial on How to Frame A Mirror.
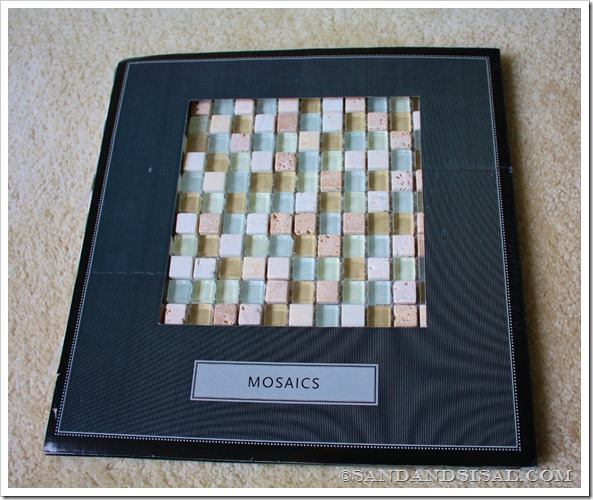
I had some tile left over from my master bathroom which I decided to use. It’s a stone and glass tile mosaic called Seabreeze from Lowe’s.
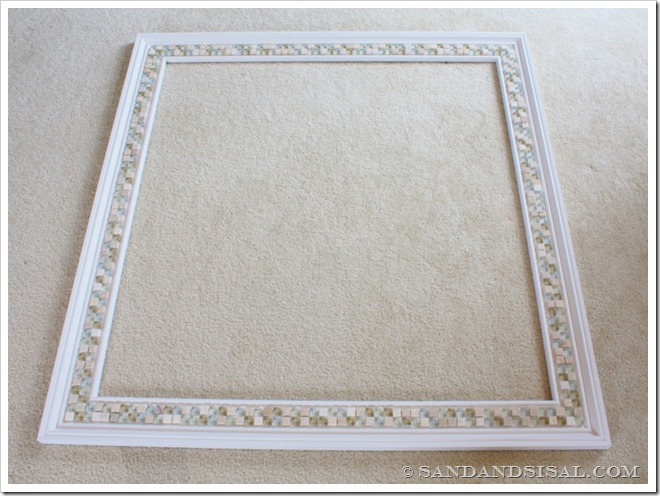
Remove the foam backing and cut the tile into strips with scissors. I chose rows of two, which fit my frame perfectly.
Then dot on clear silicone adhesive on each tile. Press onto the frame.
Now here’s the hard part.. allow the silicone to set for 24 hours. I only waited 18 hours, shhh…
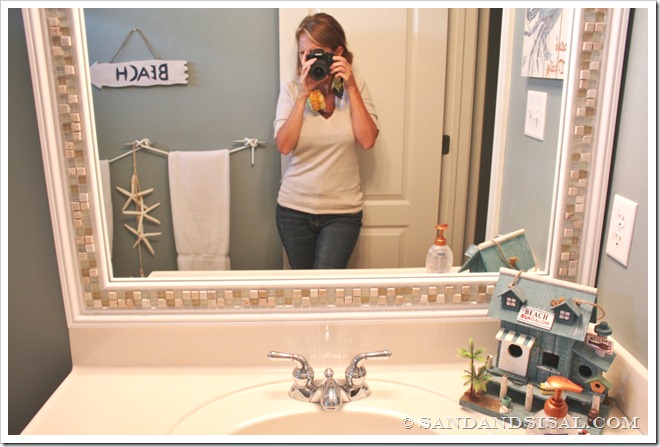
Apply outdoor mounting adhesive to the back of the frame on the corners and the sides then press against the mirror.
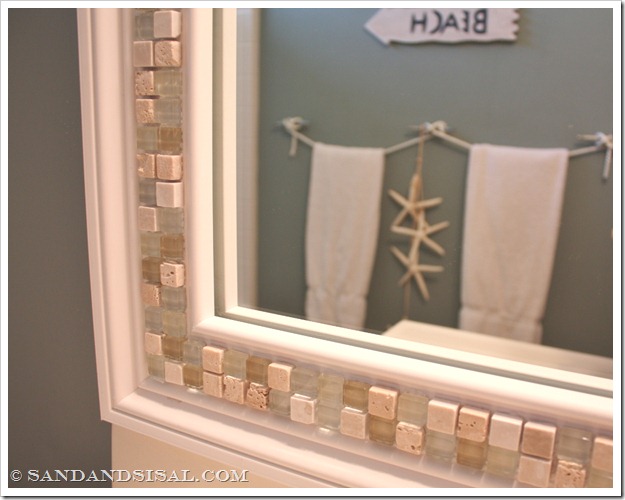
I’m loving how it turned out! My boys gave me a, “Wow, that’s cool mom!” seal of approval. Decorating a frame with tile is so simple and with the vast array of tiles to choose from, you can create something incredibly customized!
Kim


I love the way those glass tiles look on the mirror. Beautiful! I can see why your so hooked on being creative with them!
Jenn
Kim that mirror looks great in it’s new frame! I love glass tiles and think there is a future for some in my master bath! Thanks for sharing your projects;)
I’ve looked at this tile at the store and it’s beautiful. What a creative way to use it. Thanks for the inspiration. Love it! Debbie
Your mirror came out so pretty. I definitely looks beachy!
~JamieS
This is gorgeous, no one would ever think it was DIY! It looks so classy, great choice on the tiles!
Lovely tiles and a great starting project for tiling and mosaics. Thanks for the inspiration!
This comment has been removed by the author.
AMAZING!! I have NEVER seen that done before & am TOTALLY loving it!! Your family is sooo blessed to have you & all your talented goodness in the house 🙂
Looks great. What a difference they can make to a simple frame.
FANTASTIC!!! I have a mirror on my mantle that I’ve wanting to do something with, and this IS IT!!! Thanks so much!
Very pretty, I love it! Now I just need to frame my mirror and get the tiles!!
Kim, I liked what you did. I used your work as an example of what one can do with their bathroom. I linked from my article back to your website.
I hope that was alright with you.
Duane
Looks fantastic! I have a question and since you are the expert on framing mirrors…
I want to do a border around a large builder grade mirror using mosaic tile. However, I cannot add a wood frame and I don’t have enough clearance from the medicine cabinet. Do you think I can do it straight onto the mirror? The guys at home depot were completely confused when I asked – so I told them I knew exactly who to contact! LOL,
Do you suppose using the clear silicone would be strong enough to hold it up. I am not going to be able to clamp anything since it’s already mounted to the wall! Help:)
Yes, you can definitely attach the tile directly to the mirror with silicone. A couple things to keep in mind…if the tile is glass and you can see through it you will want to use Cl;ear silicone – the kind that also dries clear. If you don’t use clear than you will see the silicone through the tile. Also, since the mirror will reflect the backs of the tile, it will look much better if you remove the mesh backing from the back of the tiles. This means you will need to set then one-by-one, but it really doesn’t tale that long and it will look much better w/o the ugly reflection in back. Lastly, the tile will slide down before the silicone dries, so you need to do something to keep it in place. Along the top and bottom you can use painters tape to tape a furring strip (or similar) along the bottom edge of where the tile will go. Remove it after the glue dries. On the sides, just attach small sections of tile at a time, maybe a foot or so, and then wait for the silicone to dry a bit (about 15-20 min) before you do the next section. If you don’t do this the weight of the top tiles will cause the ones below to slide off. You can also use painters tape to help hold these tiles in place. Don’t use too much silicone – less is more. This may sound a bit complicated, but it really isn’t and it doesn’t take long at all. If you butt the tiles against one another you won’t need grout, but if you like the grout look use spacers or just eyeball equal spaces between the tiles and after the silicone is completely dry you can apply the grout on top of the tiles.
This is a great idea. My sister in law was thinking of framing in her mirror and this is a great touch to that. I can’t wait to share it with her. ~Megan
Where did you buy the frame molding like that?
Home Depot 😉
Did you put grout or anything between the tiles? Thanks for the creative ideas!
Thanks Nicole. No I didn’t add any grout. That would add additional weight to the frame which I didn’t want to do and it really isn’t necessary but you are welcome to try it out. I just can’t guarantee how it will hold up. 😉
That was awesome! I am definitely going to do this in my own home! Ana
OK- I needed to see this post! I am attempting this frame mirror thing this week! And I have to say I am loving hoe this turned out!!!
Hi Kim! I LOVE, LOVE, LOVE your blog and all your beautiful creations! I have been transforming my own home into a beach-colored/themed home over the past few months, and was so excited when I stumbled upon your site! Lucky me! I can see we have the same taste in colors/decor! I love this mirror and will add this to my list of projects, along with many others I have gotten from your site. Could you tell me what color you used on the wall that this mirror is hanging on? Also, I was curious to know what color your cabinets are in this bathroom. I have light oak right now, but am planning on making them dark brown, by following your techniques in a different blog. I wish you could come to Wisconsin and give me ideas for my entire home! Ha! Thanks again for all your creativity!
Thank you Linda! All the cabinets in my home are maple, but you’ve seen how I like to change them! haha. This bathroom color is Atmospheric by Benjamin Moore. I’ve used it in the kids play room too. It used to be a Pottery Barn color a few years back.
You can put the tile right on the mirror. Just used the 2 sided tape.Works great.
What paint color did you use on the walls? Gorgeous!!!
Thank you! It’s Atmospheric by Benjamin Moore
I love it! What a great finishing touch to the mirror! I’m absolutely going to do this for my small-space bathroom remodel!
I LOVE, LOVE, LOVE this idea. We are having a townhouse built in the Myrtle Beach SC area, and will be moving in Mid-Summer of 2014. Of course the standard “builder-style” mirror will be the plain glass with no frame or personality. I have bookmarked your page, and am going to try this as soon as I can, once we get into the new townhouse.
Thank you so much for the idea.
What did you paint you walls with? What’s the Brand and color? I love it so much! I’m thinking about doing this same style in my bathroom (:
Thanks!
Cayla Crisp
What’s the name and brand of your wall color? I love it so much. I am planing on doing this theme in my bathroom (:
It is Atmospheric by Benjamin Moore. Thanks!!!
Love the look and colors. Have question though – It’s hard to tell in pics but it seems the tile height exceeds the pvc rounded trim on both sides of it. Is that the case? And wouldn’t that prevent using grout effectively .. Seems that wouldn’t look right?
Hi Keith,
The tile is slightly thicker than the first bead of trim, but no grout is used in this project, so that wasn’t a concern. 😉