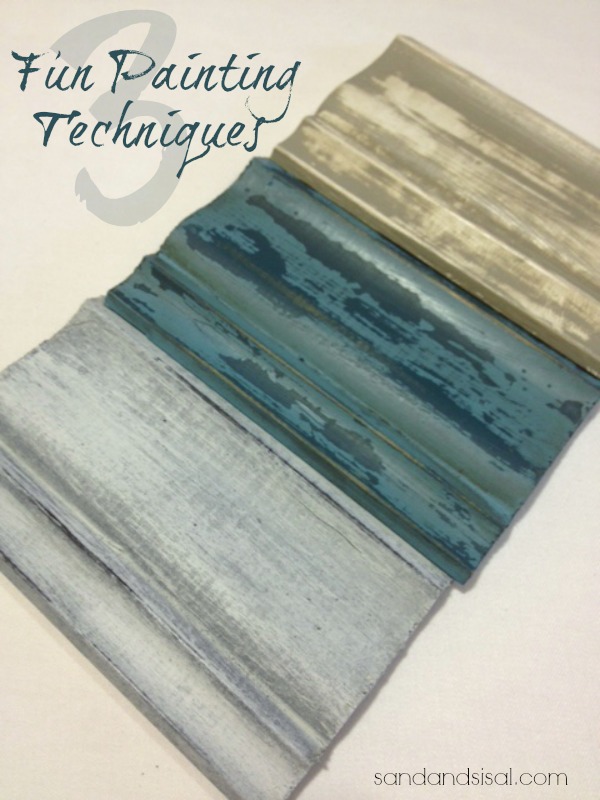
Yesterday I shared my experience at the Haven Conference, and today I wanted to show you a few things I learned at my favorite session: Advanced Painting!
 Now, I’m absolutely no expert when it comes to painting furniture but I’ve dabbled with it a bit, so I was so excited when I found out that my two furniture painting idols, Marian from Miss Mustard Seed and Shauna from Perfectly Imperfect, were teaching. They will probably laugh at that, but I’ve had the privilege of knowing these two ladies for a few years now and please know not only are they two awesome business women, but they are amazingly kind and bubbly. Marian sells her own line of paint called Miss Mustard Seed’s Milk Paint and Shaunna owns Perfectly Imperfect Shop where she sells Annie Sloan Chalk Paint and carries a variety of products.
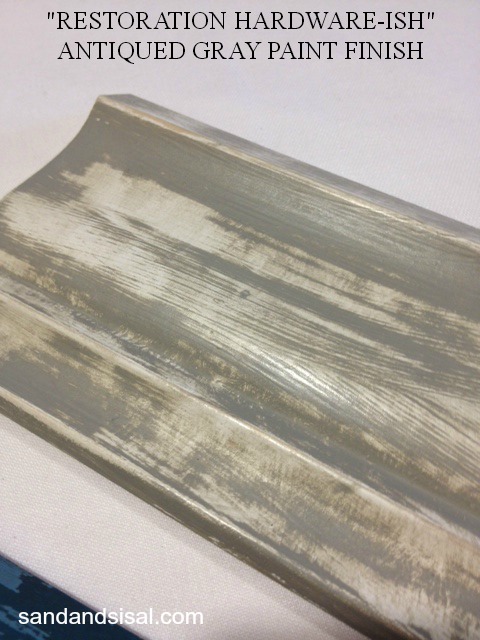
 I will try to pass along the best I can, 3 fun painting techniques for furniture that the ladies taught us. For further education, feel free to check out their blogs. All I had with me in class, was my iphone, so forgive my less-than-stellar quality pics. The 1st painting technique we tried was called the “Restoration-Hardware-ish” Finish. It is a somewhat weathered and aged look with lots of streakiness. I’m not quite sure I achieved the correct look but you can get the idea.
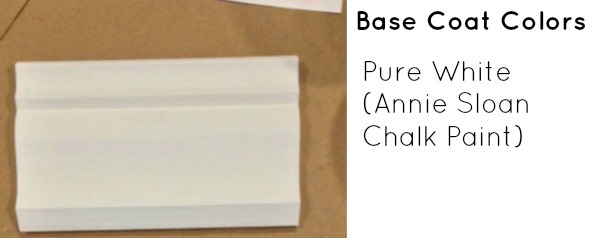
 We experimented the painting techniques on pieces raw wood molding.
Step 1) For this technique, we gave the raw wood a nice even coat of ACSP in Pure White and allowed it to dry (it dries fast!).
 Step 2) We applied a coat of ASCP in French Linen over the top of the Pure White and allowed it to dry a bit. (sorry, no pic)
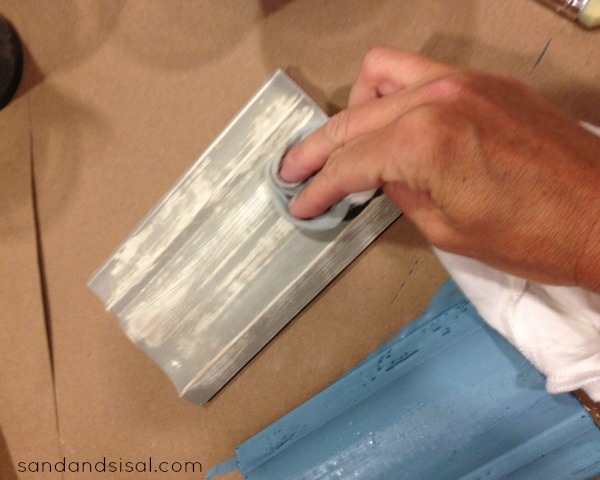
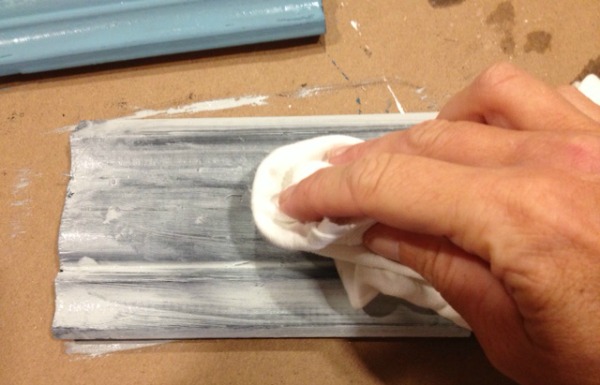
Step 3) Next we wiped off the French Linen with a damp rag, going the direction AGAINST the wood grain. This might take a bit of pressure and patience. Feel free to moisten your rag more if needed. Rubbing the high/raised areas will reveal the white color underneath.
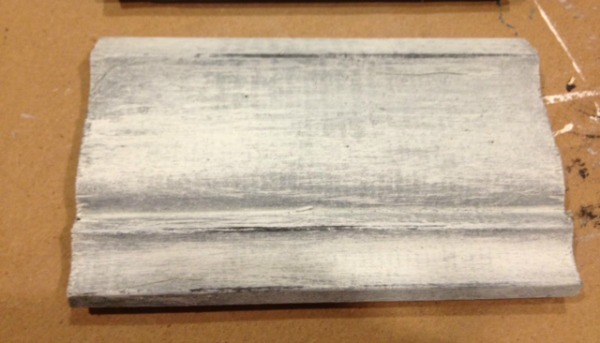
 Step 4) Apply a bit of ASCP Clear Wax to the wood and immediately buff to a shine. That’s all there is to it!
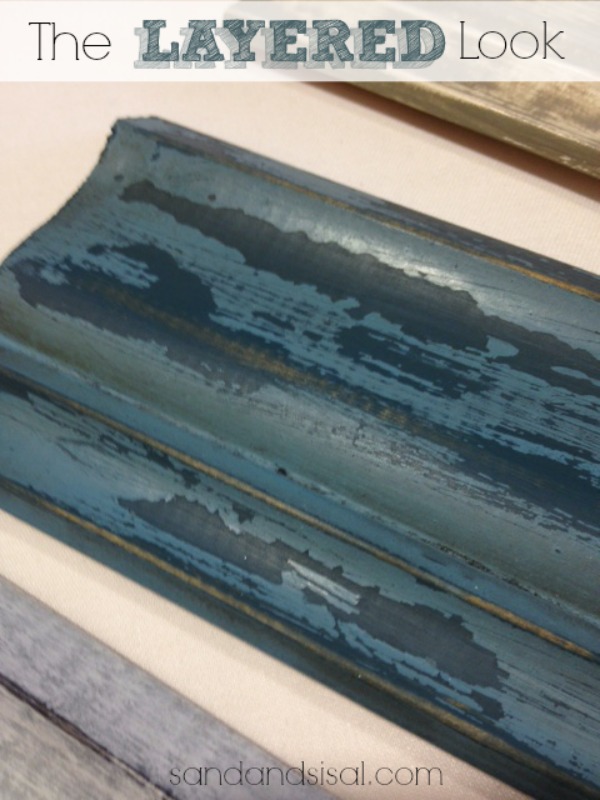
 The 2nd painting technique we tried was the layered look. It is rich with color and authentic chippy-goodness! I think this was my favorite!
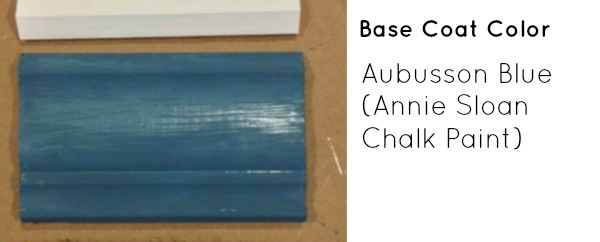
 Step 1) Give the raw wood a base coat of ASCP in Aubusson Blue and allow to dry. The pic below was taken while the paint was still wet.
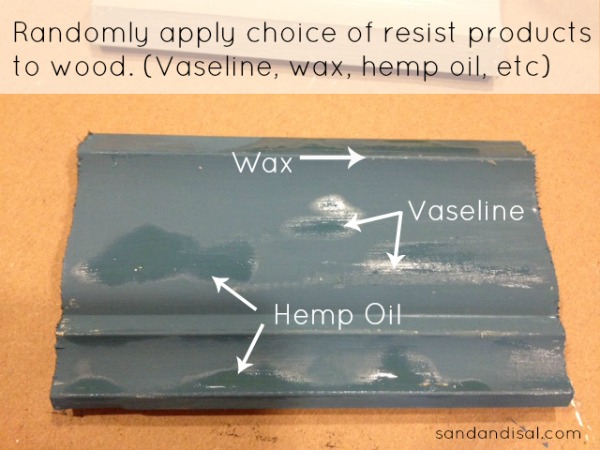
 Step 2) Apply one or a variety of resist products like vaseline, wax, or hemp oil in random areas on the wood. Focus on the raised/high areas especially or where ever you want the base color to show through. TIP: Try to think of where the piece of furniture would receive normal wear and tear over the years. These resist products will cause the next layer of paint to not stick to the base coat and each will chip, flake, or resist in different manners. You can use just one type of resist or as many as you like.
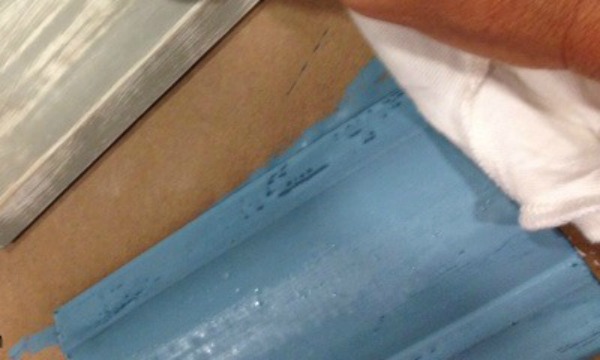
 Step 3) Apply the 2nd coat of paint gently over the entire piece. For the 2nd layer we used Miss Mustard Seed’s Milk Paint in French Enamel. Allow to dry. You can see in the picture below where the paint is really resisting to stick (see the dark blue areas?).
 Step 4: Make sure it is totally dry. Then take a bit of sand paper and rub across the wood. It is so cool to see how easily all the areas where you apply the resist, flakes off. Rub the sand paper on it as rough or as gentle as you like. There is no “right way or wrong way” here! Then rub the wood well with a soft, dry cloth.
Step 5: Seal with wax and buff to a shine. I used Miss Mustard Seed’s Antique wax.
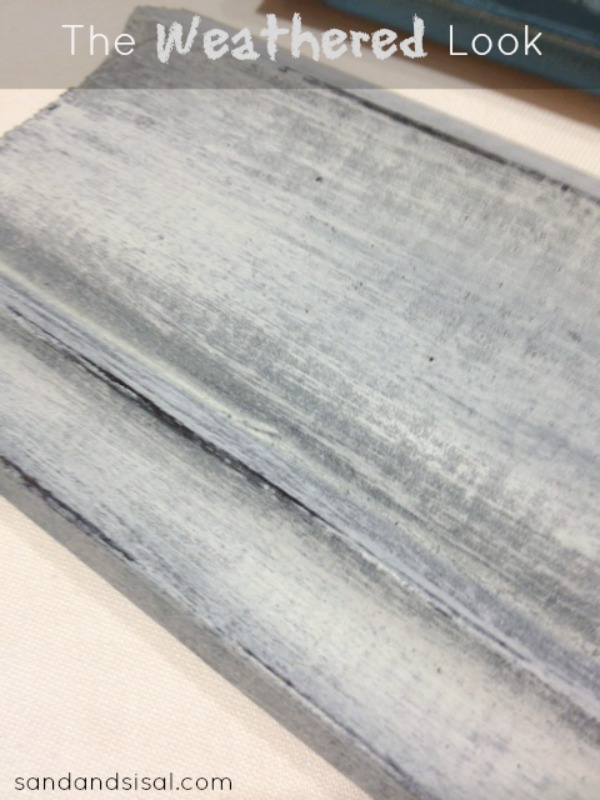
The last paint technique we tried out was called the weathered look or driftwood look.
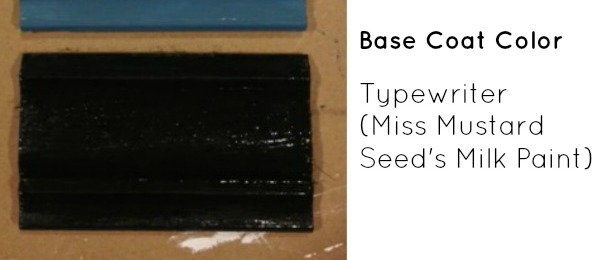
 Step 1) Start with a base coat of Miss Mustard Seed’s Milk Paint in Typewriter. Allow to dry.
 Step 2) We applied a 2nd coat that was a 50/50 solution of Shutter Gray & Grain Sack (both Miss Mustard’s Milk Paint).
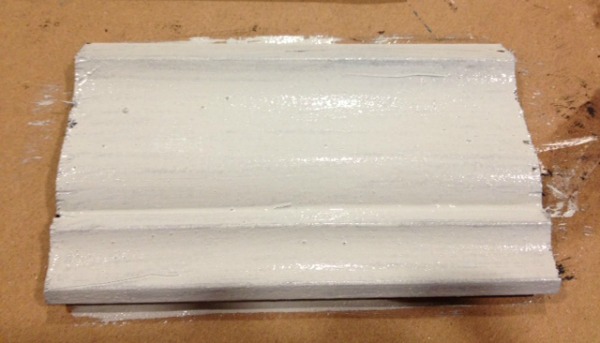 Step 3) Immediately wipe off the 2nd coat with a rag. Wipe off as much as you like, depending on how dark or light you want the piece to look. Again, remember …. no rules.
 Step 4) Dry Brush on Ironstone Milk Paint to achieve desired lightness, feathery and streaky effect.
Step 5) Seal and buff with white or clear wax.
What was amazing was how different everyone’s examples turned out! Each was unique and beautiful. Before tackling a project, I recommend trying a few of these techniques out first on some molding like we did, so that you learn what look you like best. Thanks again to Marian and Shaunna and the entire Haven Team for a great, fun, and informative time!
Kim

![]()
You might also like these painting project posts:
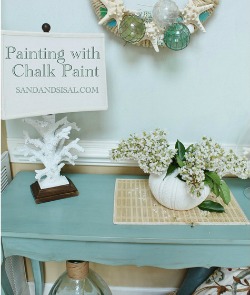
Painting with Chalk Paint: A Beginner’s Guide
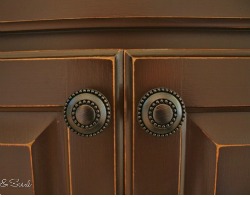
How to Paint and Distress Cabinets
Thank you for a great tutorial on these painting techniques! I missed their class and am thrilled to find your tutorial! Love these!
Thanks Betsy. It was a very fun class to attend. 😉
Great tutorial, Kim! It would be fun to try these out on picture frames… thanks for sharing!
xo Heidi
Oooo yes, picture frames would be amazing with any of these techniques. Thanks Heidi!
Great tutorial. Thank you for making it easy and the pics helped a lot. I have been a little confused with other tutorials. My motto is KISS (keep it simple, stupid). Sorry for the harsh language. lol But you did just that. 🙂 I have 3 shelves leaning agains the wall waiting for me to get the courage and just do it already. I am wanting the driftwood look so will go with #3.
Aww, you are so kind! Thank you Nancy! I tried to keep it simple. One thing I would recommend for the driftwood look is to work the 2nd coat in smaller sections because of having to wipe it off immediately. If you paint the 2nd coat all at once on a larger surface then it might dry to quickly and rubbing will be laborious. Happy painting!
Thanks for the tutorial and the pics! One question: on the weathered look did you use the MMS paint with or without the bonding agent?
Hi Kelley,
For the purpose of the class, they did not have the bonding agent in it, but they did recommend using bonding agent mixed in to the base coat (if I remember correctly). It was my first time using milk paint.
Thanks!
KIM
Excellent tutorial, simple and informative, thank you so much for sharing!
Thank you!!
These are so good looking! The wood I mean, and you Kim 😉
I wanted to attend that class, but thanks for sharing these. There are so many possibilities with the paints, I always have a hard time choosing what to do, so this helps pick colors.
So, what projects are you going to tackle with these techniques next?
Thanks Jessica! The class was so fun. I think I’ll be trying at least one of the techniques on my kitchen table. I’m not sure which one yet though. And I’m stuck too in choosing color. I just can’t decide!!
I would like to know if this could be coated with something in order to use it in the bathroom?
Hi Sona, As long as you seal it well with a few coats of wax then it should be just fine.
Thanks! ~KIM
I was thinking of on the wall and wouldnt want to have to rewax a wall etc. Thinking of a poly something?
Oh wow, I really couldn’t answer that because I’ve only seen these techniques on wood. That is probably a question for Miss Mustard Seed or Perfectly Imperfect (the teachers). I’m sorry I don’t have an answer for you.
I am sorry, I am not explaining myself verfy well 🙁 I mean for a wood covered wall. I wouldnt want to have to wax it etc.
Seriously loving these tips Kim!! I’m not overly confident when it comes to painting so this really helps! 🙂
Vanessa
Thank you Vanessa!
I enjoyed your recap of their class, Kim, and thanks for showing the examples. I didn’t attend their session but really wanted to! I have only painted a few things with chalk paint and love the layering. So many possibilities!
Thanks Jane! It was a fun class and I really learned a lot.
Thank you so much for sharing this info and picks! Excellent!
Leslie
Thanks Leslie!
Great tips – would love to use these for some of my food photography backdrops.
Hi Kristen! Someone else mentioned that these techniques would be great for the backdrops too. I hadn’t even thought of that, but now I’ll have to make some! Thanks for stopping by. ~KIM
What a great post, thank you so much!!!
Thank you!
`wow, thanks for such detailed tutorial, the photos are prerry decent anyway 🙂 Really helpful and inspiring, I need to try the 2nd and 3rd technique as soon as there’s an opportunity, thanks lovely! I might place these tips on my blog soon, if you don’t mind?
http://cherriehub.webs.com/apps/blog/
I would love to attend/ play a workshop of any nature if you know or hear of anything in the Nashville, TN area this new year!! (2014) Love your inspiration!
Best Wishes and Happy Holidays- Teresa
Hi, I would like to paint my wood framed fire surround which is at present a very dark brown. I would like a marble finish in light/dark greys any advice on how to achieve this would be very welcome.
Hi Shalmar,
I have not done much faux painting (like painting faux marble) before, so I really could not advise you. I recommend you do a Google search on “How to Paint Faux Marble” and see what tutorials come up. Thanks!
Thank you Kim for your comments, will look up on Google.
Shalmar
Thanks so much for describing these techniques. I can’t wait to give it a try.
Thank you for sharing your tips and secrets and experiences here! I’m attempting my first chalk paint project. 🙂 Quick question: if you are using two layers of color, do you sand the first layer before adding the second one? Or do you finish all the painting and then sand? Thank you!
If I think 2 layers of paint are needed then I like to use a fine grit sanding block in between each layer, very lightly, just to ensure a butter smooth finish. 😉