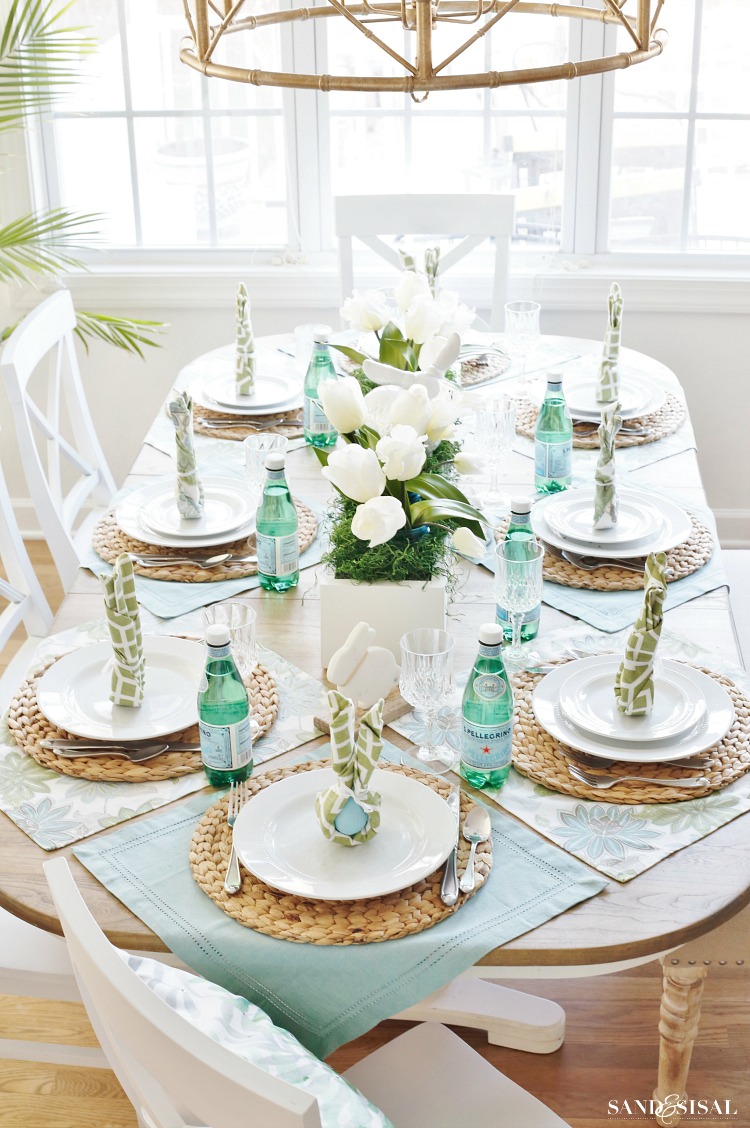
I have been wanting to make a DIY Wood Trough Centerpiece for years now! I finally decided one morning to make one and it was easy, inexpensive and didn’t take long at all. Now I’m wondering why I procrastinated for so long! The DIY wood trough is what I used as an Easter centerpiece for my spring tablescape and I’m going to show you how to make one yourself.
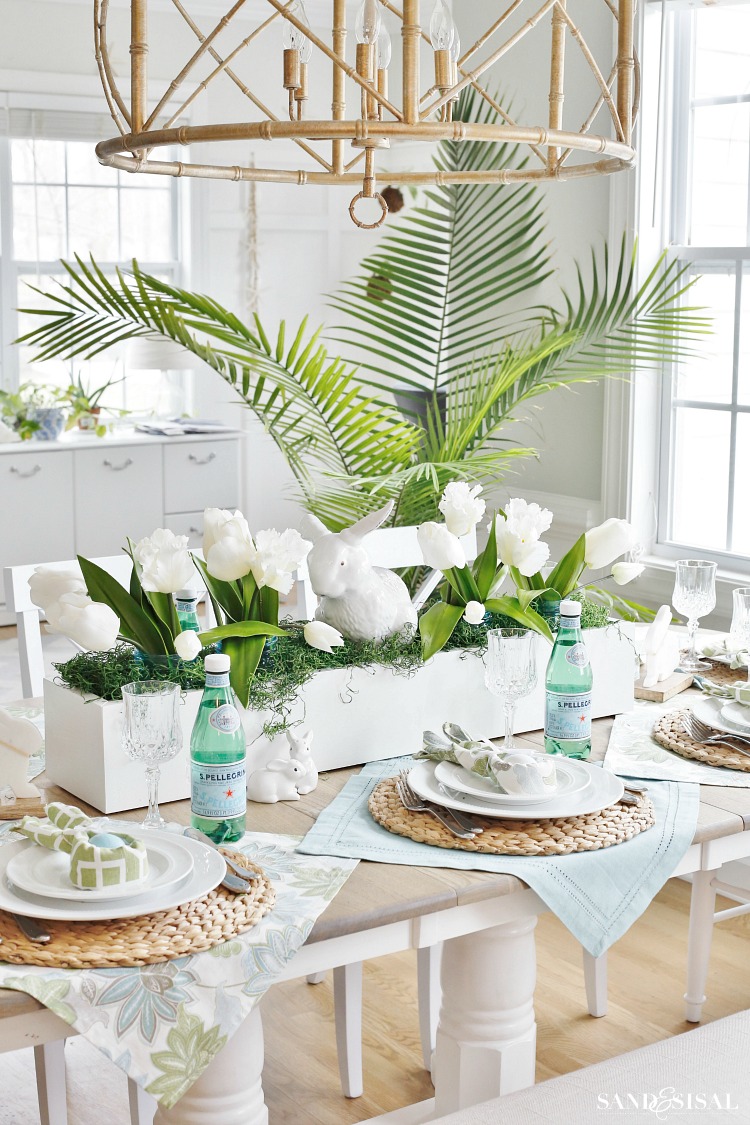
Wood trough centerpieces can be incredbily versatile and can be decorated in a variety of ways depending on the occasion or season. For this centerpiece, I placed aqua mason jars filled with tulips in the trough, added in a ceramic bunny perched on top of a jelly jar underneath. I then surrounded the jars with white plastic grocery bags topped off with a thick layer of green spanish moss.
DIY Wood Trough Centerpiece
To make a DIY Wood Trough Centerpiece you will need the following supplies:
- compound miter saw
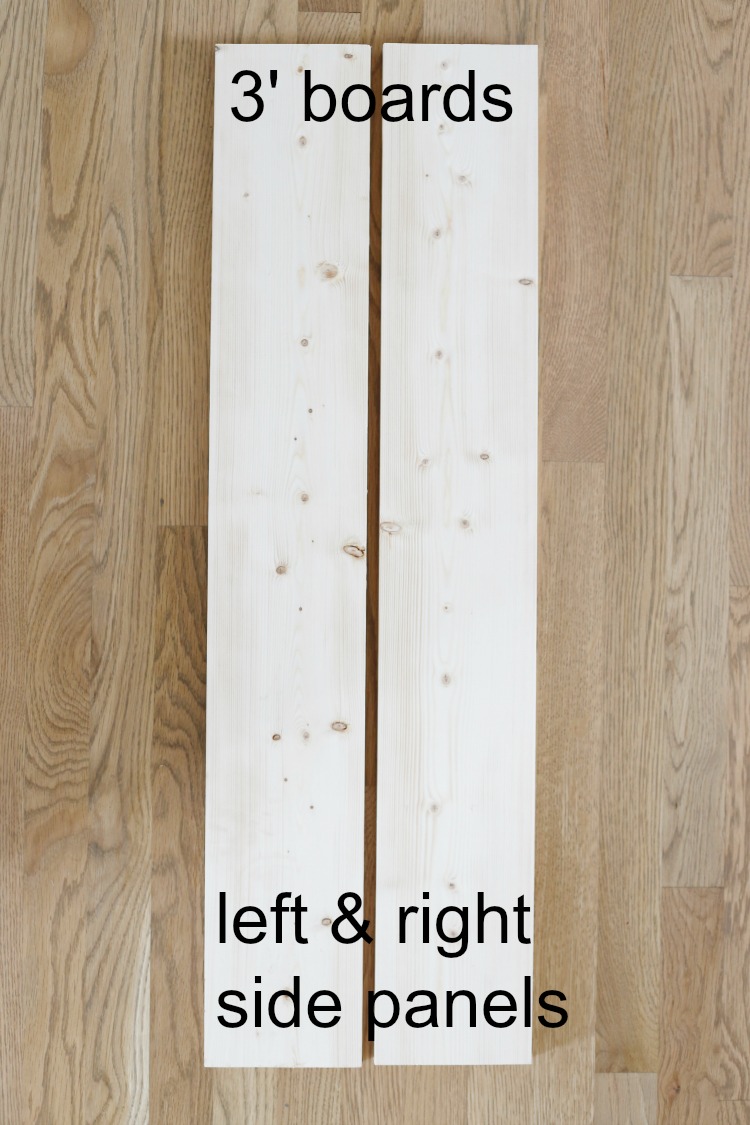
- (2) pine or MDF boards 6 feet long x 5.5 inches wide x 1/2 inch thick
- brad nailer gun
- paint or stain
- sand paper
- measuring tape
- paintable caulk or wood filler
- felt pads
Step 1: Cut one 6 foot board in half, with a straight cut, creating two 3 foot equal length boards. These will be the long sides of the trough.
Note: I used white pine boards but if I had to do it over I think I would’ve chosen the pre-primed MDF boards. They are straighter than pine boards and make the whole project easier. The MDF boards cost a few more dollars but might be worth it if you plan on painting and not staining. Just something to keep in mind.
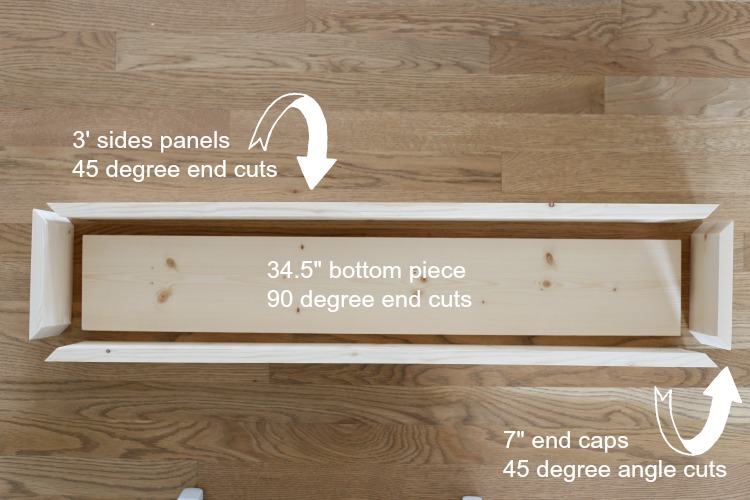
Step 2: Grab the second 6 foot board and measure and mark the board at 34.5 inches. Cut it with a straight cut at that measurement. This will be the bottom of the trough.
Step 3: Measure and cut two 7 inch lengths of board. These will be the end caps.
Step 4: Go back and now cut each end of the side boards and end caps with a 45 degree angle cut. 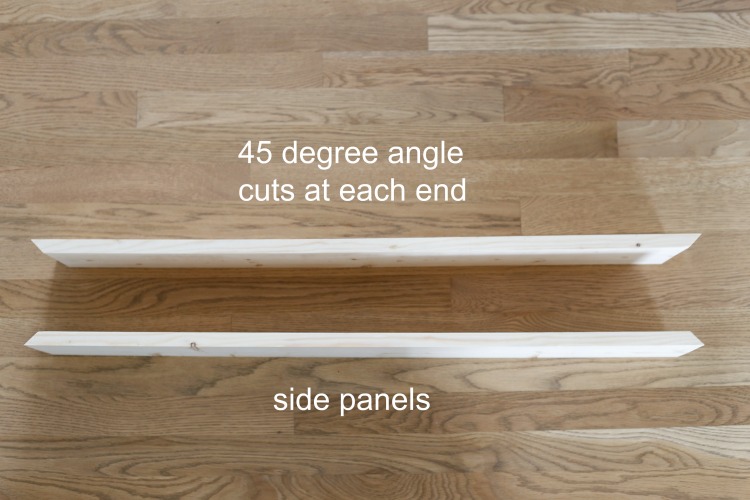
Step 5: Sand the edges of each board until smooth.
Step 6: Stand a side panel and an end cap against the bottom board, creating a tight corner. Use the brad nailer to secure the boards together and into the base board. Repeat with the other side and end cap.
Step 7: Fill any gaps or nail holes with wood filler (if staining) or paintable caulk (if painting).
Step 8: Paint or stain the wood trough with any desired color.
Step 9: After paint/stain is dry, add felt pad discs to the bottom of the trough to help protect surfaces from getting scratched.
Step 10: Fill and decorate!


The DIY wood trough centerpiece looks so great with this Easter tablescape! You can see more of my Easter table setting and how to make these cute Easter bunny napkins HERE.
For summer I plan on filling the DIY wood trough with shells and candles. Maybe I’ll fill it with succulents. The possibilities are endless! Imagine how you can decorate it at Christmas even! I hope you try making your own DIY Wood Centerpiece!
KIM
Beautiful! Love the length of the box and the items for decoration were so Spring pretty!
The entire table is done simply and with good taste. Great job!
Thanks so much Char! It was a fun project to make! Wish I had made one years ago!
On my way to Home Depot now-thanks for the inspiration. Btw where did you get the fabulous chandelier over the table?
Thanks Kathy!!! It’s from Ballard Designs. They carry it currently this season still. We love it!
Great job on the trough. I, too, would love to know where you purchased the gorgeous bamboo look chandelier, please? I want one for my foyer.
Thank you so much Debbie! The chandelier is from Ballard Designs. They have it in stock this season too. Have a lovely Easter weekend! ~ KIM
Beautiful table setting. The trough is a fantastic idea. I really love the bunny salt and pepper shakers!!
Thanks for sharing. Happy Easter!
Thanks so much Debbie! My daughter picked me up those little bunny shakers at TJMaxx for $4 this year. Aren’t they just the cutest! Thanks for stopping by and have a very Happy Easter! ~ KIM
Your wood trough is great, love look of it. As you said, so many ways to decorate with/in it. How marvelous what a simple box can be. Have had cause to realize the simpler something is the more can do with it. Thanks so much for wonderful tutorial, hopefully will be making one soon..
Your trough looks fantastic for your Easter table. The tulips are perfect and look so sweet and pretty along with rest of table.
Happy Easter .
Thank you so much JaneEllen! I appreciate your sweet comment! Happy Easter to you too!