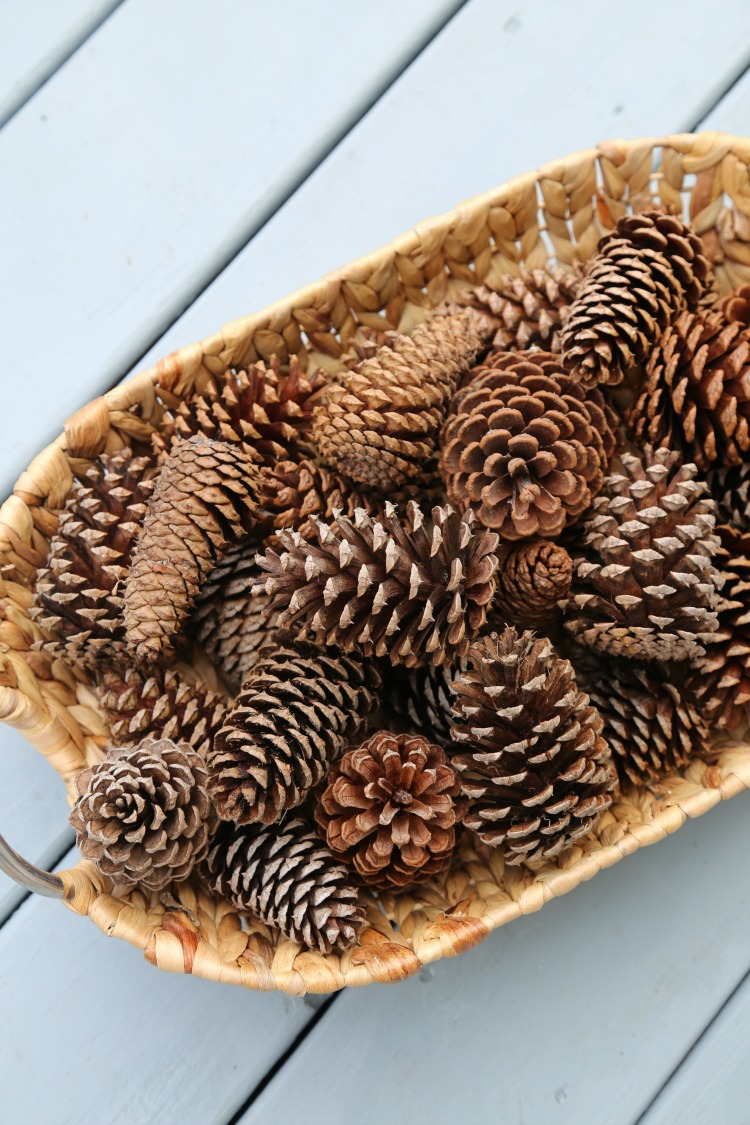
I have been wanting to do this project for so many years that I don’t understand what took me so long. While decorating for my Coastal Fall Home Tour I was wishing I had more bleached pinecones. Buying them seemed like a waste of money (they aren’t cheap). My youngest sister was cursing the gazillion pinecones covering her yard and decided to pay my little nieces a penny for each pinecone they could collect. Those sweet girls made a killing! So I called my {pinecone} supplier and asked if I could take some off her hands. A resounding YES was the response. Because this was my 1st time bleaching pinecones, I’m going to walk you through How to Make Beautifully Bleached Pinecones and a few lessons learned and tips. These will be perfect for my fall and Christmas holiday crafts and decor.

Start off with pinecones that are in good condition, brown, not green, and have already started opening. The drier they are, the more open the pinecones become. The very dry pinecone will also accept bleach better than one with lots of moisture in it. Many tutorials out there show using a bag of purchased craft pinecones. Those packaged pinecones have been baked and are very dry. They are a great option to use if you do not have any pinecones available to you naturally in your area. My goal here was to do this project as cheaply as possible.
How to Make Beautifully Bleached Pinecones
You will need the following items:
- very dry, fully opened pinecones (approximately 30)
- bucket (I used a 2.5 gallon bucket)
- 1.5 gallons of bleach (regular basic bleach, not the “no-splash” kind)
- water
- bricks or rocks
- tarp for drying
- rubber gloves
***Do this bleached pinecone craft outside or in a very well ventilated location!***
Step 1: Place your pinecones into the bucket.
Step 2: Pour 1.5 gallons of bleach over the pinecones.
Step 3: Add water to completely cover the pinecones. (I found best results were 80% bleach/20% water). Do not add too much water.
Step 4: Place bricks or rocks on top of the pinecones to prevent them from floating.
Step 5: Leave in the bleach solution for 36-48 hours. Don’t freak out. They will all close up tight while wet.
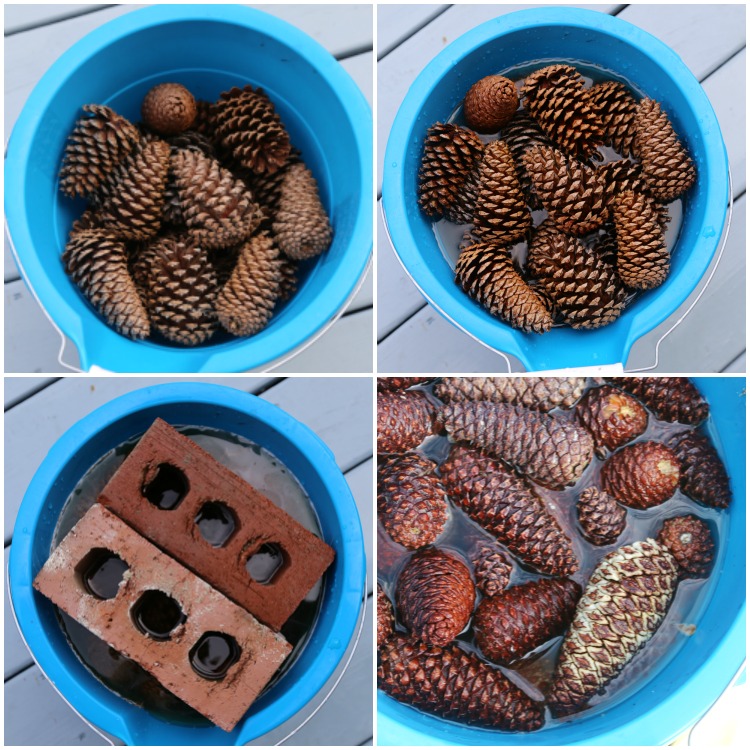
Step 6: At around the 36th hour, put your rubber gloves on and start removing any pinecones that look like the white-ish pinecone in the pic above (bottom right pic). If you remove them earlier (24 hrs) they will still be bleached but the bleached pinecones will have more of a driftwood or weathered look to them. They will not be the bodacious blonde bombshells your are going for. 😉 Place them on a tarp outside in the sun, preferably on a concrete, asphalt or brick surface to start drying. Rotate them every few hours. Sometimes if you leave the pinecones in the bleach too long then they might start disintegrating in some spots, so just be aware of that possibility.
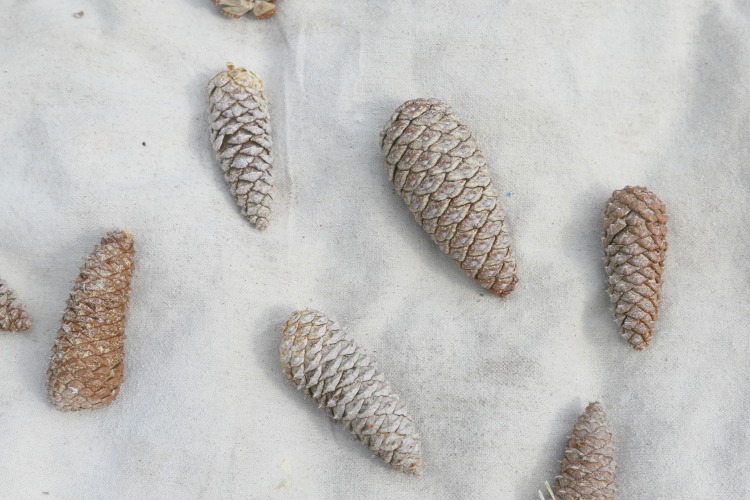
The drying process takes a few days. After a full day in the sun and 85 degree temps, I moved my pinecones down onto my brick patio where it was hotter. This worked great! It took a 2nd full day of being in the sun before the pinecones would open fully. When they open FULLY then you know they are ready.
Note: If your pinecones are not as bleached as you like then your can repeat the process. Check after 24 hours if this is your 2nd soaking.
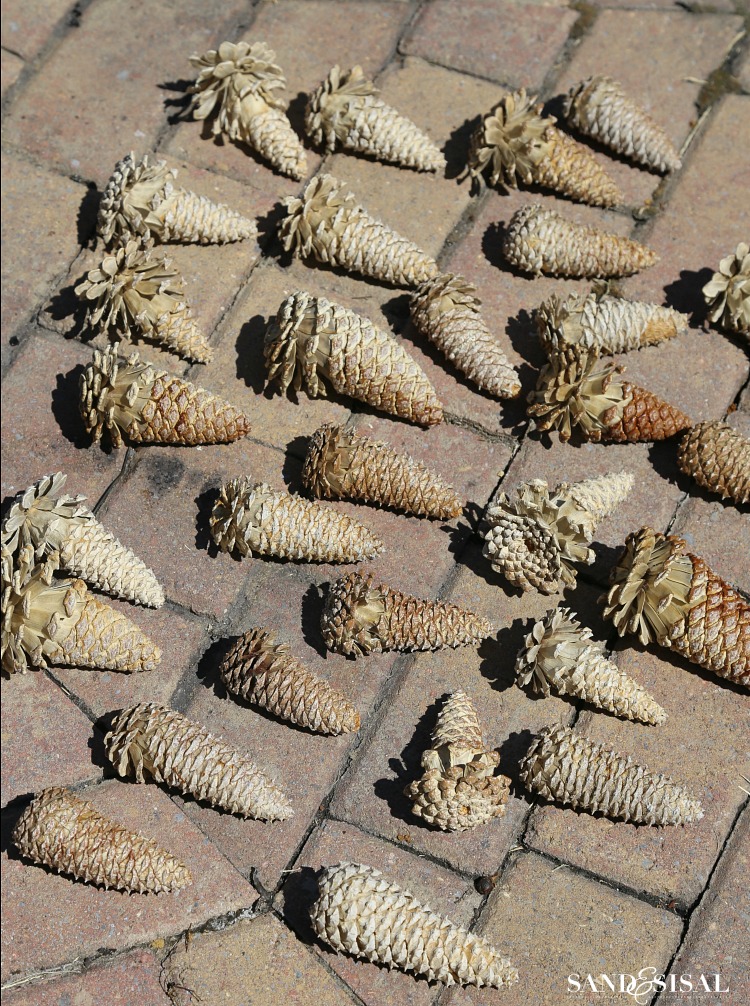
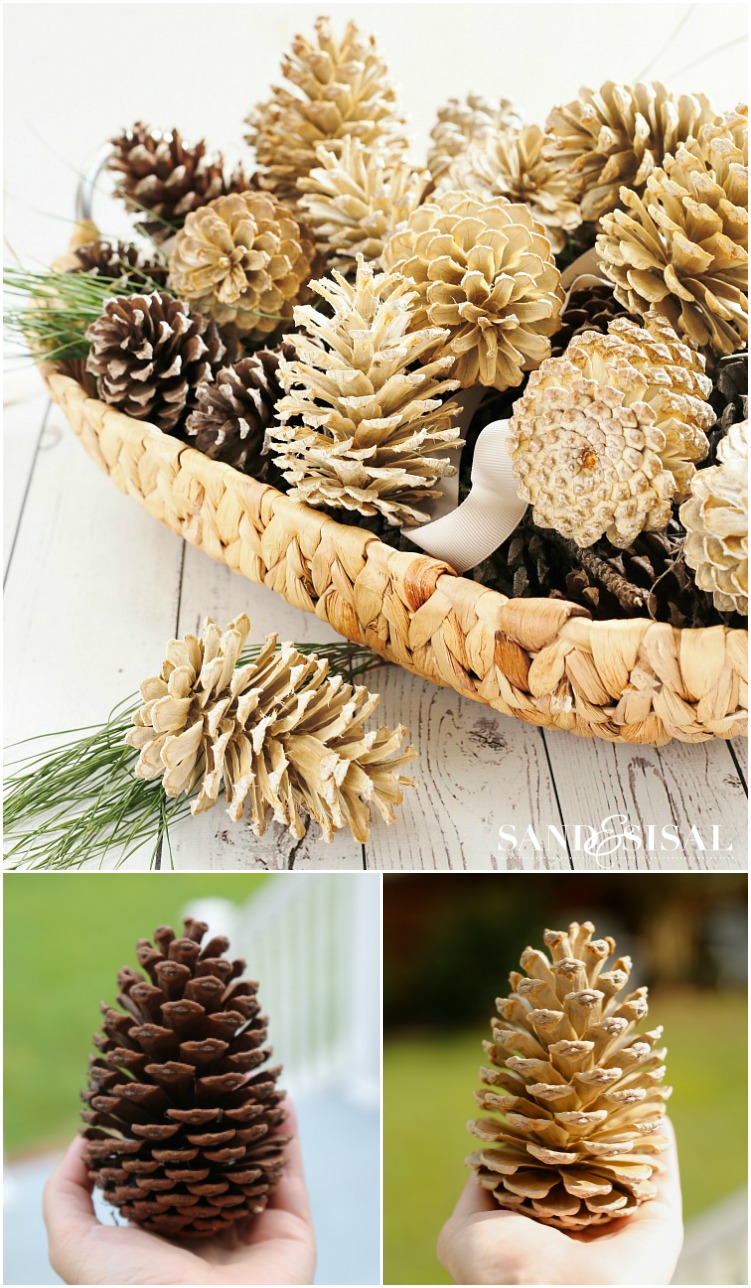
You will be giddy with excitement when they open and reveal their Marilyn Monroe gorgeousness. The decorating possibilities are endless with bleached pinecones! I can’t wait to start crafting. A frequently asked question is, “Will they smell like bleach?” The answer is no. Drying outside for a few days in the hot sun should eliminate any bleach scent.
I hope you try to make some of these beautifully bleached pinecones for yourself!
KIM
You might also like this pinecone project:
Thank you, thank you, oh Lordy THANK YOU!!! lol I have searched everywhere for a comprehensive tutorial. No luck. Now you show up with exactly what I needed!! Oh yea! I’m a little excited to say the least. Gotta go. Off to bleach pinecones!!
Good luck! Send me a pic when you’re done! 😉
Did you have any kind of a problem with squirrels well you were drying there now?
Hi Claira! No, we don’t have any issue with squirrels. We in fact don’t have many squirrels in our neighborhood. 😉
Awesome! Thanks so much for the tutorial! I’ve pinned it for future reference, and I will definitely refer to it!
Here’s another tip: you can make things with the pinecones while they are in their wet, shrunken stage. For instance, you can make a wreath with wet pinecones and then place the wreath in the sunshine or oven to dry. The pinecones will open and will become interlocked in the process, and you’ll end up with a much richer, fuller creation than you could have crafted with the dry cones.
What a FABULOUS tip! Thank you for sharing that Richella! My next plan is to make a wreath and yes using them while they are wet would be less “painful”. Those babies can be sharp!
Great idea! I have 2 pine trees and a love – hate relationship. Got buckets. Going to dollar tree for bleach. Hope they have it.
Some friends may get “repurposed” cones for Christmas!
Thanks Carol!
First off … hush now about pinecones! You’re jumping the season. But I bleached pine cones last year and it was pretty comical. All turned out fine but the husband was perplexed as to what I cooking up in the basement this time. I will be interested to see if they are still in one piece when when I pull them out this year because I kept soaking and soaking them because they didn’t seem to be getting lighter. Of course they lightened up just fine when I baked them.
Ha!! I decorate with pinecones from Sept-Feb. but the bleached ones make the decorating options a bit more expanded, especially with my lighter coastal decor. And yes, once you bake them then that is when they reveal their bleachy-goodness. 😉
Hi, GREAT pin! If I were to bake, what temperature and for how long? I have a lot of stray cats and a TON of squirrels where I live and I don’t trust that they will be left alone.
Hi Claira! I tried it at 275 degrees for 6 hours but I didn’t find it as successful as just placing it out in the sun on my bricks. Thanks so much!!!
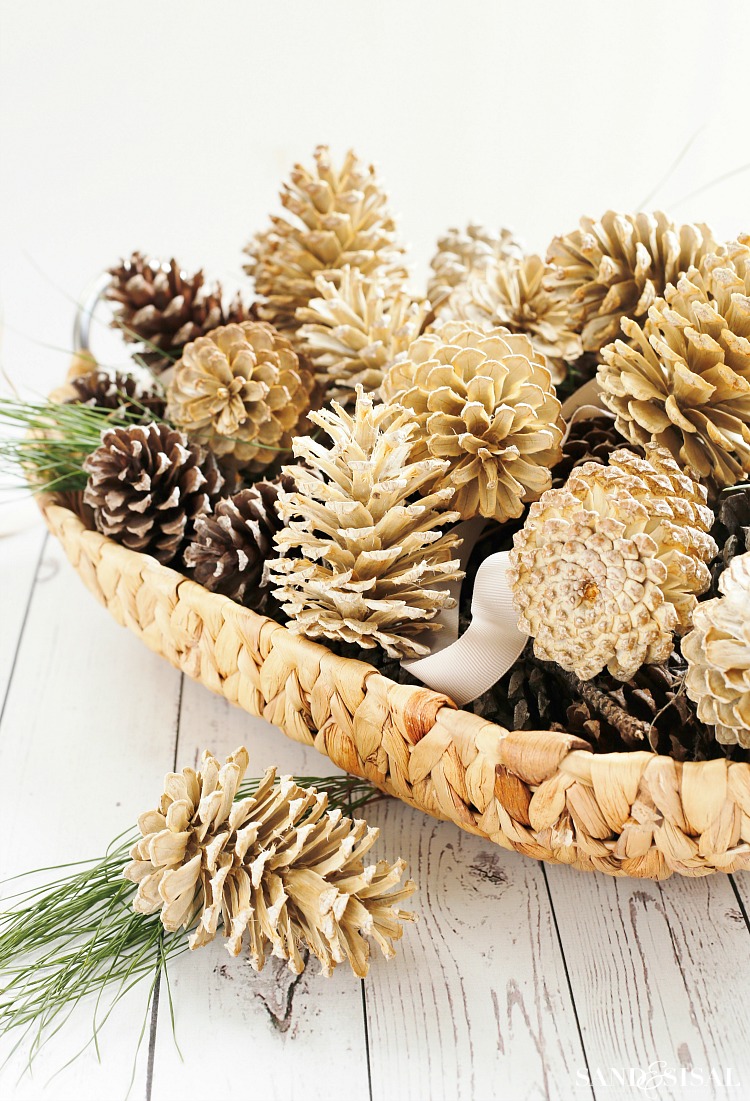
I have never heard of this before, but it’s an interesting idea. The bleached ones actually look nice when paired with the darker ones. Thanks for a fun and easy tutorial!
Thanks Debbie! I like the contrast of mixing the natural with the bleached. Keeping it interesting!
Can you scent them and burn them after bleaching them this way?
Those are gorgeous! They’d make a beautiful wreath. Thanks for the tutorial Kim.
– Susan
Kim ,
These are just wnderful. I’m going to try this this weekend. Thanks for the tutorial!
Do they retain the bleach smell after drying them?
Hi Kim! I was worried about that too but, nope, not at all. There is no bleach smell, not even if you bake them in the oven. The only smell I had in the oven was a slight pine sap smell.
Thanks for this added info. I was concerned about a bleach smell too. Now I know how I’m going to get my crafting on this weekend!
I tried this last fall. I’d did NOT work for me. Just love the look. not sure what went wrong. Did just what it says.
Hi,
Does it matter what bland of bleach that you use ?
Thanks
Nope! Any brand of bleach you choose is fine.
i was looking ahead for Christmas decorations and found this….I actually have a pinecone wreath my mother made more than 30 years ago that is still in perfect condition ( can you believe it?) …..you have inspired me to bleach it to give it a new look And a new life! Thank you for the great tutorial!
Hi Linda! Thank you so much! I want to highly caution you before you bleach your beloved mom’s wreath. I’m assuming are attached to a wire frame, correct? If you were to put that wreath into the bleach solution then the metal will errode and rust. IF you want to give it a new look then you can always spray paint it white or what ever color you desire. Best of luck on whatever you choose! ~ KIM
Yikes!I never gave it a thought! You are absolutely correct! Thanks for this…..
I’m sorry it didn’t work out for you Maxine. There could be several factors at play. Maybe the type of pinecone possibly? The pinecones might not have been fully dry before bleaching, therefore not absorbing the bleach as well. You can bleach them a 2nd time for 24 hrs if desired, increasing the bleach to water ratio. I also found air drying in the sun gave better results for my pinecones. Painting is always a pretty option too. Thanks! ~ KIM
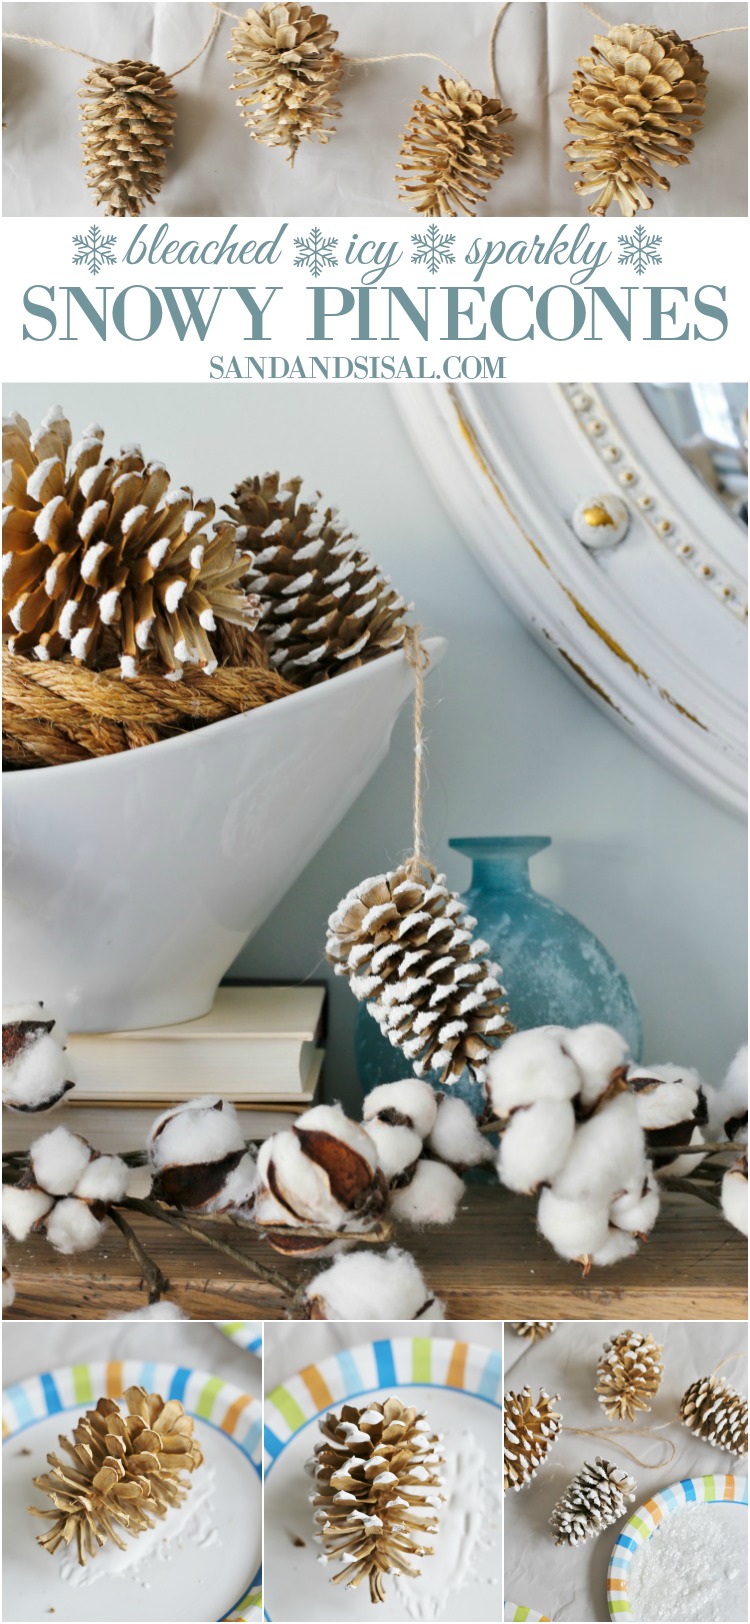
I saw on one pin how to paint a/o use beads or glitter on cones after they are bleached. Do you know which pin that might have been or do you know how to do it?
Hi Sarah! I haven’t seen that pin but I imagine it would be rather easy. You could simply roll the bleached pincone in a plate with a pool of tacky glue on it, then lift the pine cone and sprinkle on the microbeads or glitter. Hope that helps you! 😉
Besides reading a blog post I tend to read all the comments. As in this case especially when post has been how to do something. Usually somebody has good tip or two.. I wondered myself about “cooking” pinecones with bleach on them.
Have always heard if cones are just off ground or tree to cook to get rid of any bugs in them. Found out the hard way one time when we lived in KY. Had sugar cones from tree between our property and neighbors, took them in house noticed little bugs flying around, duh, were out of pine cones. Took outside right away and put fan where had had pine cones in house.
Of course I heard about cooking them after had done that, lol.
When we lived in MT (before KY) if I needed pine cones just had to go down by lake to harvest all the cones I wanted. Would take back bags of them. When I need pine cones here (we live few miles west of Grand Junction, CO, state park is 7 miles northwest of us.) I go to state park to hunt cones. Find lots of those little ones, are great to mix bigger cones with, make very attractive arrangement on wreath or in basket.
One of many things I love about blogland, so much to learn, readily available.
Happy New Year.
Thanks Jane Ellen! My sister’s yard is chock full of pinecones. I love the idea of mixing the little ones with the larger ones for a wreath! I just need to find some small pinecones now!
If you are using pine cones from your yard, you have to clean them. I mean really scrub them. If they are newly fallen, they will have sap and bugs and things and they won’t bleach well. Try and get the older pines that have laid the longest if you can, otherwise you have to really clean them to get all the goop off to get a good bleaching.
🌟🌟🌟FOR THOSE OF YOU HAVING TROUBLE, PLEASE NOTE BLEACH DOES NOT WORK. TRY SODIUM CAUSTIC HYDROXIDE. AVAILABLE AT ANY CRAFT STORE. IT DOES A BEAUTIFUL JOB.
The bleached cones are beautiful. Another possibility is a quick dip in latex paint (wire or string the cones first.) Happy crafting.
Absolutely Jane! Great idea!
I have a question pertaining to the bleached pinecones. I live in GA and it pretty cold and will have an overcast most winter.so, it will take forever for them to air-dry. Do you think it would work if I baked the pine cones after bleached to dry them? Thanks for your time!
Hi Brittany! You can bake them but many people are worried about toxic fumes,etc., so I don’t recommend it. I have found that baking didn’t work as well and it took all day in the oven on a low temp. You might want to keep your pinecones and wait until next summer to do the project. Hope that helps! ~ KIM
Can you bake them on a wreath form
Hi Ron! I don’t recommend baking but I do have a friend who told me she wired the pinecones while still wet to a metal wreath form and then allowed it to dry in the summer sun. She said they opened and naturally interlocked with each other creating a beautiful pinecone wreath. I haven’t tried it but she said it worked. Hope that helps! ~ KIM