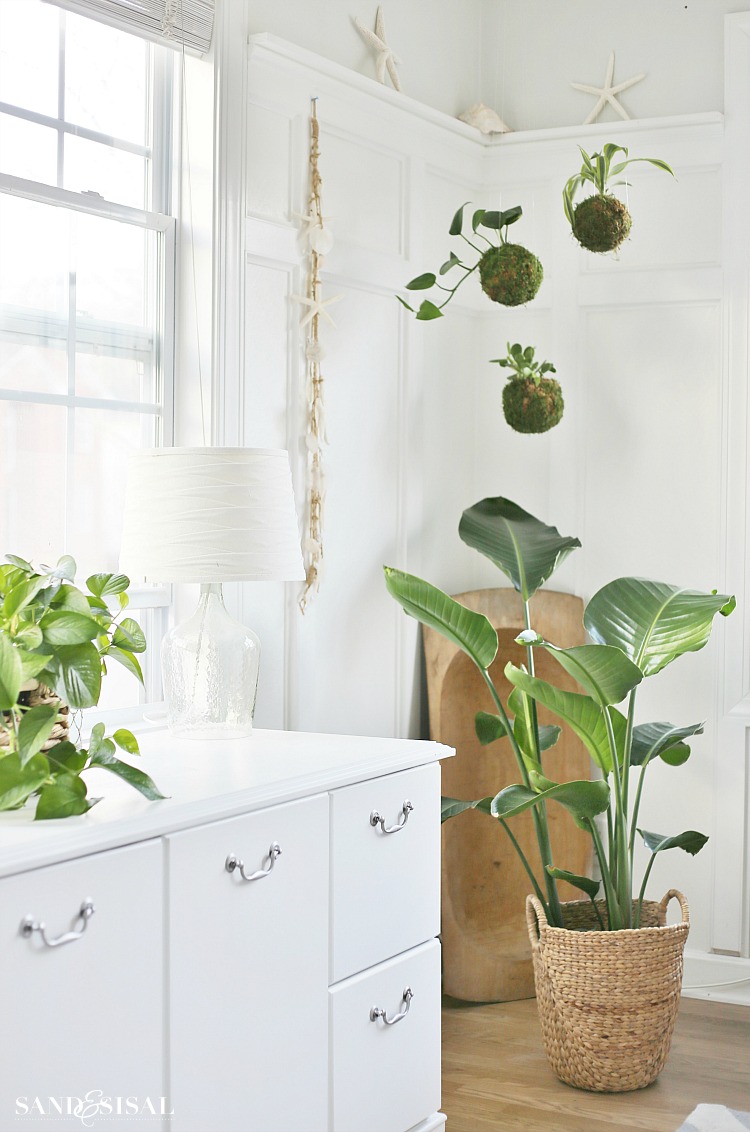
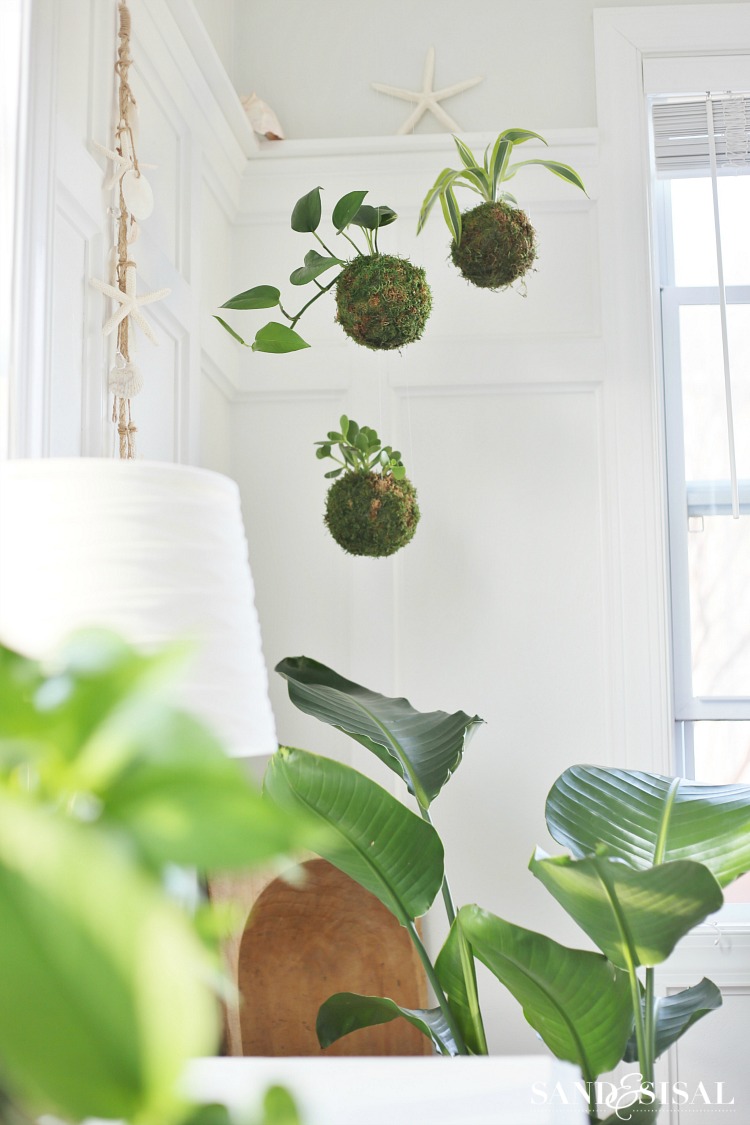
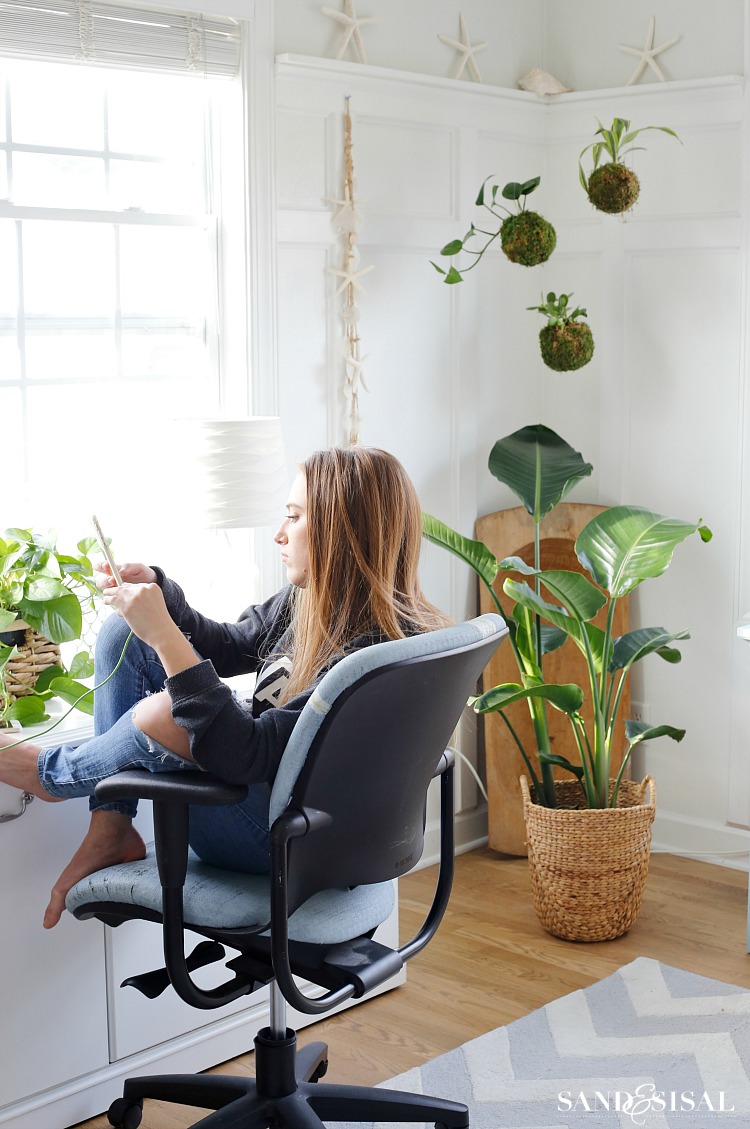
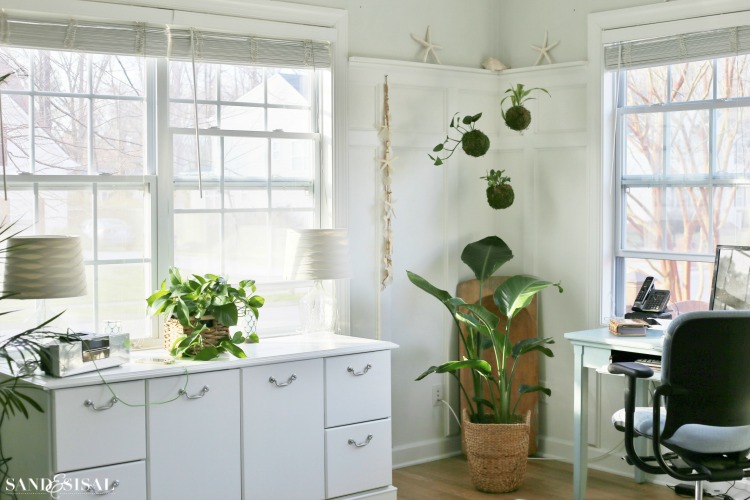
My office is also the sunroom in our home. I’ve been doing some redecorating in the office to give it a more comfortable and relaxed feel. House plants are essential to helping clean the air indoors, especially during the winter months. If you haven’t read my post about 10 Houseplants that Clean the Air, you’ll want to check it out. House plants don’t have to be boring. They can be little works of art! I am so excited to show you a fun and whimsical way to display plants in your home. Today we are going to make DIY Kokedama – Japanese Moss Ball Planters!
Kokedama literally means moss ball in Japanese. They are also called string gardens. Kokedama are a type of bonsai gardening that dates back to the 1600’s. I’ve read several different tutorials on how to make DIY Kokedama and many differ on methods. Most make it look very easy. It isn’t. So after trying a few methods, I came up with the easiest tutorial that worked well for me.
REAL LIFE TIPS: So many of the tutorials out there make this look easy peasy. It’s more challenging than I thought it would be but please don’t let that deter you. I believe in being totally honest and not making DIY look easier than it is. Making your own DIY Kokedama is messy, so put on clothes you don’t mind getting dirty. Your manicure will be destroyed, so if you don’t mind dirt under your finger nails then proceed! Also, I highly recommend preparing the cutting of all the twine, cheese cloth and fishing line ahead of time. Have everything set up before you start, because once you start, everything you touch will have mud on it. Good times!
DIY Kokedama:
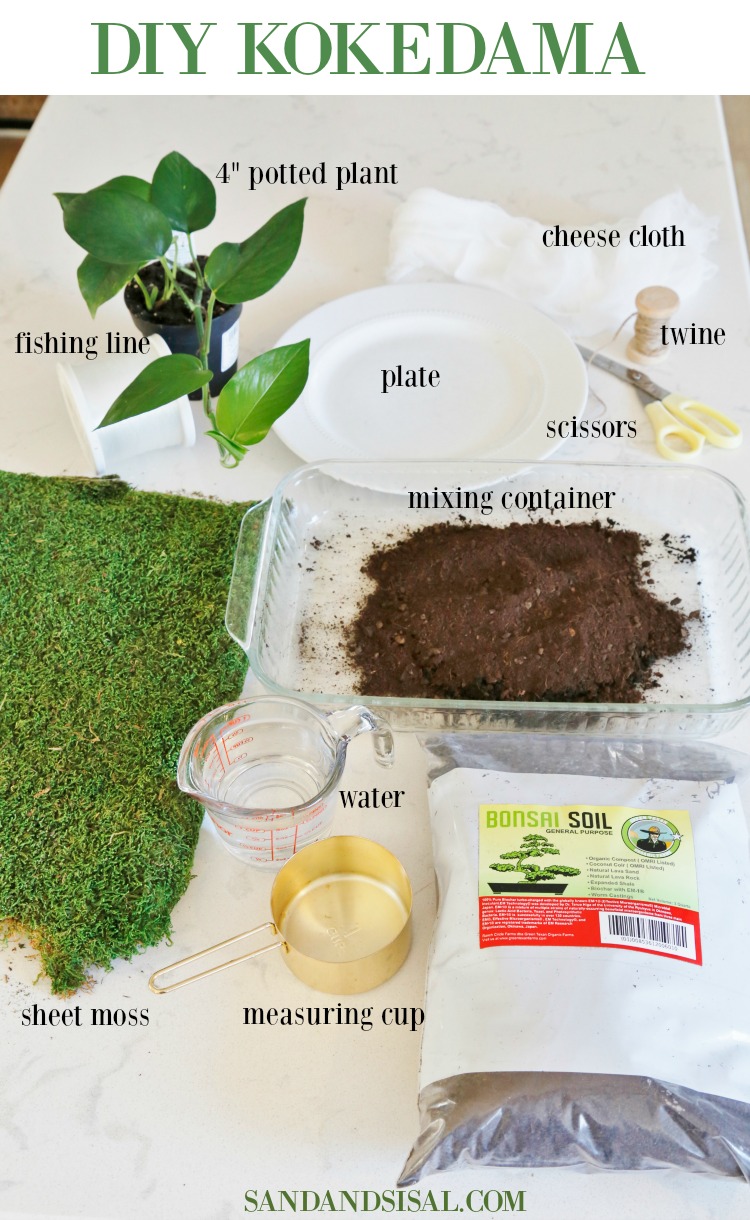
To make a Kokedama you will need the following supplies: (affiliate links provided for your shopping convenience)
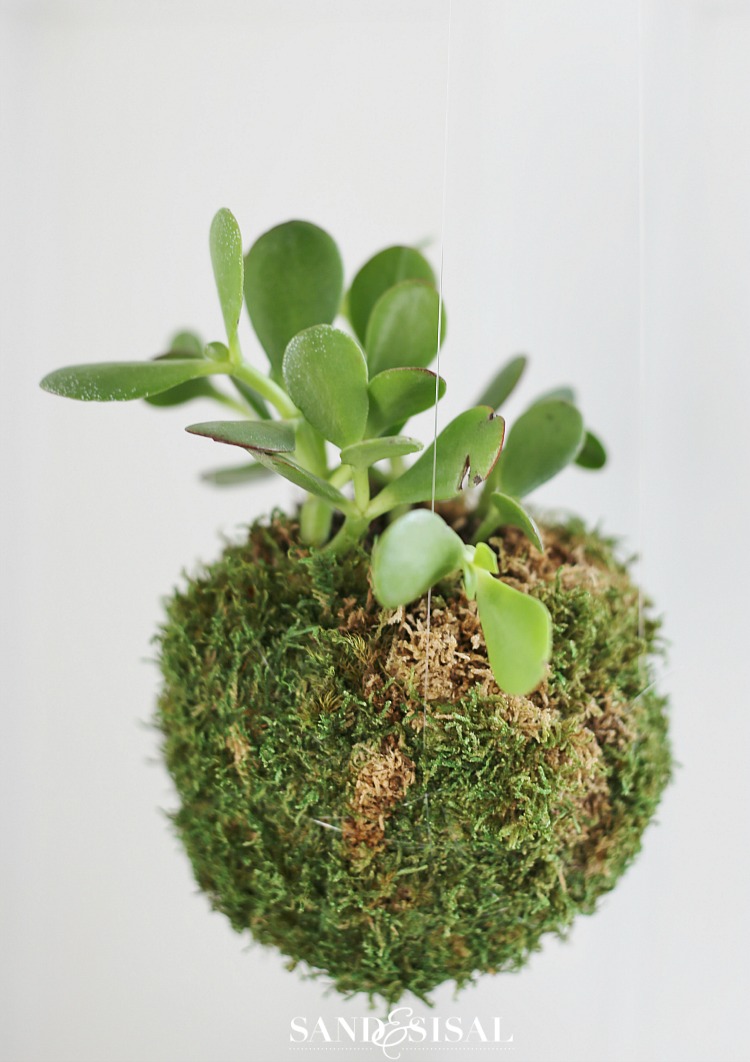
- a 4″ potted plant (I used Jade, Pothos, and Dracanea)
- cheese cloth
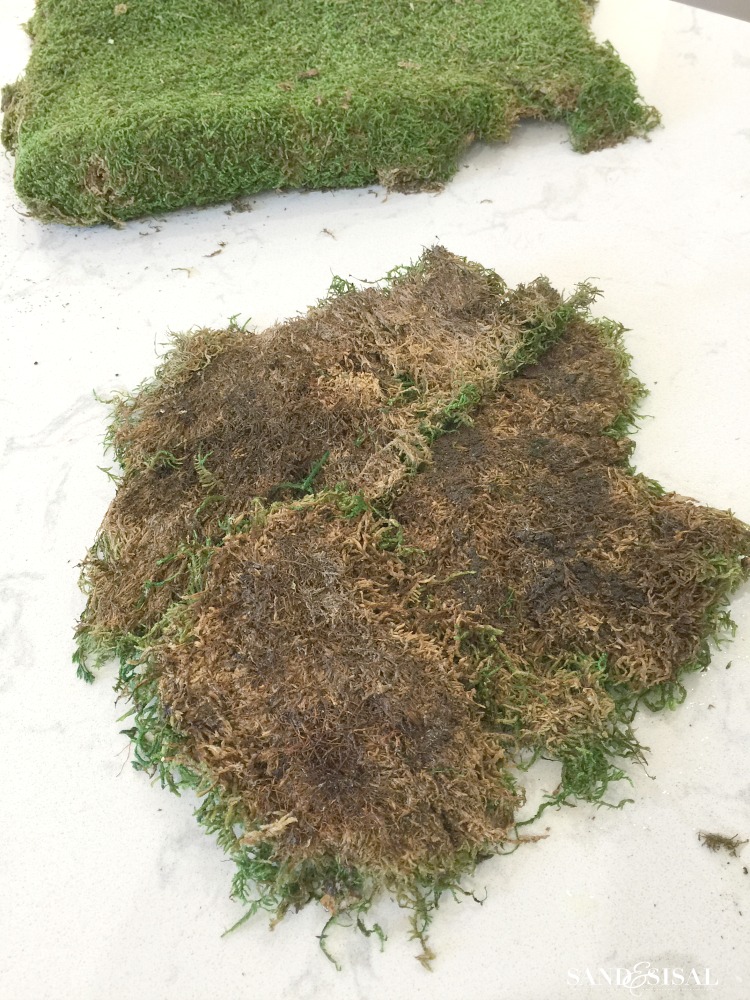
- sheet moss
- bonsai soil
- fishing line
- twine
- measuring cup
- scissors
- water
- mixing bowl
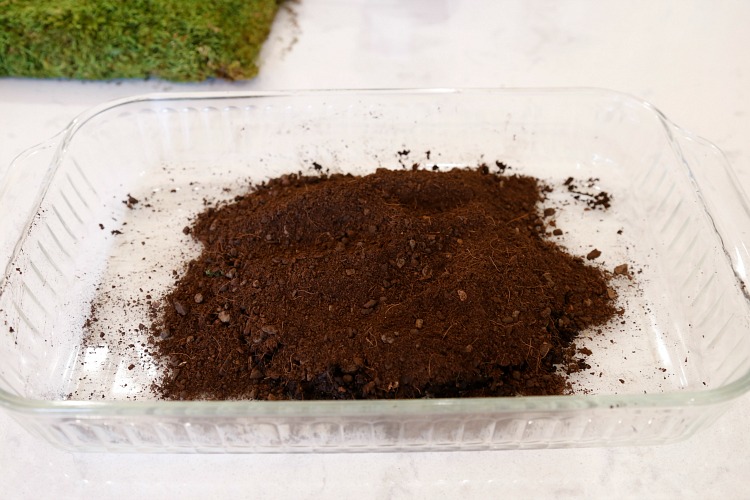
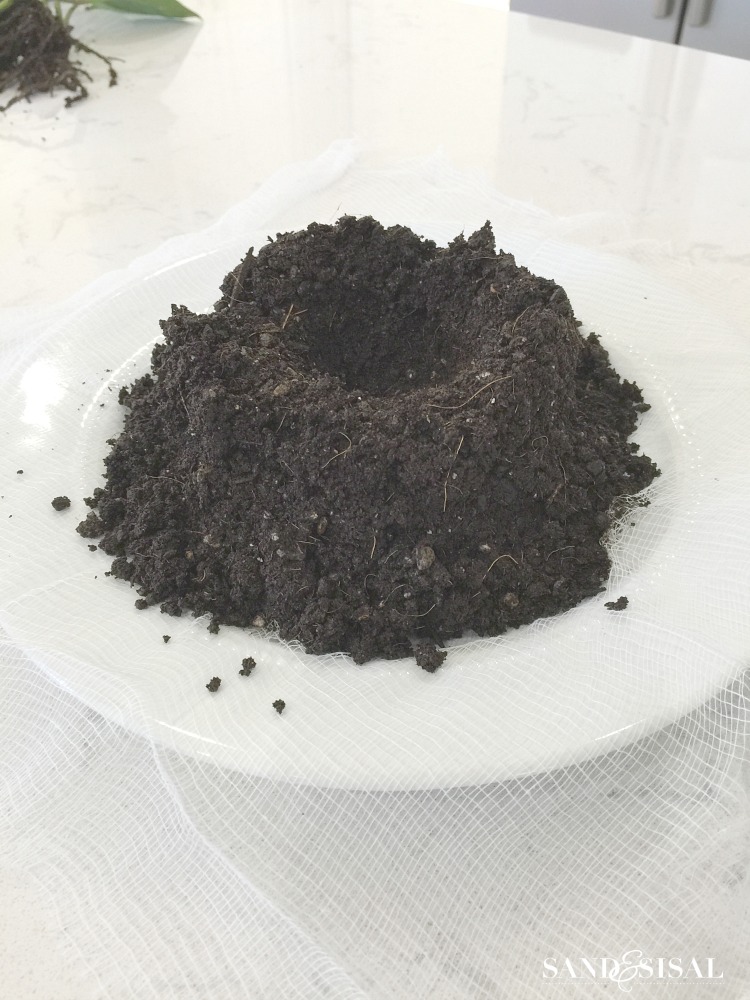
DIY Kokedama Step 1: Measure 2 cups of bonsai soil into a large bowl, dish, or tray.
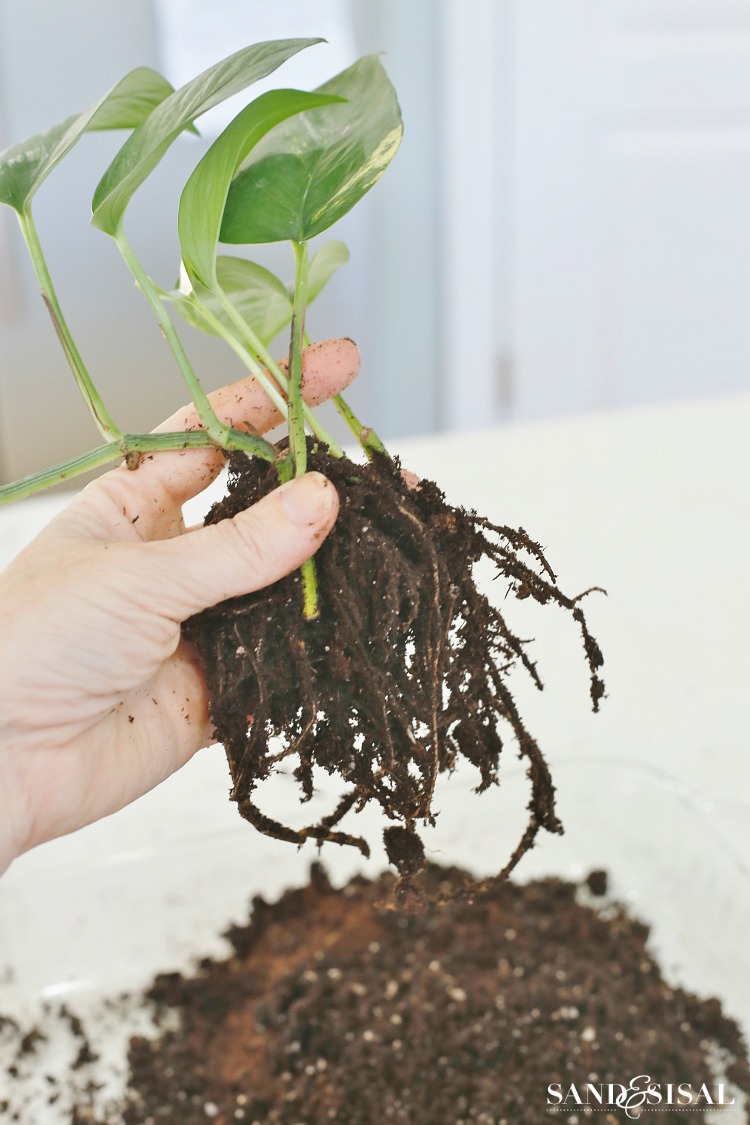
DIY Kokedama Step 2: Hold the plant over the dish of bonsai soil and carefully remove the soil from the plant roots as much as possible, taking extra care to not damage the root system. Allow the potting soil to fall onto the bonsai soil. Set plant aside.
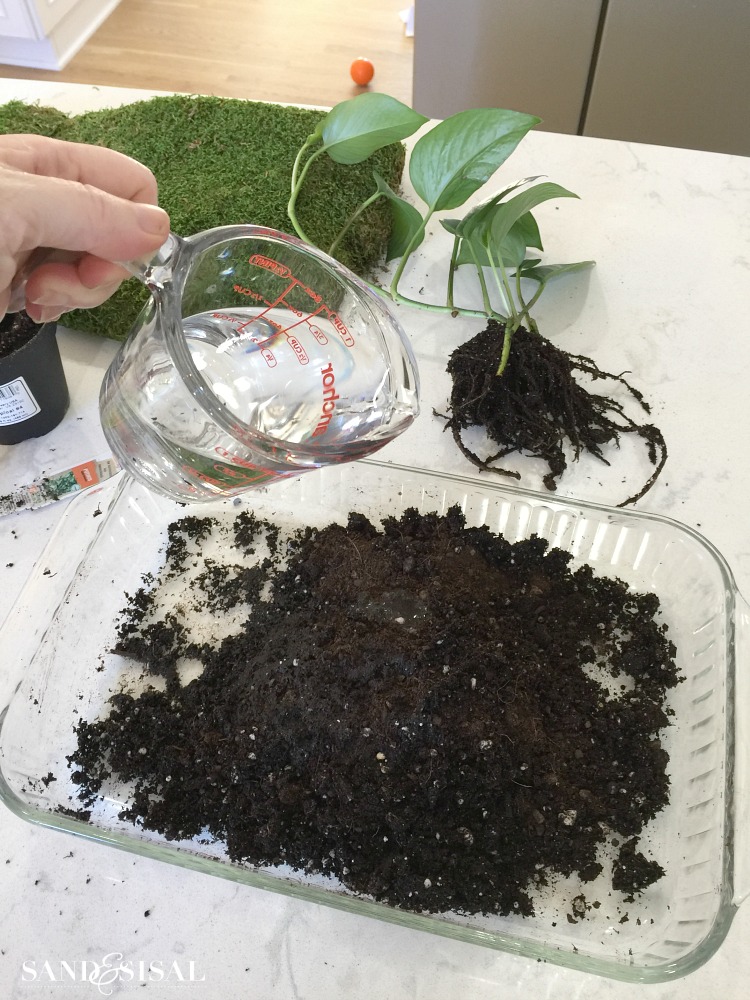
DIY Kokedama Step 3: Pour a bit of water over the soil and mix both the bonsai and potting soil together with your hands. Add more water as necessary until the soil holds it shape when pressed into a ball.
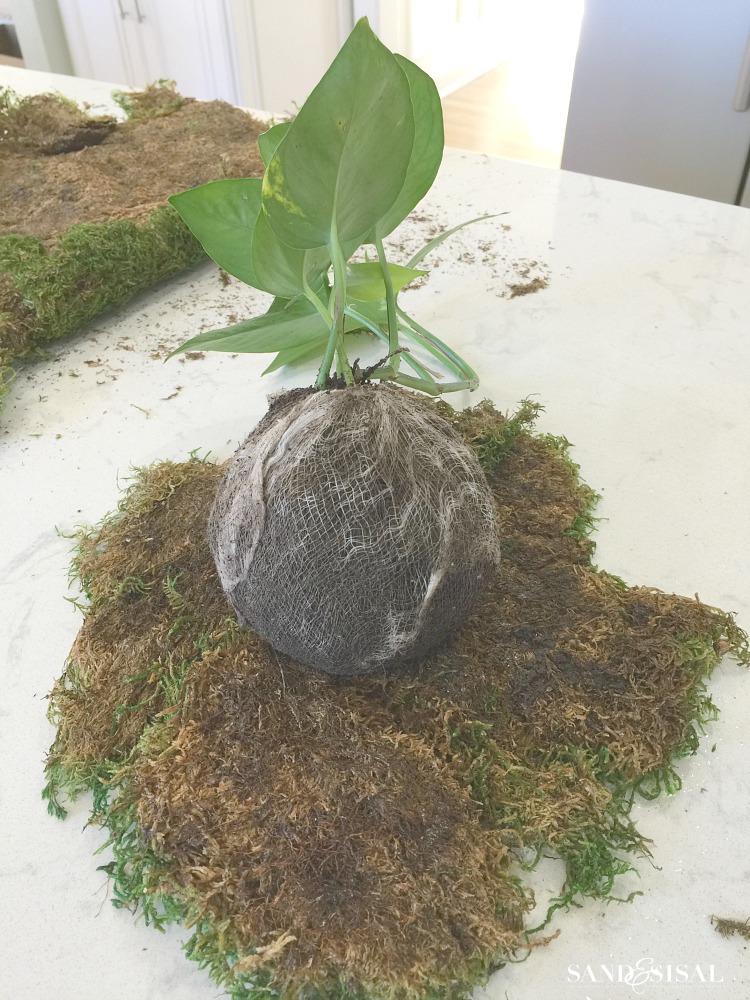
DIY Kokedama Step 4: Cut a large piece of cheese cloth into a square. This piece should be 3-4 inches wider than a dinner plate. Scoop all the soil onto the cheese cloth covered plate and form a hole in the center. This is where you will insert the plant roots. Note- cheese cloth can be found at most supermarkets in the baking aisle or online (link provided in the supply list above)
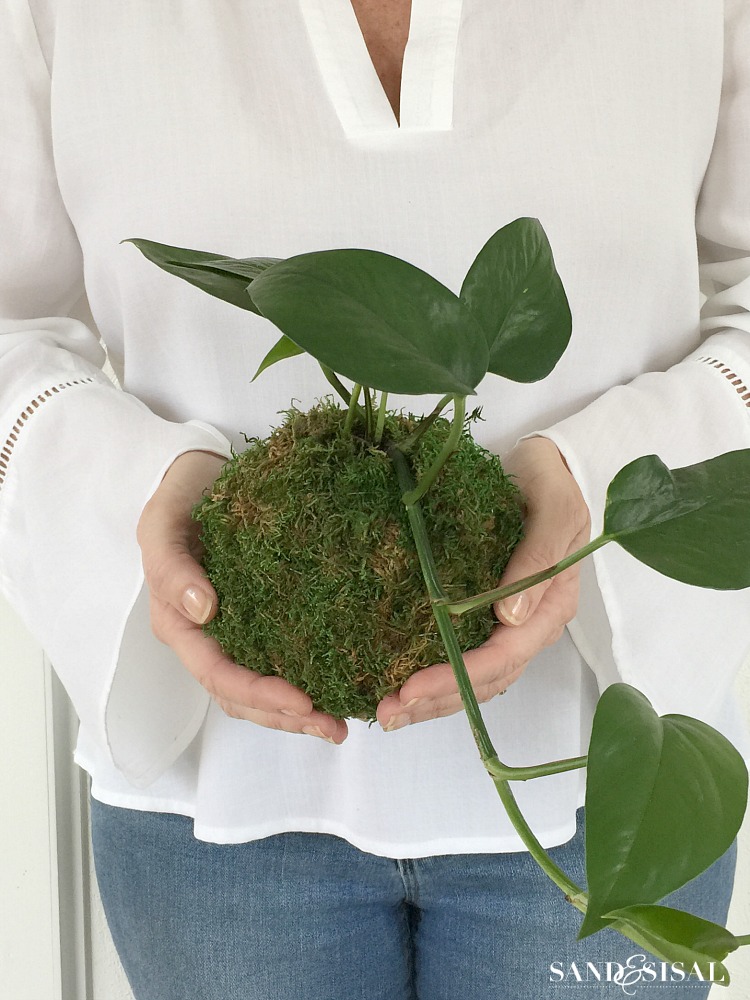
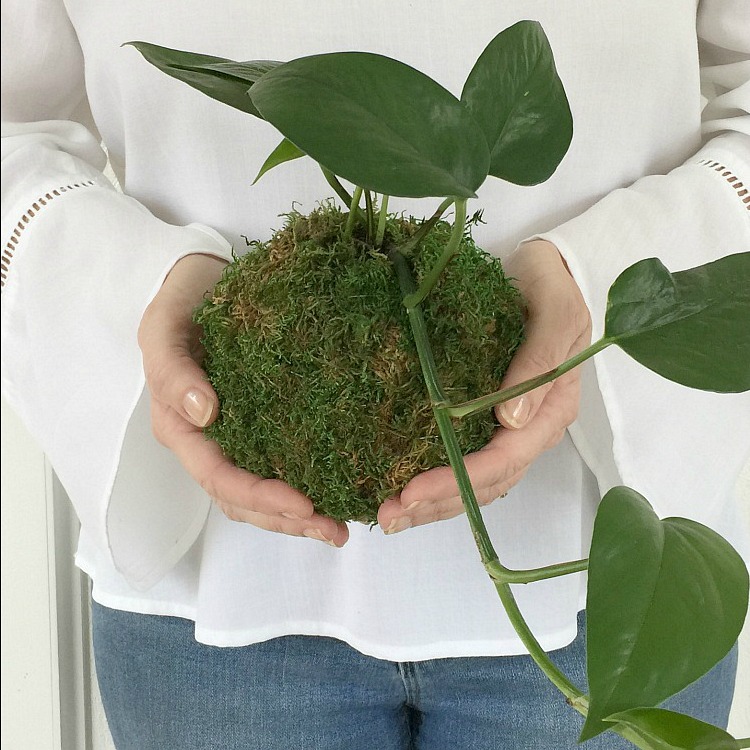
DIY Kokedama Step 5: Place the plant into the hole and slowly gather up the cheese cloth around the soil. Start forming the soil into a ball shape. The cheese cloth is my secret weapon. It allows you to easily shape and mold the soil into a ball.
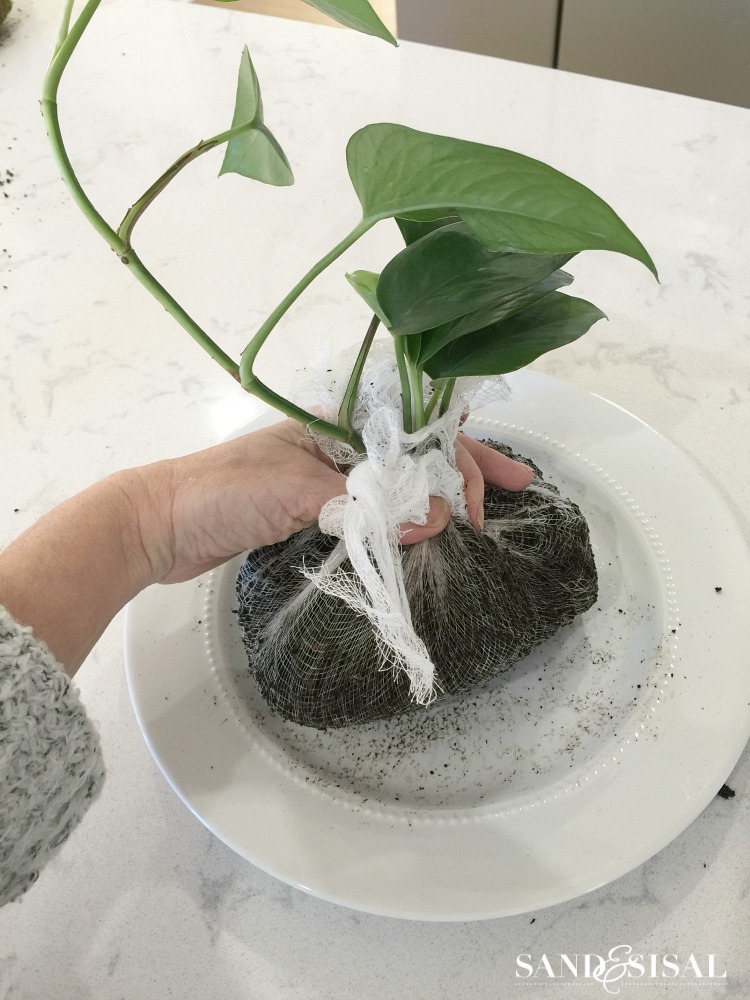
DIY Kokedama Step 6: Secure the cheese cloth with twine. Avoid tying the twine to tightly around the base of the plant. We will snip this twine at the end.
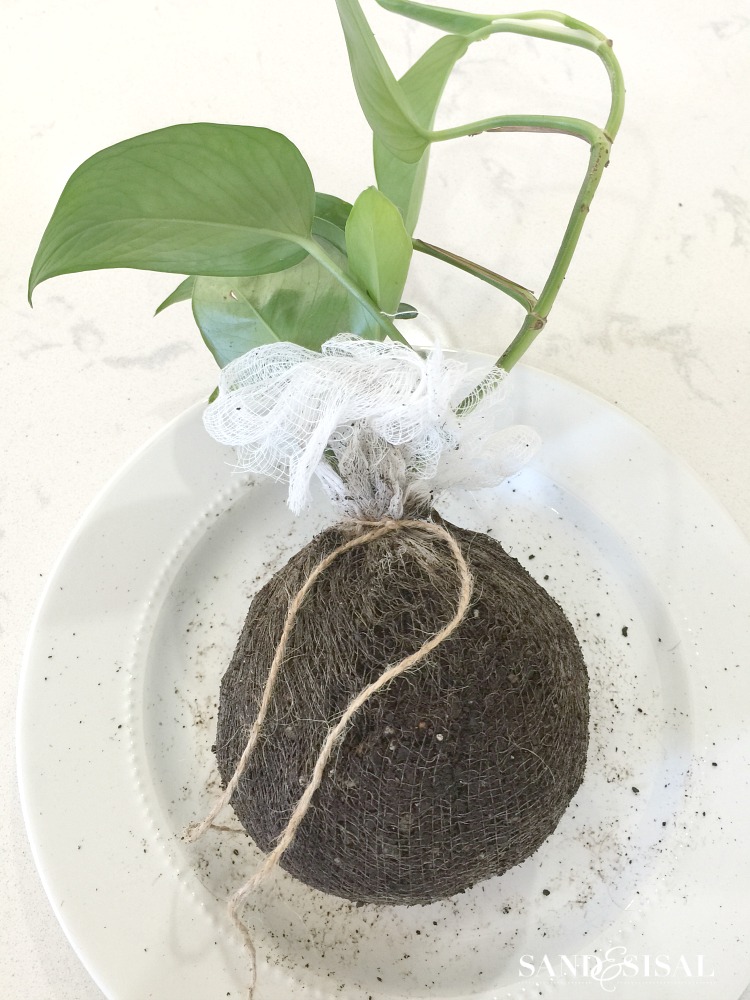
DIY Kokedama Step 7: Fold down and spread out the extra cheese cloth at the top.
DIY Kokedama Step 8: Place the sheet moss into the sink and soak with water until moist and pliable. Allow to drain for a few minutes. Tear a section of sheet moss and place the moss green side down on a counter.
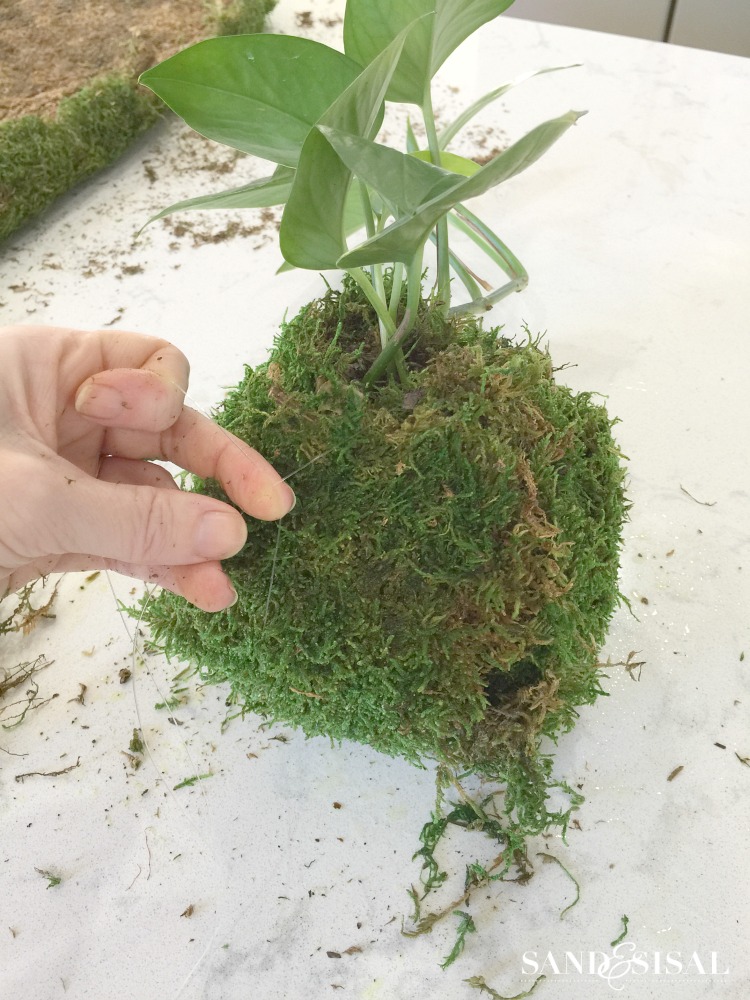
DIY Kokedama Step 9: Wrap the sheet moss around the soil ball and start securing with long lengths of fishing line. I cut several lengths of line that were approximately 6 feet long.
DIY Kokedama Step 10: Tightly wrap each section of fishing line around the moss ball in every direction. Add more moss where needed if you have gaps and then wrap with more line. Tie off each end securely. Twine or string can be used also to wrap the kokedama, which is a very popular option hence the name “string gardens”, but I prefer the invisible look of the fishing line.
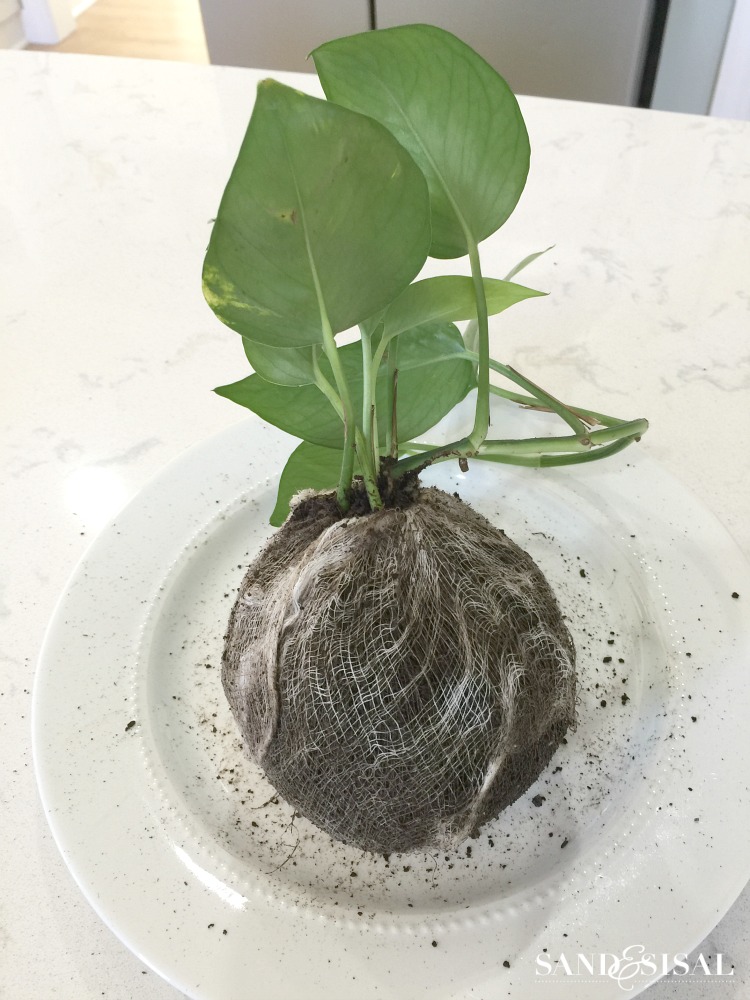
After you are done wrapping and securing the moss, go ahead and snip the piece of twine at the top which holds the cheese cloth together. Snipping the twine will give the plant stems more room to grow, expand, and allow a more air to circulate around the base.
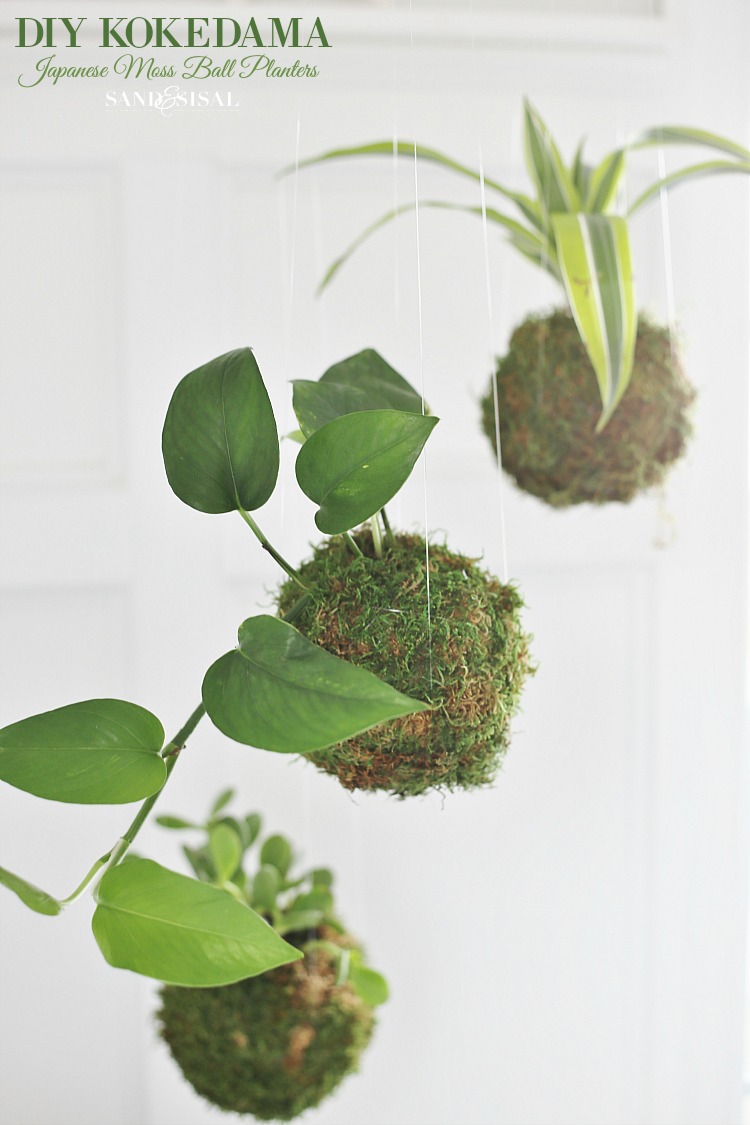
How to Hang a Kokedama
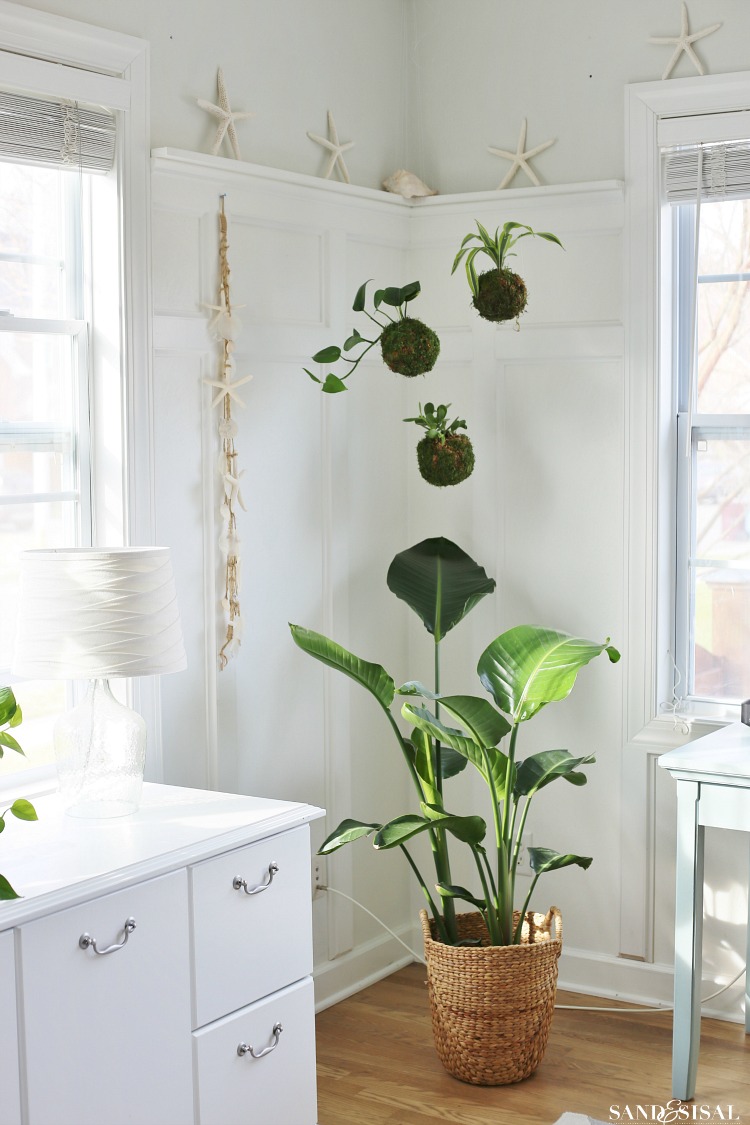
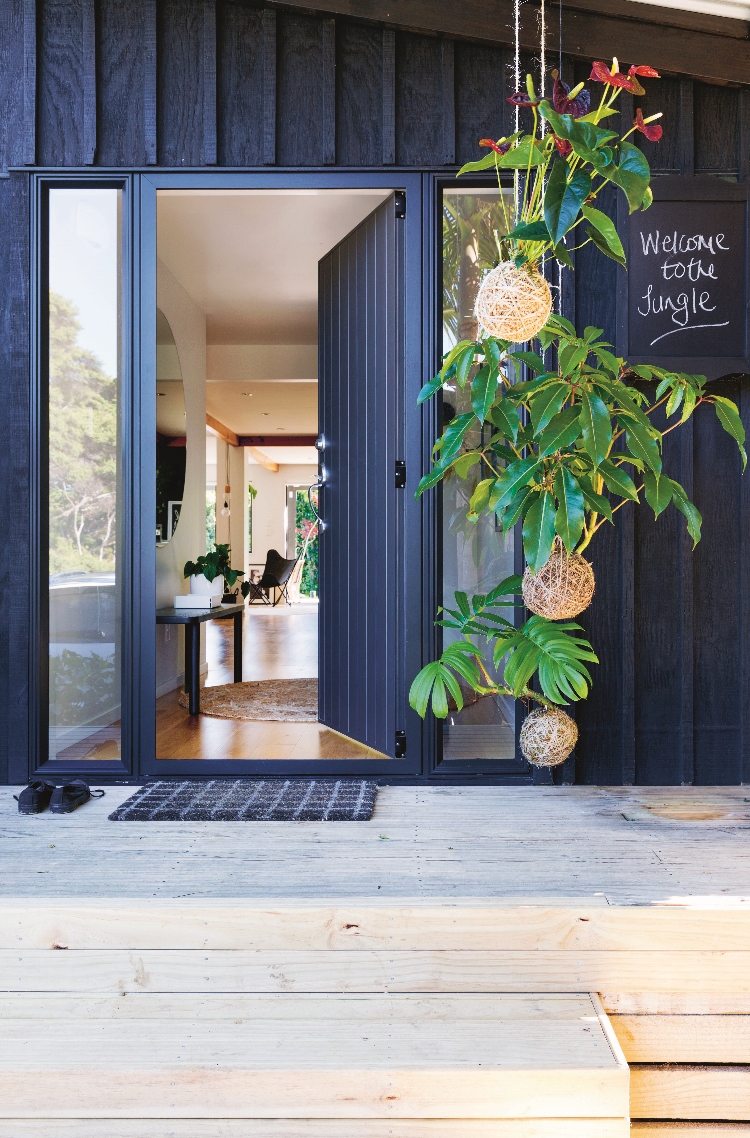
Once the Kokedama is finished I allowed set it upon a cup to drain any excess moisture that was still inside. Then I decided to hang them from 3 hooks in my ceiling. The way I hung the Kokedama was simple. First, decide how far down from the ceiling you want the Kokedama to hang. Next you need to cut TWO VERY LONG lengths of fishing line or string (mine were 10-12 feet long each). Tie the two fishing lines together in the middle. Then spread them apart into an “X” formation. Set the Kokedama in the middle of the “X” and lift up the lines. Tie the top in a double knot at the desired length and then hang. The fishing lines are practically invisible and give the appearance that the moss balls are floating in the air.
How to Water a Kokedama
If the moss ball feels very light or if the foliage starts wilting then you know it is in need of watering. Every 2-3 weeks (or less depending on the type of plant you choose) dip the Kokedama into a bowl full of water for approximately 10-20 minutes. A dry kokedama will float in the bowl at first then sink down once the water starts being absorbed. Remove the soaked kokedama and drain in a collander for a bit. House plants love being misted too, especially during the dry winter months so don’t skip out on misting.
My kids came home from school and loved the new, vibrant, and fresh look of my office with the new plants and Kokedama. My younger daughter was especially loving the sunny, relaxed and inviting atmosphere.
I love how the DIY Kokedama look in my office! They are fun, whimsical and I love that they are cleaning the air while I work.
I hope try making a DIY Kokedama yourself! Don’t forget to Pin IT if you LOVE it!
Happy Indoor Gardening!
KIM
You might like this post too!
Hanging Kokedama – Creating Potless Plants for the Home
I was going to do a tute for these last year on my blog, but the process seemed daunting! This is the best I’ve seen on the net (never saw the use of cheesecloth and think that’s a great tip)! Awesome step by step instructions and gorgeous pics! Love it!
Thanks Doreen!
Yes, the other methods sound easy but they aren’t… I’ve tried unsuccessfully. I thought why not use cheesecloth so that the soil doesn’t collapse and make a mess everywhere. It was a 1000 times easier. I hope you try making one now! 😉
i love these. have never seen anything like it.
Thanks Laura! Aren’t they cool? And to think the Japanese have been making Kodedama since the 1600’s! So fun. 😉
I love all the sun and the green with the natural materials of the baskets and the white!! That’s the look I’m craving for our new house! Also, totally distracted by that white blouse in the first picture – where is it from? Love it!! And I will definitely have to try a kokedama or two at home!
Ha! Thank you! The top is from Anthropologie. I love it! My sister gave me a gift card to the store, otherwise I doubt I would have splurged.
How unique! In the spring I will attempt this and hang them on my screened in porch. Looking forward also to sharing this with my Master Gardeners group. Maybe I cannot share a gardening idea that is new to everyone. 😀
Thanks Anita! It was fun getting dirty in the middle of winter! They are quite different but I love their whimsical vibe. Have a great week!~ KIM
Love these! I’ve never heard of them before.
Thanks Gina! They are fun aren’t they? Thanks for stopping by! Have a great week!
These are so cute! I’ve never seen them before, but I think I might have to make a couple for my bedroom!
Thanks Rachel! They are fun to make!
what other plants could we use? such a great idea.!
Hi Lyn! Thanks! Different types of ferns and philodendronare are great choices too and easy to grow. I’ve seen some with succulents too but with those you wouldn’t want to water them very often.
Hi I cant wait to try this. Can I use any plant??
Hi Sandy! You shouldn’t use any plant. Choose plants that are slow growing, stay relatively small, do not need full light, and choose plants that do not require a lot of water. Hope that helps!
Hi, KIM It’s a sooo nice work. I appreciate your DIY project. Hope I Will get more unique DIY guide from you. I have decided to make kokedama so I need cheesecloth. Would you kindly tell me which cheesecloth do I choose?
Hi Rebekah! Thank you! I find cheesecloth at most grocery stores in the baking aisle. Nothing special needed.
I love the look, but how do you water them?
Hi Pat! You must have missed that part. There is a paragraph all about watering near the bottom of the blog post. But it’s easy! Just put the kokedama in a bowl of water (or a bucket if it’s a large kokedama) and allow it to soak up water for 10-30 minutes then drain in a collander and then hang it back up.
Hey, Kim Good job…! I read and see your full article and get some informative information about DIY Kokedama. I decided to choose this. I am full of inspired now. I am following your technique.
Thanks for sharing your post.
Thank you Martha! I hope you give them a try! They add a unique and fun splash of greenery to any modern home.
Hi! I just discovered this post. I have to tell you, it is EXACTLY what I was hoping to find. This one, I think I can do! Off to buy plants. Thanks so much.
Thank you Linda! They are fun (yet messy) to make but I love kokedamas! Have fun making yours! ~KIM
Wow! What a great tutorial!
I just came across one of these for the first time at the florist’s. They used an Orchid! I BOUGHT it! ha ha ha!
It is so beautiful, I thought that I would love to make these as gifts. Unusual and so so lovely.
Yours is absolutely the best tutorial I have found. The cheesecloth tip is Brilliant!
Thank you so so much <3
Ps…wish I could show you a pic of mine. I have laid it on its side in a small shallow white dish on a glass table, flowers are bright pink. It is stunning! Thank you again!
Thank you so much Deborah! Your kokedama sounds beautiful! The cheesecloth really makes creating one of these a whole lot easier! Thanks for stopping by! ~ KIM