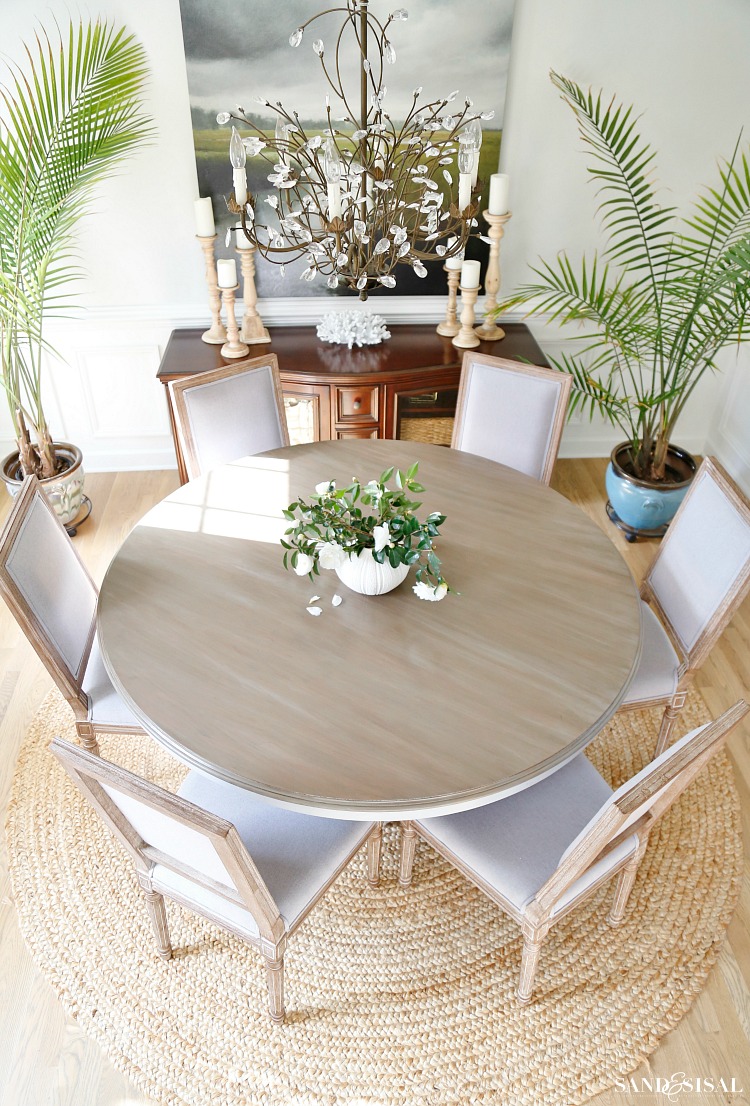
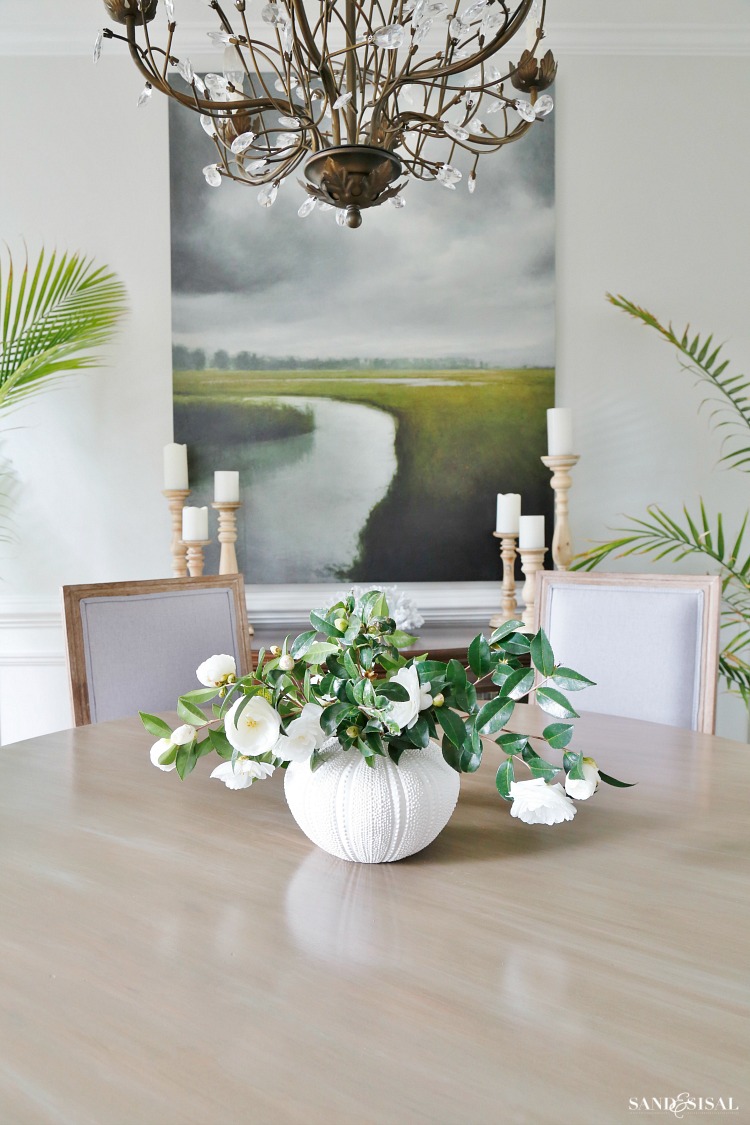
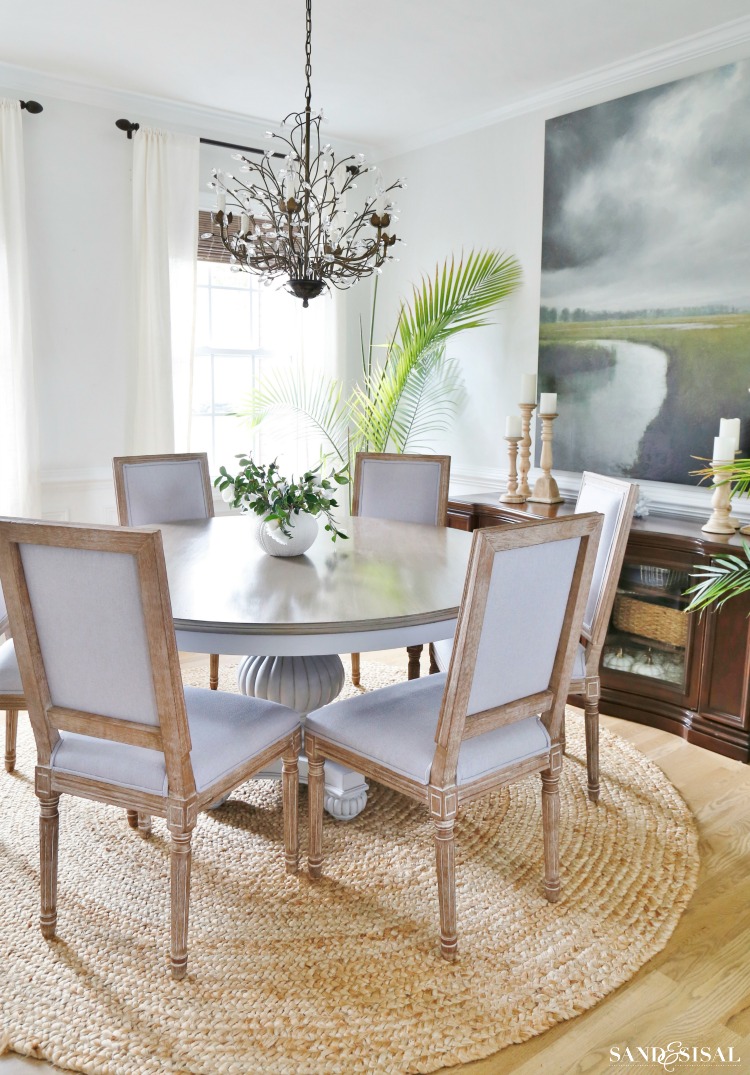
Our dining room has been going through a few changes lately… AGAIN! If you follow me on Instagram, which I hope you do, you might have followed along with my Instastories and watched the live step-by-step process of refinishing our dining room table. I really love how the dining room have evolved over the years, but I’ve never liked the cherry red tabletop. So if you don’t love something then change it! Today I’m going to show you my new Driftwood Refinished Veneer Tabletop and share lessons learned along the way.
This is a view of our dining room taken 8 years ago. The pedestal table and chairs were a thriftstore steal for $120!
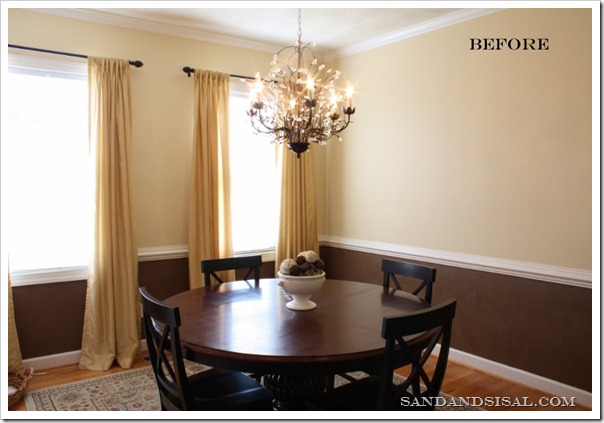
I tired of the black and lightened up the base and chairs a couple years back with Rustoleum Chalk Paint. It was a huge improvement but the tabletop unfortunately looked even more red than before. Don’t get me wrong, I know it’s perfectly lovely as is, but I desire a lighter, coastal vibe. The traditional dark wood just isn’t my style.
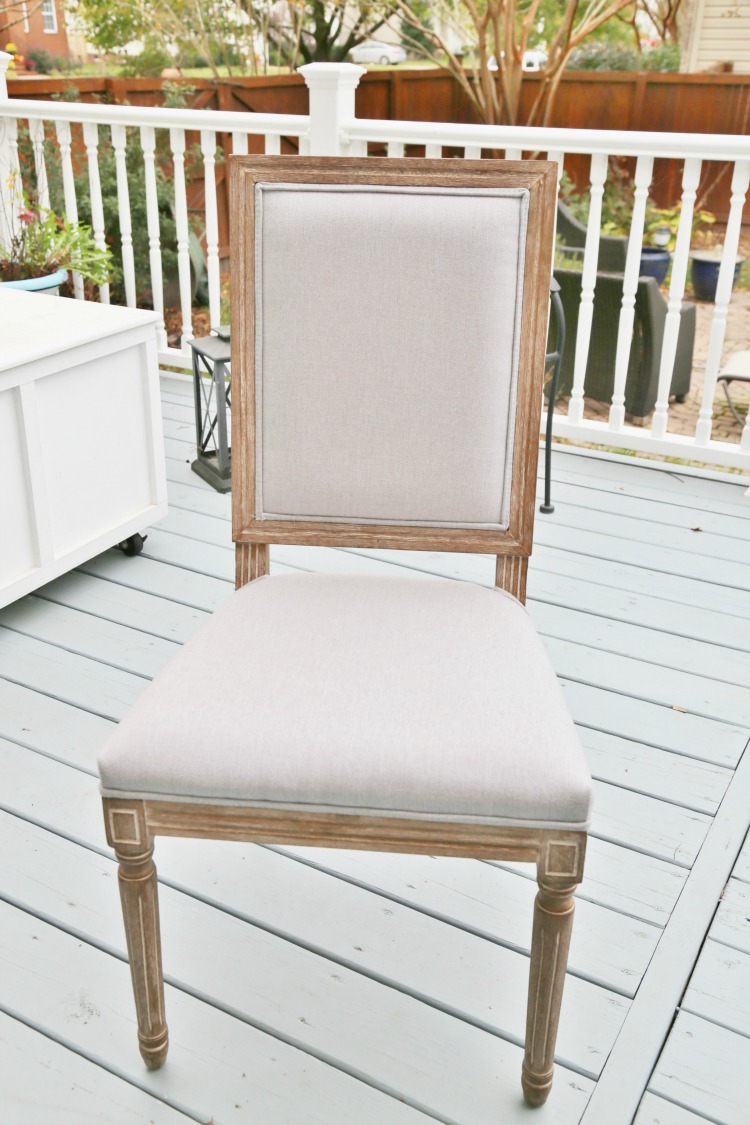
A few weeks ago I walked into HomeGoods and found these gray linen chairs with a rustic driftwood finish. I was instantly in love! They were a fabulous deal too! Once I brought the chairs home, I knew the tabletop had to be refinished. Matching the chair stain was going to be a challenge but one was ready to take on!
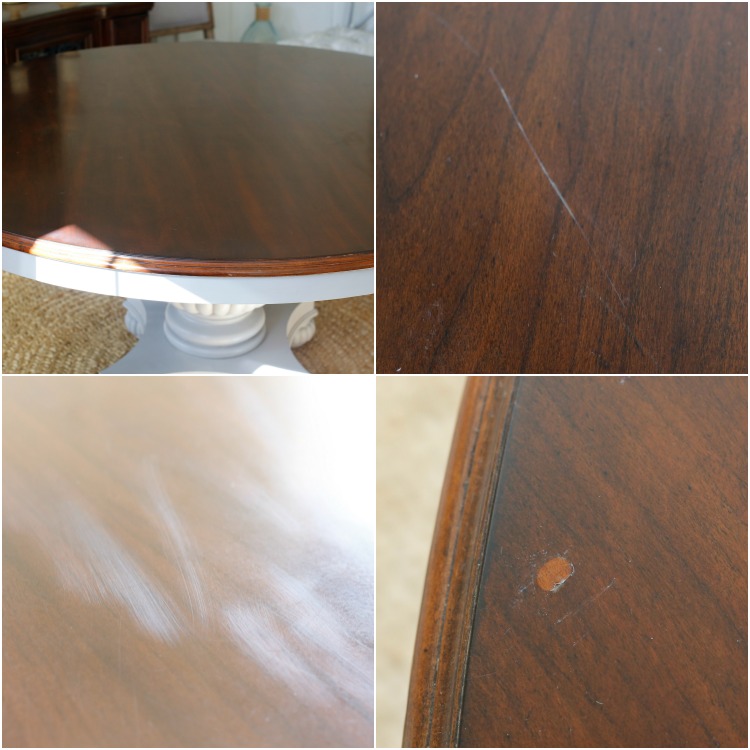
The problem with this dining room table was that I had zero clue as to what it was made out of. My husband guessed it was a veneer top, which posed a whole new set of challenges for refinishing. If it was a veneer then the next mystery was the type of wood veneer. The tabletop had a very thick, shiny, glassy varnish. The tabletop had several deep scratches, abrasions and chips.
Refinishing the tabletop would be a risk I was willing to take, but if it resulted in a failure then I decided I would simply paint it. I really despise stripping furniture. It isn’t a fun process. This time I tried Ready Strip paint and varnish remover. They recommend slathering it on thick and allowing it to sit until it changes color. It goes on green an turns white.
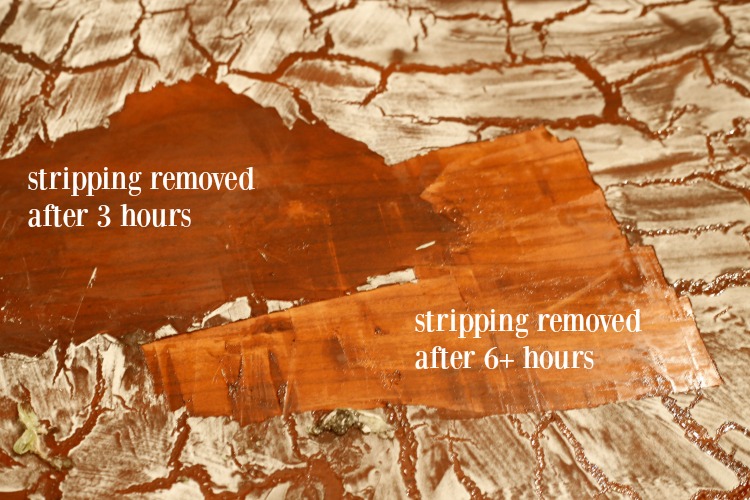
Now here comes one of my lessons learned. I started scraping off an area after 3 hours and only a bit of the shiny clear coat came off. The deep red stain remained. It was getting late so I left the stripping agent on the table overnight and when I woke up the next morning I started scraping. Oh… my… mistake! The Ready Strip had dried out too much and scraping it off was so difficult! Removing the thick layer of sludge was exhausting, but once I started, I had to finish. It was like removing a thick sticky layer of dried molassas. YUCK!
At this point I started to panic. Areas where I had applied the Ready Strip too thin didn’t come off. The table looked horrible. I called my sister and she had refinished her solid wood, dark stained table (see it here) and recommended reappling a 2nd coat of Ready Strip.

I reapplied the stripping agent and removed it after 2 hours. Finally, I was starting to see the results I wanted. After stripping, the table needed to be cleaned and scrubbed with mineral spirits and steel wool (grade 0).
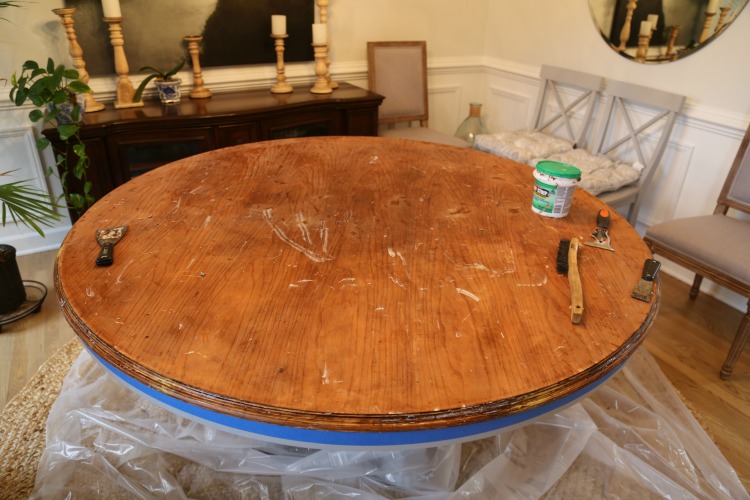
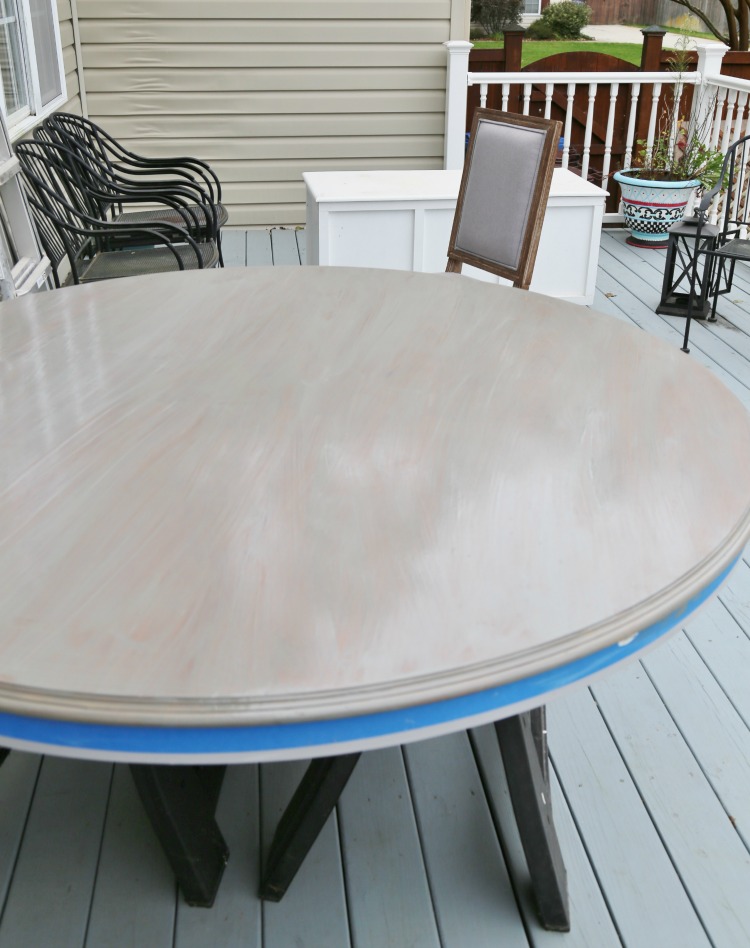
After cleaning the tabletop we disassembled the table and took the top outside to sand. I would have stripped it outside also, but we had a very rainy week. The cherry red stain had to go! I started sanding with my power sander using 80 grit sandpaper, then moved onto a 100 grit, and finished with 120. The legit risk with sanding a veneer is that you have no idea how thick the veneer is. It could be as thin as paper or 1/8th+ inch thick. After sanding I wiped down the tabletop with a damp cloth, removing any remaining sawdust and allowed the tabletop to dry.

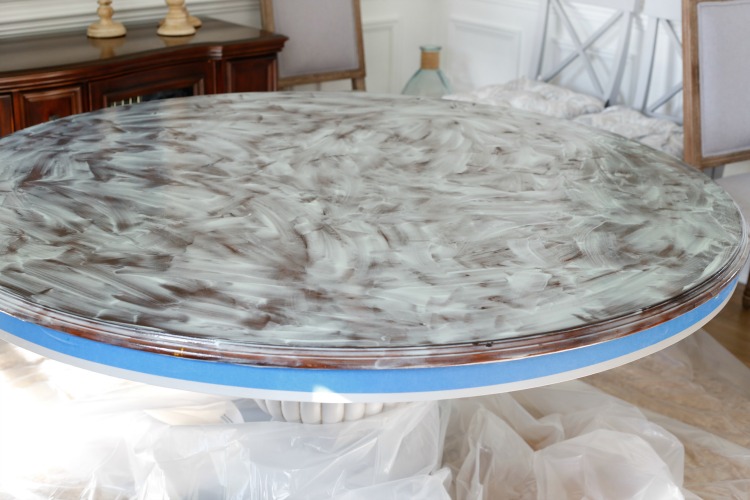
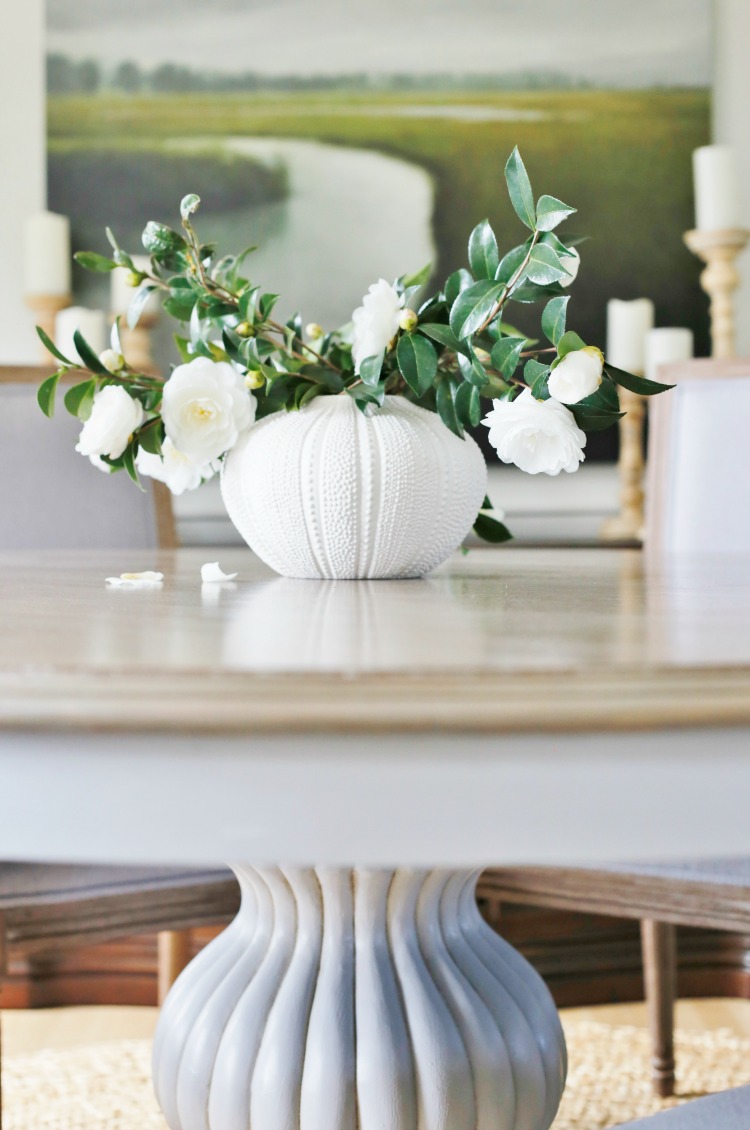
Time to stain! Here comes the tricky part. Stains can look vastly different when applied to different types of wood and I had no idea what type of wood veneer I was dealing with. Let the staining games begin! I pulled out my all time favorite stains, Weathered Oak and Classic Gray by Minwax. I was dealing with the bottom 2 inches of the quart. I do not recommend using the bottom of the barrel for stains but so be it. I went for it. I looked at this tabletop like a canvas and the stains as my paint palette. To be honest, I was actually ready to start experimenting and threw caution to the wind.
Weathered Oak and Classic Gray have white pigment added to stain. The white/gray pigment sits on top of the wood grain. The other tinted elements of the stain absorb into the wood. In my case, the bottom of the can had a large amount of white pigment deposits, which I blended in until smooth. I painted on a layer of Weathered Oak. If I had a fresh can of stain, the results would look like Classic Gray. I allowed the stain to sit for 15 minutes and then lightly wiped off with an clean t-shirt rag. The results were still not what I wanted. The tabletop was still red looking with gray streaks. Grrrr….. Time to switch things up.
I next took a bit of Classic Gray and poured in a splash of Provencial, which is a beautiful true brown stain. I mixed the two stains until it had a muddy driftwood appearance. I applied the new “driftwood” stain over the tabletop and allowed it to sit for only 10 minutes and then lightly wiped it off in long sweeping strokes the direction of the grain, turning the t-shirt over with each stroke. The results were amazing!
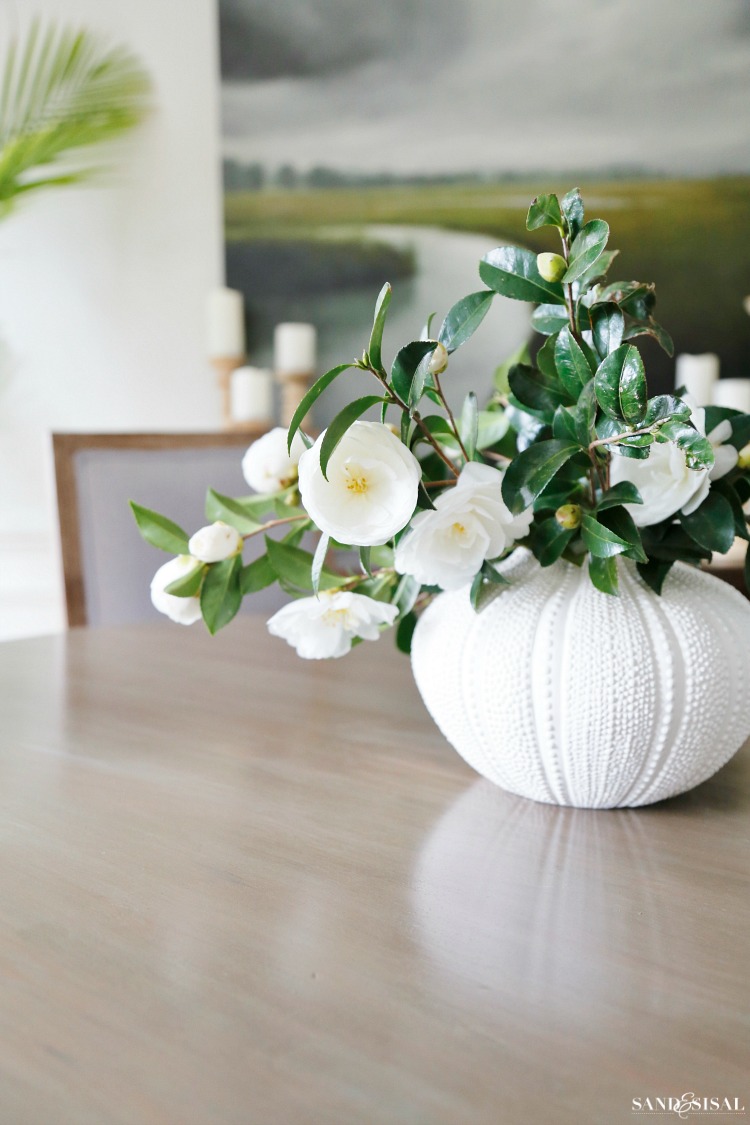
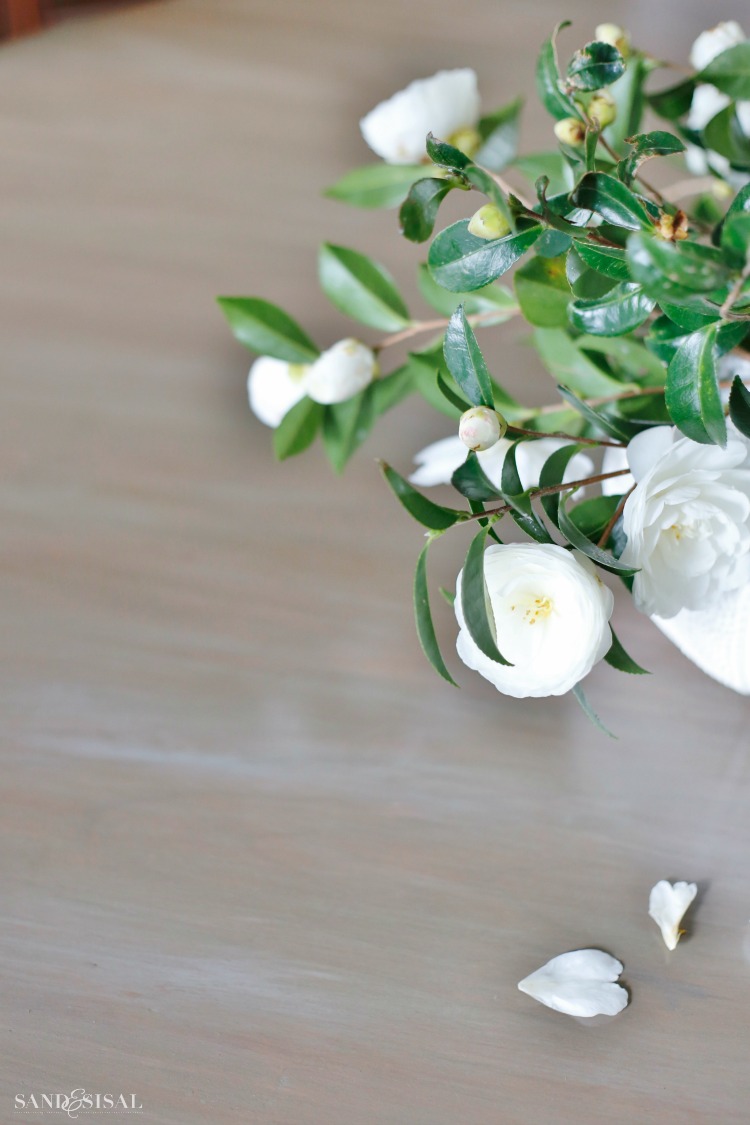
The stain was allowed to dry for 48 hours before I applied a thin coat of Matte Polycrylic. I think I will apply a 2nd coat soon, because the table is still shinier than I prefer.

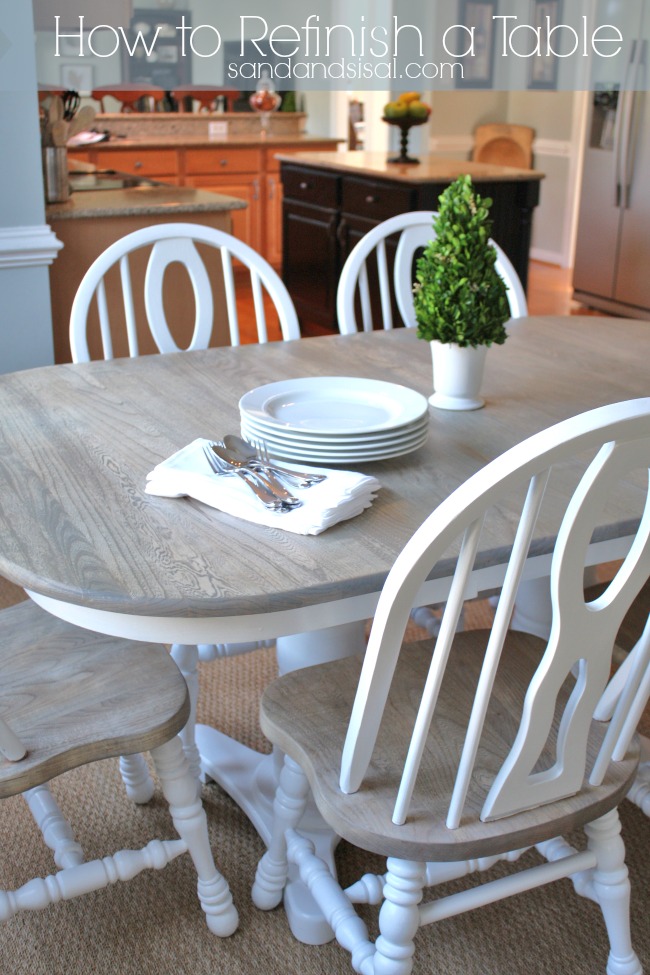
Was this a gamble? Absoutely yes! Did I win? I say YES! I achieved the look I wanted, the best I could with the product I was given. A driftwood veneer refinished top is possible with a bit of perseverance and patience. It isn’t perfect, but it’s good. If I was refinishing real wood then I would have repeated the process that I did with my refinished kitchen table. Check out that tutorial, because if you have real solid wood, then that tutorial is so much easier! PS- that tutorial is my #1 most popular post on my blog ever! 😉
I’m planning on replacing the mahogany “buffet table”. It is actually an entertainment unit that I moved into the dining room. It’s been working ok for now, but it is better suited for media purposes. So if anyone local wants to make an offer, let me know!
I hope sharing my experience helps you if you are considering refinishing a table. Listed below are all the products I’ve used for this project and all the decorative sources in the room.
Products used to refinish the table (affliate links provided for your shopping convenience):
- Ready Strip Paint and Varnish Remover
- plastic sheeting
- disposable protective gloves
- metal putty knives/scrapers
- steel wire brush
- odorless mineral spirits
- grade #0 steel wool
- finishing sander
- sand paper
- Minwax Weathered Oak, Classic Gray, Provincial Stain
- Matte Polycrylic sealer
- high quaity paintbrush
- painter’s tape
- clean, old rag cotton t-shirts
Decorative Room Sources:
- Wall color – SW Extra White & SW Reserved White
- Marsh Painting- Ballard Designs
- Twig Chandelier
- Round Jute Rug
- Table – Thriftstore
- Chairs – HomeGoods
- Wood Candleholders
Check out these popular posts too!
How to Paint Laminate Furniture

Looks great! A lot of work, but it paid off.
Oh it was a lot of work, but I’m happy I persevered! Thank you!!!
This table looks gorgeous! I have a round oak pedestal table that I want to refinish. I love this look. Great job!
Thank you so much Martha!!!
It looks amazing! I think I would have freaked out and given up halfway through. I admire your persistence! My dining room is a red toned cherry and it drives me insane. I keep trying to work around the color of the wood because of course, I have one of those husbands who doesn’t believe in painting wood…ugh. Anyway, I love how yours turned out. The room is so bright and inviting!
Shelley
I hear ya! My hubs is just like that too. He didnt care about this project though because it was so inexpensive. I seriously almost freaked out that I had ruined it, but the gamble paid off thankfully! Thanks so much for stopping by!
I’m glad you kept with it and ended up with a really nice looking tabletop. Way to go.
Thanks Sandy! I love the shape of the table and I’m happy with the results. Have a lovely week! ~KIM
Your table is now what I would love if was mine. So glad you kept at it. Did you feel you had nothing to lose in the end?
I am not a lover of dark stains, need light. Your table is so gorgeous now, who would know what it looked like before you took the chance and so worth It!.
Your new chairs complement table perfectly. Your dining room gives entirely different and improved impression, you must be so happy with how it turned out.
Happy week
Thank you JaneEllen! I was panicking for a bit but it came through in the end! Whoo-hoo! Now I need to sell that buffet/entertainment unit and find a lighter one. Have a great week! ~ KIM
This is one of my all-time favorite furniture makeovers. Just lovely.
Thank you Nancy! I was seriously wondering if it was going to work. I’m glad it did!
What a warm, pretty gray! You are so brave and it really paid off. The results are stunning. I’m looking around my coastal Carolina home wondering what I can change up!
Thanks so much Kim!!!!
This one is definitely a winner! See? Persevere and you will succeed! Super great job.
Awww, thank you Linda!
Excellent job! Your table turned out beautifully with such a unique coastal color. Isn’t it wonderful when everything turns out like you wanted? Thanks for sharing.
It is! Thank you so much Debbie!!
Why don’t you paint the ‘media’ console gray like the base of your table. Then put large baskets in the openings the same color as your rattan rug. At least until your find the perfect console. I think painting what you have would be easier than finding something to match your table.
Hi Carley! I was considering painting the console but it is mahogany and painting mahogany is very difficult because it loves to bleed through paint, even with really good primer underneath. I need more storage too. I’m hoping it finds a good home with someone who will love it as is. 😉 Thanks for stopping by! ~KIM
Can you share any information about your lighting fixture? I absolutely LOVE it!
Hi Anne! Thank you! Links for all the room sources are at the bottom of the post but here it is again for you: http://rstyle.me/n/ct9r4sxqg6
We have been so happy with the chandelier. It’s probably the one thing in the room I haven’t changed! ha! Have a great week.
Wow I like your project
What paint color did you use for the table?
Nice post.